Mice In Love
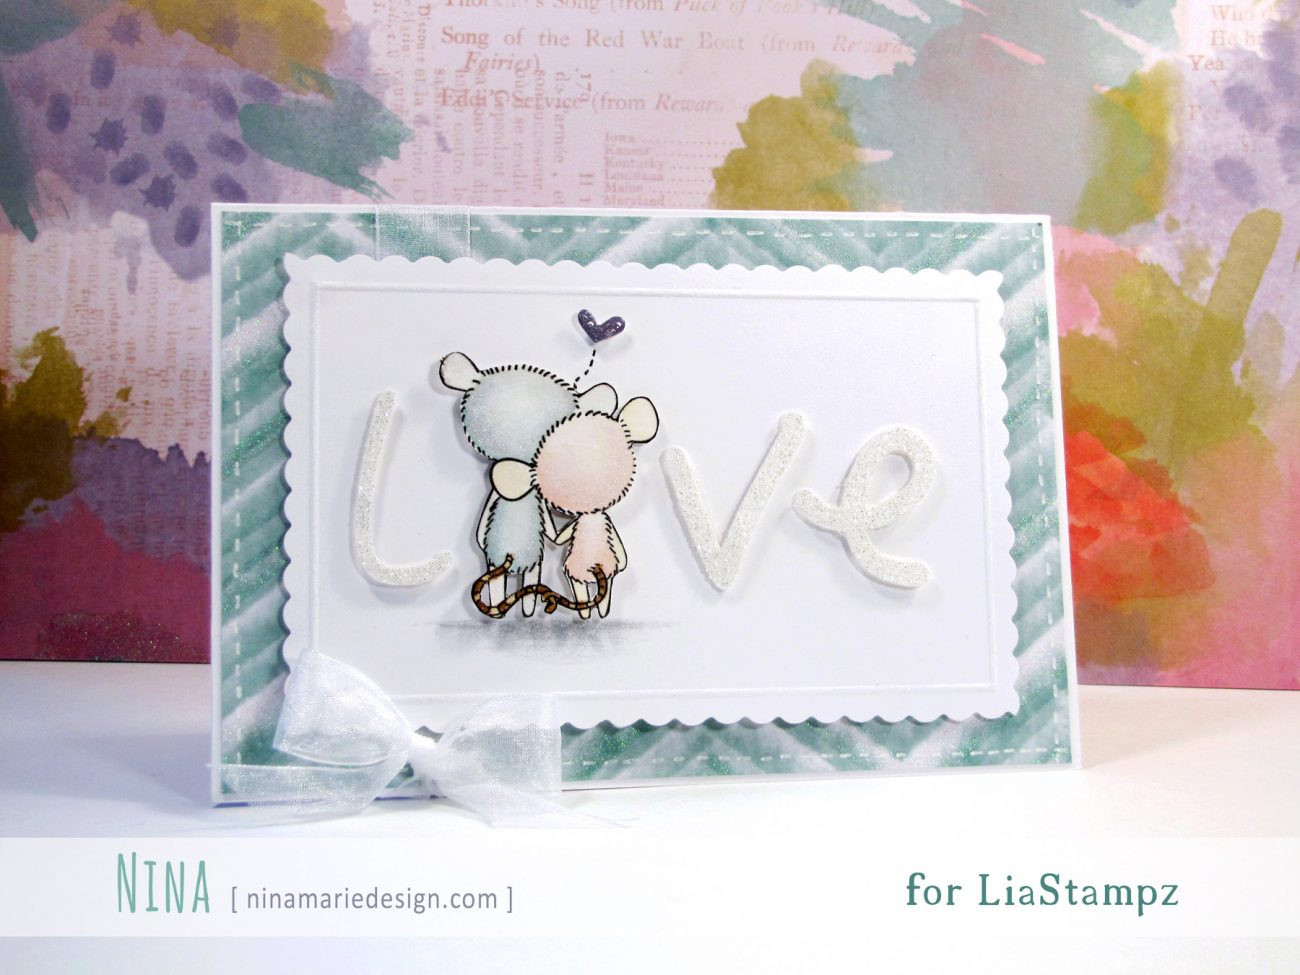
Winter sure has been chilly this year, but to put a little warmth into our hearts, today’s card is all about love… now how cozy is that?! :) This adorable mice couple, lovingly holding hands is positively heartwarming, and is also my project for this week’s LiaStampz challenge.
 For this week’s challenge (#82), the theme is a “Winterland”, which has a beautiful, wintry color scheme as the inspiration for your project. Be sure to join us this week, and participate in all the fun!
I wanted to have the Valentine’s Mice digi stamp really stand out on this card, so I went with a clean and simple design. Cutting out the letters “l, v and e” with my Silhouette Cameo and some white cardstock, I heat embossed them in my own glitter embossing powder.
For the times you do not have the exact glitter powder you need, try making your own! With the right ratio, you can get a DIY embossing powder that lights up your card. Scroll down to the bottom of the post to see the steps I took in creating mine.
Printing out the digi stamp, I watercolored the boy’s fur in Iced Spruce and Peacock Feathers distress inks, while for the girl I used Tattered Rose and Worn Lipstick. For the rest of their bodies and their tails, I used Antique Linen, Tea Dye and Walnut Stain distress inks.

Taking a 5″ x 3 1/4″ piece of cardstock, I scored a frame on all four sides, about an 1/8 of an inch from the edge; I also trimmed the paper with some scalloped paper edgers. I then adhered the mice and glitter-letters to my panel using dimensional foam tape.
Cutting a 6″ x 4″ card base (6×8 before folding), I covered the card in a glitter chevron paper from the Recollections “Painted Fancy” 12×12 paper pad, with some white faux stitching along the outside edges.
Next, my mice/love panel was adhered to the card using some more foam tape, and a sheer ribbon was tied around the left side of the card. A bit of Wink of Stella clear glitter was applied to certain parts of the mice, as well to the dry-embossed frame.

Working on the inside, I cut a piece of matching paper from the “Painted Fancy” paper pad, and printed out the “I adore you” and the “simply” sentiments. The “I adore you” is included in the Valentine’s Mice digi stamp set, and the “simply” uses the same Hanzi Pen SC font used for the letters on the front of the card.
Thanks for stopping by today! I hope you enjoyed, and will be joining us over at LiaStampz this week for the Winterland color challenge!
Be sure to also stop over at my fellow design team member’s blogs to check out their amazing projects for this week!
Happy Creating! :)
DIY Embossing Glitter Embossing Powder
Supplies:
- embossing powder
- fine glitter
- measuring cups
- a clean bowl for mixing
- a spoon
Taking pour all of your embossing powder into one of the measuring cups. Take the glitter and measuring out only half of what the powder measures to be (i.e.: 1/2 cup of embossing powder to 1/4 cup of glitter). Pour both into your bowl and mix thoroughly with a spoon. Store in an air tight container.
Challenges
This card is submitted into the Stampin’ Royalty challenge #264, “Love/ Valentines”.
[one_third]![]() [/one_third]
[/one_third]

 LinkDeli Free 15 day trial
What a cute idea to use the mice for a letter!
You are so creative with your cards especially this one! I love it !
What an adorable card!
I love this one! I love the colours you chose, so soft and light, The card looks just perfect!