Colored Pencils + Stencils + Simon’s STAMPtember Release Blog Hop!
[fusion_builder_container hundred_percent=”no” equal_height_columns=”no” hide_on_mobile=”small-visibility,medium-visibility,large-visibility” background_position=”center center” background_repeat=”no-repeat” fade=”no” background_parallax=”none” parallax_speed=”0.3″ video_aspect_ratio=”16:9″ video_loop=”yes” video_mute=”yes” border_style=”solid” admin_toggled=”no” admin_label=”Post Content”][fusion_builder_row][fusion_builder_column type=”1_1″ layout=”1_1″ background_position=”left top” background_color=”” border_size=”” border_color=”” border_style=”solid” border_position=”all” spacing=”yes” background_image=”” background_repeat=”no-repeat” padding=”” margin_top=”0px” margin_bottom=”0px” class=”” id=”” animation_type=”” animation_speed=”0.3″ animation_direction=”left” hide_on_mobile=”small-visibility,medium-visibility,large-visibility” center_content=”no” last=”no” min_height=”” hover_type=”none” link=””][fusion_imageframe image_id=”” style_type=”none” stylecolor=”” hover_type=”none” bordersize=”” bordercolor=”” borderradius=”” align=”center” lightbox=”yes” gallery_id=”” lightbox_image=”” alt=”Colored Pencils + Stencils + Simon’s STAMPtember Blog Hop | Nina-Marie Design” link=”” linktarget=”_self” hide_on_mobile=”small-visibility,medium-visibility,large-visibility” class=”” id=”” animation_type=”” animation_direction=”left” animation_speed=”0.3″ animation_offset=””]https://ninamariedesign.com/wp-content/uploads/2017/09/STAMPtember-Colored-Pencils-Stencils-SLIDER-01.jpg[/fusion_imageframe][fusion_separator style_type=”none” hide_on_mobile=”small-visibility,medium-visibility,large-visibility” top_margin=”10″ bottom_margin=”10″ alignment=”center” /][fusion_text]
Woohoo, the big day is here! The first day of an entire month of stamping fun… Simon Says STAMPtember! And today is day one of Simon’s STAMPtember release blog hop!
[/fusion_text][fusion_separator style_type=”none” hide_on_mobile=”small-visibility,medium-visibility,large-visibility” top_margin=”10″ bottom_margin=”10″ alignment=”center” /][fusion_imageframe image_id=”13561″ style_type=”none” stylecolor=”” hover_type=”none” bordersize=”” bordercolor=”” borderradius=”” align=”center” lightbox=”no” gallery_id=”” lightbox_image=”” alt=”Colored Pencils + Stencils + Simon’s STAMPtember Release Blog Hop | Nina-Marie Design” link=”http://shrsl.com/jomv” linktarget=”_blank” hide_on_mobile=”small-visibility,medium-visibility,large-visibility” class=”” id=”” animation_type=”” animation_direction=”left” animation_speed=”0.3″ animation_offset=””]https://ninamariedesign.com/wp-content/uploads/2017/09/Stamptember2017_927x408-01.jpg[/fusion_imageframe][fusion_separator style_type=”none” hide_on_mobile=”small-visibility,medium-visibility,large-visibility” top_margin=”10″ bottom_margin=”10″ alignment=”center” /][fusion_text]
If you’ve already been hopping along with so-very-talented Amy Rysavy’s blog! Or if you are just joining in, you can find the entire hop list down below.
[/fusion_text][fusion_separator style_type=”none” hide_on_mobile=”small-visibility,medium-visibility,large-visibility” top_margin=”10″ bottom_margin=”10″ alignment=”center” /][fusion_imageframe image_id=”” style_type=”none” stylecolor=”” hover_type=”none” bordersize=”” bordercolor=”” borderradius=”” align=”center” lightbox=”no” gallery_id=”” lightbox_image=”” alt=”Colored Pencils + Stencils + Simon’s STAMPtember Release Blog Hop | Nina-Marie Design” link=”http://shrsl.com/jomv” linktarget=”_blank” hide_on_mobile=”small-visibility,medium-visibility,large-visibility” class=”” id=”” animation_type=”” animation_direction=”left” animation_speed=”0.3″ animation_offset=””]https://ninamariedesign.com/wp-content/uploads/2017/08/STAMPtember-HOP-600×264.jpg[/fusion_imageframe][fusion_separator style_type=”none” hide_on_mobile=”small-visibility,medium-visibility,large-visibility” top_margin=”10″ bottom_margin=”10″ alignment=”center” /][fusion_text]
STAMPtember is a much-anticipated event for all of us, and a lot of prep works goes into this fabulous month of celebration! All of us at Simon have been extremely busy over the past few months gearing up for the festivities and I hope you have a ton of fun this STAMPtember! Stay tuned for upcoming new releases, exclusives, prizes, social media action and some big surprises!
Now, onto some inspiration…!
[/fusion_text][fusion_separator style_type=”none” hide_on_mobile=”small-visibility,medium-visibility,large-visibility” top_margin=”10″ bottom_margin=”10″ alignment=”center” /][fusion_imageframe image_id=”13562″ style_type=”none” stylecolor=”” hover_type=”none” bordersize=”” bordercolor=”” borderradius=”” align=”center” lightbox=”yes” gallery_id=”” lightbox_image=”https://ninamariedesign.com/wp-content/uploads/2017/09/STAMPtember-Colored-Pencils-Stencils-8.jpg” alt=”Colored Pencils + Stencils + Simon’s STAMPtember Release Blog Hop | Nina-Marie Design” link=”http://shrsl.com/jomv” linktarget=”_blank” hide_on_mobile=”small-visibility,medium-visibility,large-visibility” class=”” id=”” animation_type=”” animation_direction=”left” animation_speed=”0.3″ animation_offset=””]https://ninamariedesign.com/wp-content/uploads/2017/09/STAMPtember-Colored-Pencils-Stencils-8.jpg[/fusion_imageframe][fusion_separator style_type=”none” hide_on_mobile=”small-visibility,medium-visibility,large-visibility” top_margin=”10″ bottom_margin=”10″ alignment=”center” /][fusion_text]
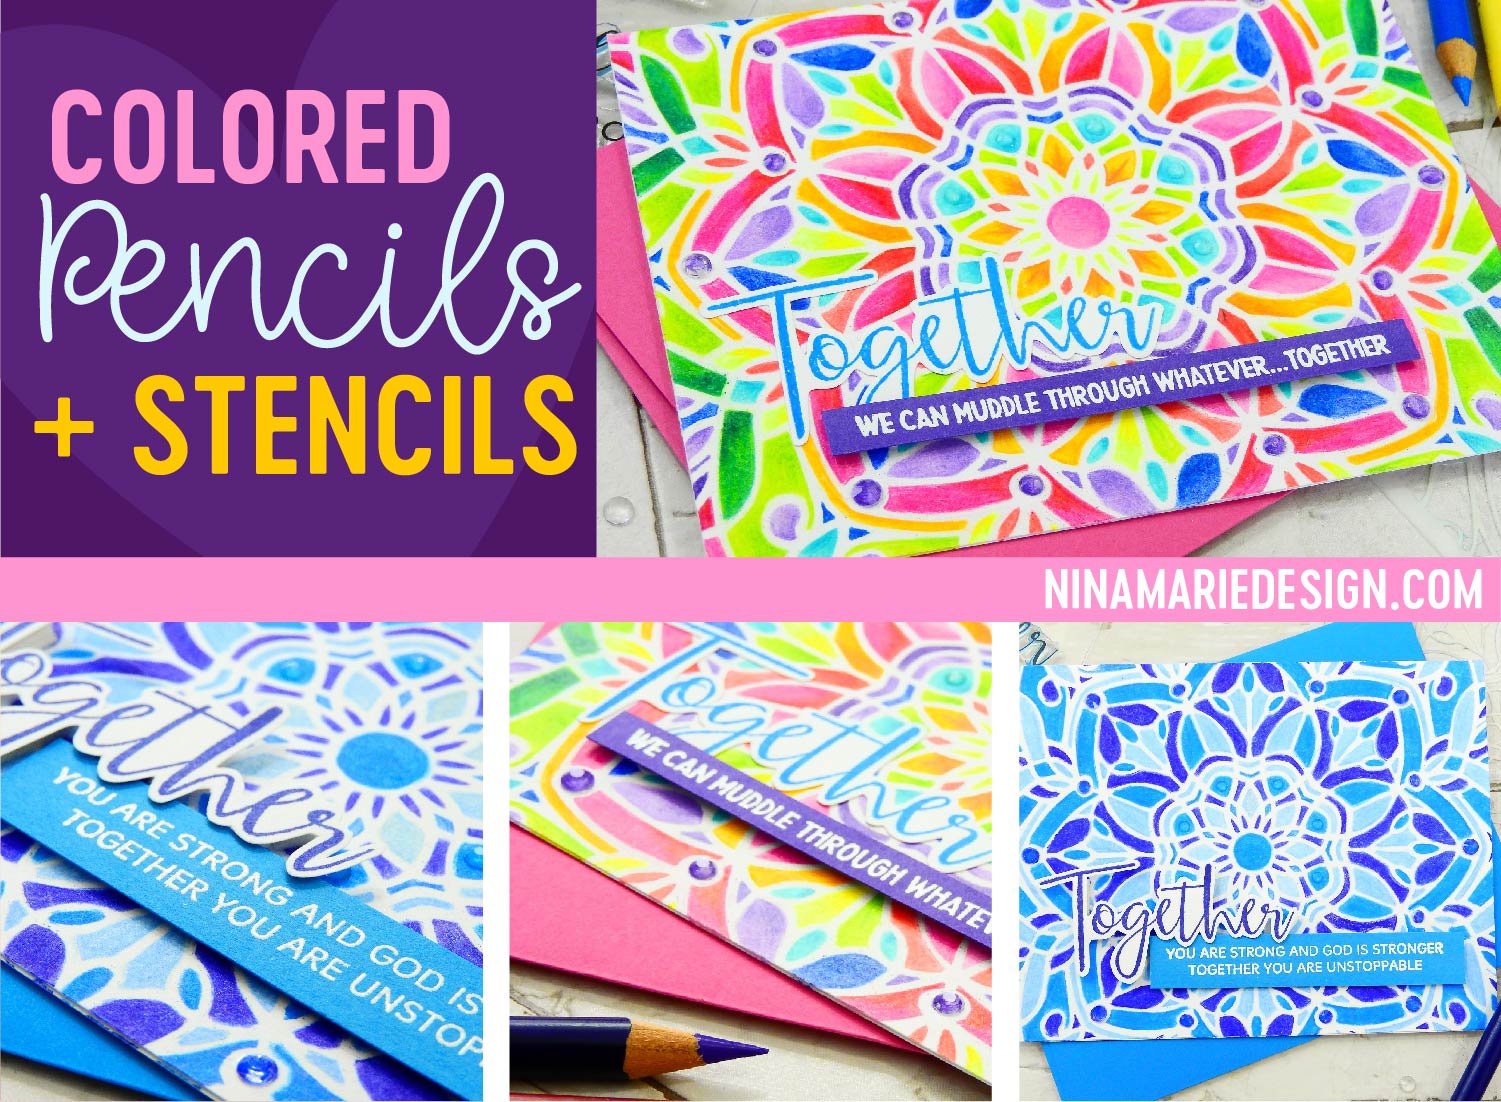
I was really excited to play with the new Stained Glass 1 stencil, as I really loved the pattern of it. There are a couple of other new stencils that I loved from the STAMPtember release as well; Debra and the Holiday Tree Medallion.
One evening I was relaxing and watching some TV and while I did so, I broke out my colored pencils. I at first thought of coloring a stamped image, but then had the idea of using the new Stained Glass 1 stencil. So I taped it to a white card base and colored away! The result was this gorgeous rainbow-background that I absolutely love.
[/fusion_text][fusion_separator style_type=”none” hide_on_mobile=”small-visibility,medium-visibility,large-visibility” top_margin=”10″ bottom_margin=”10″ alignment=”center” /][/fusion_builder_column][fusion_builder_column type=”1_3″ layout=”1_1″ spacing=”” center_content=”no” hover_type=”none” link=”” min_height=”” hide_on_mobile=”small-visibility,medium-visibility,large-visibility” class=”” id=”” background_color=”” background_image=”” background_position=”left top” background_repeat=”no-repeat” border_size=”0″ border_color=”” border_style=”solid” border_position=”all” padding=”” dimension_margin=”” animation_type=”” animation_direction=”left” animation_speed=”0.3″ animation_offset=”” last=”no”][fusion_imageframe image_id=”13565″ style_type=”none” stylecolor=”” hover_type=”none” bordersize=”” bordercolor=”” borderradius=”” align=”center” lightbox=”yes” gallery_id=”” lightbox_image=”https://ninamariedesign.com/wp-content/uploads/2017/09/STAMPtember-Colored-Pencils-Stencils-11.jpg” alt=”Colored Pencils + Stencils + Simon’s STAMPtember Release Blog Hop | Nina-Marie Design” link=”http://shrsl.com/jomv” linktarget=”_blank” hide_on_mobile=”small-visibility,medium-visibility,large-visibility” class=”” id=”” animation_type=”” animation_direction=”left” animation_speed=”0.3″ animation_offset=””]https://ninamariedesign.com/wp-content/uploads/2017/09/STAMPtember-Colored-Pencils-Stencils-11.jpg[/fusion_imageframe][/fusion_builder_column][fusion_builder_column type=”1_3″ layout=”1_1″ spacing=”” center_content=”no” hover_type=”none” link=”” min_height=”” hide_on_mobile=”small-visibility,medium-visibility,large-visibility” class=”” id=”” background_color=”” background_image=”” background_position=”left top” background_repeat=”no-repeat” border_size=”0″ border_color=”” border_style=”solid” border_position=”all” padding=”” dimension_margin=”” animation_type=”” animation_direction=”left” animation_speed=”0.3″ animation_offset=”” last=”no”][fusion_imageframe image_id=”13563″ style_type=”none” stylecolor=”” hover_type=”none” bordersize=”” bordercolor=”” borderradius=”” align=”center” lightbox=”yes” gallery_id=”” lightbox_image=”https://ninamariedesign.com/wp-content/uploads/2017/09/STAMPtember-Colored-Pencils-Stencils-9.jpg” alt=”Colored Pencils + Stencils + Simon’s STAMPtember Release Blog Hop | Nina-Marie Design” link=”http://shrsl.com/jomv” linktarget=”_blank” hide_on_mobile=”small-visibility,medium-visibility,large-visibility” class=”” id=”” animation_type=”” animation_direction=”left” animation_speed=”0.3″ animation_offset=””]https://ninamariedesign.com/wp-content/uploads/2017/09/STAMPtember-Colored-Pencils-Stencils-9.jpg[/fusion_imageframe][/fusion_builder_column][fusion_builder_column type=”1_3″ layout=”1_1″ spacing=”” center_content=”no” hover_type=”none” link=”” min_height=”” hide_on_mobile=”small-visibility,medium-visibility,large-visibility” class=”” id=”” background_color=”” background_image=”” background_position=”left top” background_repeat=”no-repeat” border_size=”0″ border_color=”” border_style=”solid” border_position=”all” padding=”” dimension_margin=”” animation_type=”” animation_direction=”left” animation_speed=”0.3″ animation_offset=”” last=”no”][fusion_imageframe image_id=”13564″ style_type=”none” stylecolor=”” hover_type=”none” bordersize=”” bordercolor=”” borderradius=”” align=”center” lightbox=”yes” gallery_id=”” lightbox_image=”https://ninamariedesign.com/wp-content/uploads/2017/09/STAMPtember-Colored-Pencils-Stencils-10.jpg” alt=”Colored Pencils + Stencils + Simon’s STAMPtember Release Blog Hop | Nina-Marie Design” link=”http://shrsl.com/jomv” linktarget=”_blank” hide_on_mobile=”small-visibility,medium-visibility,large-visibility” class=”” id=”” animation_type=”” animation_direction=”left” animation_speed=”0.3″ animation_offset=””]https://ninamariedesign.com/wp-content/uploads/2017/09/STAMPtember-Colored-Pencils-Stencils-10.jpg[/fusion_imageframe][/fusion_builder_column][fusion_builder_column type=”1_1″ layout=”1_1″ spacing=”” center_content=”no” hover_type=”none” link=”” min_height=”” hide_on_mobile=”small-visibility,medium-visibility,large-visibility” class=”” id=”” background_color=”” background_image=”” background_position=”left top” background_repeat=”no-repeat” border_size=”0″ border_color=”” border_style=”solid” border_position=”all” padding=”” dimension_margin=”” animation_type=”” animation_direction=”left” animation_speed=”0.3″ animation_offset=”” last=”no”][fusion_separator style_type=”none” hide_on_mobile=”small-visibility,medium-visibility,large-visibility” class=”” id=”” sep_color=”” top_margin=”10″ bottom_margin=”10″ border_size=”” icon=”” icon_circle=”” icon_circle_color=”” width=”” alignment=”center” /][fusion_text]
The next day, after creating that background, I knew I wanted to do it again. This time I filmed the process and chose a new color scheme. Instead of bright rainbows, I went with a more calming selection of blues…
[/fusion_text][fusion_separator style_type=”none” hide_on_mobile=”small-visibility,medium-visibility,large-visibility” class=”” id=”” sep_color=”” top_margin=”10″ bottom_margin=”10″ border_size=”” icon=”” icon_circle=”” icon_circle_color=”” width=”” alignment=”center” /][fusion_imageframe image_id=”13566″ style_type=”none” stylecolor=”” hover_type=”none” bordersize=”” bordercolor=”” borderradius=”” align=”center” lightbox=”yes” gallery_id=”” lightbox_image=”https://ninamariedesign.com/wp-content/uploads/2017/09/STAMPtember-Colored-Pencils-Stencils-2.jpg” alt=”Colored Pencils + Stencils + Simon’s STAMPtember Release Blog Hop | Nina-Marie Design” link=”http://shrsl.com/jomv” linktarget=”_blank” hide_on_mobile=”small-visibility,medium-visibility,large-visibility” class=”” id=”” animation_type=”” animation_direction=”left” animation_speed=”0.3″ animation_offset=””]https://ninamariedesign.com/wp-content/uploads/2017/09/STAMPtember-Colored-Pencils-Stencils-2.jpg[/fusion_imageframe][fusion_separator style_type=”none” hide_on_mobile=”small-visibility,medium-visibility,large-visibility” class=”” id=”” sep_color=”” top_margin=”10″ bottom_margin=”10″ border_size=”” icon=”” icon_circle=”” icon_circle_color=”” width=”” alignment=”center” /][fusion_text]
If you watch the video below, I’ll take you through the steps I took in creating the background – as well as the rest of the card. As with the first card, I used the Stained Glass 1 stencil.
The beautiful script sentiment is stamped in Blue Violet ink using the new Together stamp set. On this blue version, I white heat embossed a supporting sentiment using another new STAMPtember set called You Got This. I’m particularly excited to share this stamp set because it’s the my latest of stamps designed exclusively for Simon!
[/fusion_text][fusion_separator style_type=”none” hide_on_mobile=”small-visibility,medium-visibility,large-visibility” class=”” id=”” sep_color=”” top_margin=”10″ bottom_margin=”10″ border_size=”” icon=”” icon_circle=”” icon_circle_color=”” width=”” alignment=”center” /][/fusion_builder_column][fusion_builder_column type=”1_3″ layout=”1_1″ spacing=”” center_content=”no” hover_type=”none” link=”” min_height=”” hide_on_mobile=”small-visibility,medium-visibility,large-visibility” class=”” id=”” background_color=”” background_image=”” background_position=”left top” background_repeat=”no-repeat” border_size=”0″ border_color=”” border_style=”solid” border_position=”all” padding=”” dimension_margin=”” animation_type=”” animation_direction=”left” animation_speed=”0.3″ animation_offset=”” last=”no”][fusion_imageframe image_id=”13569″ style_type=”none” stylecolor=”” hover_type=”none” bordersize=”” bordercolor=”” borderradius=”” align=”center” lightbox=”yes” gallery_id=”” lightbox_image=”https://ninamariedesign.com/wp-content/uploads/2017/09/STAMPtember-Colored-Pencils-Stencils-6.jpg” alt=”Colored Pencils + Stencils + Simon’s STAMPtember Release Blog Hop | Nina-Marie Design” link=”http://shrsl.com/jomv” linktarget=”_blank” hide_on_mobile=”small-visibility,medium-visibility,large-visibility” class=”” id=”” animation_type=”” animation_direction=”left” animation_speed=”0.3″ animation_offset=””]https://ninamariedesign.com/wp-content/uploads/2017/09/STAMPtember-Colored-Pencils-Stencils-6.jpg[/fusion_imageframe][/fusion_builder_column][fusion_builder_column type=”1_3″ layout=”1_1″ spacing=”” center_content=”no” hover_type=”none” link=”” min_height=”” hide_on_mobile=”small-visibility,medium-visibility,large-visibility” class=”” id=”” background_color=”” background_image=”” background_position=”left top” background_repeat=”no-repeat” border_size=”0″ border_color=”” border_style=”solid” border_position=”all” padding=”” dimension_margin=”” animation_type=”” animation_direction=”left” animation_speed=”0.3″ animation_offset=”” last=”no”][fusion_imageframe image_id=”13570″ style_type=”none” stylecolor=”” hover_type=”none” bordersize=”” bordercolor=”” borderradius=”” align=”center” lightbox=”yes” gallery_id=”” lightbox_image=”https://ninamariedesign.com/wp-content/uploads/2017/09/STAMPtember-Colored-Pencils-Stencils-3.jpg” alt=”Colored Pencils + Stencils + Simon’s STAMPtember Release Blog Hop | Nina-Marie Design” link=”http://shrsl.com/jomv” linktarget=”_blank” hide_on_mobile=”small-visibility,medium-visibility,large-visibility” class=”” id=”” animation_type=”” animation_direction=”left” animation_speed=”0.3″ animation_offset=””]https://ninamariedesign.com/wp-content/uploads/2017/09/STAMPtember-Colored-Pencils-Stencils-3.jpg[/fusion_imageframe][/fusion_builder_column][fusion_builder_column type=”1_3″ layout=”1_1″ spacing=”” center_content=”no” hover_type=”none” link=”” min_height=”” hide_on_mobile=”small-visibility,medium-visibility,large-visibility” class=”” id=”” background_color=”” background_image=”” background_position=”left top” background_repeat=”no-repeat” border_size=”0″ border_color=”” border_style=”solid” border_position=”all” padding=”” dimension_margin=”” animation_type=”” animation_direction=”left” animation_speed=”0.3″ animation_offset=”” last=”no”][fusion_imageframe image_id=”13567″ style_type=”none” stylecolor=”” hover_type=”none” bordersize=”” bordercolor=”” borderradius=”” align=”center” lightbox=”yes” gallery_id=”” lightbox_image=”https://ninamariedesign.com/wp-content/uploads/2017/09/STAMPtember-Colored-Pencils-Stencils-5.jpg” alt=”Colored Pencils + Stencils + Simon’s STAMPtember Release Blog Hop | Nina-Marie Design” link=”http://shrsl.com/jomv” linktarget=”_blank” hide_on_mobile=”small-visibility,medium-visibility,large-visibility” class=”” id=”” animation_type=”” animation_direction=”left” animation_speed=”0.3″ animation_offset=””]https://ninamariedesign.com/wp-content/uploads/2017/09/STAMPtember-Colored-Pencils-Stencils-5.jpg[/fusion_imageframe][/fusion_builder_column][fusion_builder_column type=”1_1″ layout=”1_1″ spacing=”” center_content=”no” hover_type=”none” link=”” min_height=”” hide_on_mobile=”small-visibility,medium-visibility,large-visibility” class=”” id=”” background_color=”” background_image=”” background_position=”left top” background_repeat=”no-repeat” border_size=”0″ border_color=”” border_style=”solid” border_position=”all” padding=”” dimension_margin=”” animation_type=”” animation_direction=”left” animation_speed=”0.3″ animation_offset=”” last=”no”][fusion_separator style_type=”none” hide_on_mobile=”small-visibility,medium-visibility,large-visibility” class=”” id=”” sep_color=”” top_margin=”10″ bottom_margin=”10″ border_size=”” icon=”” icon_circle=”” icon_circle_color=”” width=”” alignment=”center” /][fusion_separator style_type=”shadow” hide_on_mobile=”small-visibility,medium-visibility,large-visibility” class=”” id=”” sep_color=”#ffffff” top_margin=”” bottom_margin=”” border_size=”0″ icon=”fa-heart” icon_circle=”yes” icon_circle_color=”#00b3aa” width=”” alignment=”center” /][fusion_separator style_type=”none” hide_on_mobile=”small-visibility,medium-visibility,large-visibility” class=”” id=”” sep_color=”” top_margin=”10″ bottom_margin=”10″ border_size=”” icon=”” icon_circle=”” icon_circle_color=”” width=”” alignment=”center” /][/fusion_builder_column][/fusion_builder_row][/fusion_builder_container][fusion_builder_container hundred_percent=”no” equal_height_columns=”no” hide_on_mobile=”small-visibility,medium-visibility,large-visibility” background_position=”center center” background_repeat=”no-repeat” fade=”no” background_parallax=”none” enable_mobile=”no” parallax_speed=”0.3″ video_aspect_ratio=”16:9″ video_loop=”yes” video_mute=”yes” border_style=”solid” padding_top=”20px” padding_bottom=”20px” admin_label=”Products COLORED PENCIL CARDS” admin_toggled=”no”][fusion_builder_row][fusion_builder_column type=”1_1″ layout=”1_1″ spacing=”” center_content=”no” hover_type=”none” link=”” min_height=”” hide_on_mobile=”small-visibility,medium-visibility,large-visibility” class=”” id=”” background_color=”” background_image=”” background_position=”left top” background_repeat=”no-repeat” border_size=”0″ border_color=”” border_style=”solid” border_position=”all” padding=”” animation_type=”” animation_direction=”left” animation_speed=”0.3″ animation_offset=”” last=”no”][fusion_title margin_top=”” margin_bottom=”” hide_on_mobile=”small-visibility,medium-visibility,large-visibility” class=”” id=”” size=”1″ content_align=”center” style_type=”none” sep_color=””]
SUPPLIES USED FOR THESE CARDS
[/fusion_title][fusion_separator style_type=”none” hide_on_mobile=”small-visibility,medium-visibility,large-visibility” top_margin=”10″ bottom_margin=”10″ alignment=”center” /][fusion_text]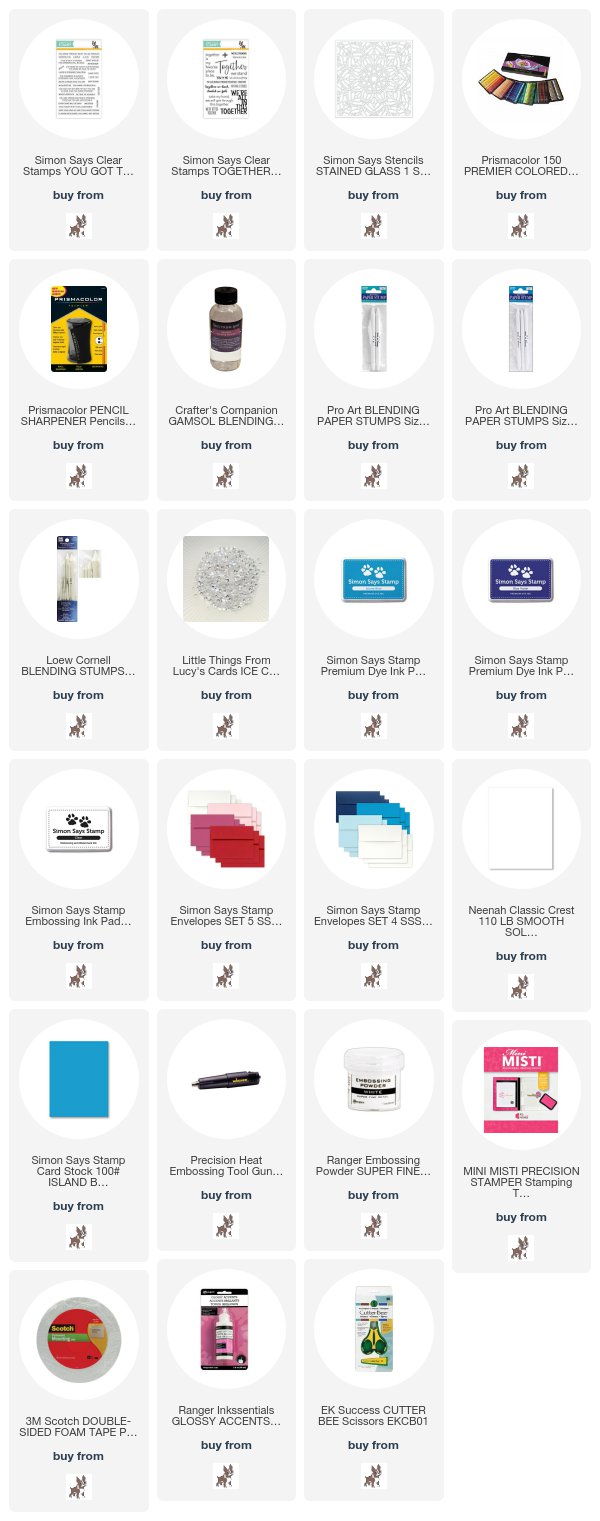
[/fusion_text][/fusion_builder_column][fusion_builder_column type=”1_1″ layout=”1_1″ spacing=”” center_content=”no” hover_type=”none” link=”” min_height=”” hide_on_mobile=”small-visibility,medium-visibility,large-visibility” class=”” id=”” background_color=”” background_image=”” background_position=”left top” background_repeat=”no-repeat” border_size=”0″ border_color=”” border_style=”solid” border_position=”all” padding=”” dimension_margin=”” animation_type=”” animation_direction=”left” animation_speed=”0.3″ animation_offset=”” last=”no”][fusion_separator style_type=”none” hide_on_mobile=”small-visibility,medium-visibility,large-visibility” class=”” id=”” sep_color=”” top_margin=”10″ bottom_margin=”10″ border_size=”” icon=”” icon_circle=”” icon_circle_color=”” width=”” alignment=”center” /][fusion_separator style_type=”shadow” hide_on_mobile=”small-visibility,medium-visibility,large-visibility” class=”” id=”” sep_color=”#ffffff” top_margin=”” bottom_margin=”” border_size=”0″ icon=”fa-heart” icon_circle=”yes” icon_circle_color=”#00b3aa” width=”” alignment=”center” /][fusion_separator style_type=”none” hide_on_mobile=”small-visibility,medium-visibility,large-visibility” class=”” id=”” sep_color=”” top_margin=”10″ bottom_margin=”10″ border_size=”” icon=”” icon_circle=”” icon_circle_color=”” width=”” alignment=”center” /][/fusion_builder_column][/fusion_builder_row][/fusion_builder_container][fusion_builder_container hundred_percent=”no” equal_height_columns=”no” hide_on_mobile=”small-visibility,medium-visibility,large-visibility” background_position=”center center” background_repeat=”no-repeat” fade=”no” background_parallax=”none” enable_mobile=”no” parallax_speed=”0.3″ video_aspect_ratio=”16:9″ video_loop=”yes” video_mute=”yes” border_style=”solid” padding_top=”20px” padding_bottom=”20px” admin_label=”Video” admin_toggled=”no”][fusion_builder_row][fusion_builder_column type=”1_1″ layout=”1_1″ spacing=”” center_content=”no” hover_type=”none” link=”” min_height=”” hide_on_mobile=”small-visibility,medium-visibility,large-visibility” class=”” id=”” background_color=”” background_image=”” background_position=”left top” background_repeat=”no-repeat” border_size=”0″ border_color=”” border_style=”solid” border_position=”all” padding=”” dimension_margin=”” animation_type=”” animation_direction=”left” animation_speed=”0.3″ animation_offset=”” last=”no”][fusion_title margin_top=”” margin_bottom=”” hide_on_mobile=”small-visibility,medium-visibility,large-visibility” class=”” id=”” size=”1″ content_align=”center” style_type=”none” sep_color=””]
WATCH THE VIDEO
[/fusion_title][fusion_separator style_type=”none” hide_on_mobile=”small-visibility,medium-visibility,large-visibility” top_margin=”10″ bottom_margin=”10″ alignment=”center” /][fusion_youtube id=”https://youtu.be/vknFfNdfrV8″ alignment=”” width=”1000″ height=”562″ autoplay=”false” api_params=”” hide_on_mobile=”small-visibility,medium-visibility,large-visibility” class=”” /][fusion_separator style_type=”none” hide_on_mobile=”small-visibility,medium-visibility,large-visibility” top_margin=”10″ bottom_margin=”10″ alignment=”center” /][fusion_title margin_top=”” margin_bottom=”” hide_on_mobile=”small-visibility,medium-visibility,large-visibility” class=”” id=”” size=”1″ content_align=”center” style_type=”none” sep_color=””]
SEE THE ENTIRE STAMPTEMBER RELEASE!
[/fusion_title][fusion_separator style_type=”none” hide_on_mobile=”small-visibility,medium-visibility,large-visibility” top_margin=”10″ bottom_margin=”10″ alignment=”center” /][fusion_youtube id=”https://youtu.be/ct1GSy7S9L4″ alignment=”” width=”1000″ height=”562″ autoplay=”false” api_params=”” hide_on_mobile=”small-visibility,medium-visibility,large-visibility” class=”” /][fusion_separator style_type=”none” hide_on_mobile=”small-visibility,medium-visibility,large-visibility” top_margin=”10″ bottom_margin=”10″ alignment=”center” /][/fusion_builder_column][fusion_builder_column type=”1_1″ layout=”1_1″ spacing=”” center_content=”no” hover_type=”none” link=”” min_height=”” hide_on_mobile=”small-visibility,medium-visibility,large-visibility” class=”” id=”” background_color=”#ffffff” background_image=”” background_position=”left top” undefined=”” background_repeat=”no-repeat” border_size=”7″ border_color=”#f7c025″ border_style=”solid” border_position=”left” padding=”10px 20 20 20″ margin_top=”” margin_bottom=”” animation_type=”” animation_direction=”left” animation_speed=”0.3″ animation_offset=”” last=”no”][fusion_text]
WANT TO SEE ALL OF MY VIDEOS?
Subscribe to my YouTube channel so that you’ll never miss one of my weekly tutorials! And if you enjoyed today’s video, please give it a “thumbs up”!
[/fusion_text][fusion_separator style_type=”none” hide_on_mobile=”small-visibility,medium-visibility,large-visibility” top_margin=”10″ bottom_margin=”10″ alignment=”center” /][fusion_button link=”http://www.youtube.com/channel/UC0op_DVZPkLDnypq69UHz5Q?sub_confirmation=1″ title=”” target=”_blank” alignment=”left” modal=”” hide_on_mobile=”small-visibility,medium-visibility,large-visibility” class=”” id=”” color=”custom” button_gradient_top_color=”#ce2580″ button_gradient_bottom_color=”#ce2580″ button_gradient_top_color_hover=”#f7c025″ button_gradient_bottom_color_hover=”#f7c025″ accent_color=”” accent_hover_color=”” type=”” bevel_color=”” border_width=”” size=”xlarge” stretch=”default” shape=”” icon=”fa-heart” icon_position=”left” icon_divider=”no” animation_type=”” animation_direction=”left” animation_speed=”0.3″ animation_offset=””]SUBSCRIBE[/fusion_button][fusion_separator style_type=”none” hide_on_mobile=”small-visibility,medium-visibility,large-visibility” top_margin=”10″ bottom_margin=”10″ alignment=”center” /][/fusion_builder_column][fusion_builder_column type=”1_1″ layout=”1_1″ spacing=”” center_content=”no” hover_type=”none” link=”” min_height=”” hide_on_mobile=”small-visibility,medium-visibility,large-visibility” class=”” id=”” background_color=”” background_image=”” background_position=”left top” background_repeat=”no-repeat” border_size=”0″ border_color=”” border_style=”solid” border_position=”all” padding=”” animation_type=”” animation_direction=”left” animation_speed=”0.3″ animation_offset=”” last=”no”][fusion_separator style_type=”shadow” hide_on_mobile=”small-visibility,medium-visibility,large-visibility” class=”” id=”” sep_color=”#ffffff” top_margin=”” bottom_margin=”” border_size=”0″ icon=”fa-heart” icon_circle=”yes” icon_circle_color=”#00b3aa” width=”” alignment=”center” /][fusion_separator style_type=”none” hide_on_mobile=”small-visibility,medium-visibility,large-visibility” top_margin=”10″ bottom_margin=”10″ alignment=”center” /][/fusion_builder_column][/fusion_builder_row][/fusion_builder_container][fusion_builder_container hundred_percent=”no” equal_height_columns=”no” hide_on_mobile=”small-visibility,medium-visibility,large-visibility” background_position=”center center” background_repeat=”no-repeat” fade=”no” background_parallax=”none” enable_mobile=”no” parallax_speed=”0.3″ video_aspect_ratio=”16:9″ video_loop=”yes” video_mute=”yes” border_style=”solid” padding_top=”20px” padding_bottom=”20px” admin_label=”no line watercolor leaves” admin_toggled=”no”][fusion_builder_row][fusion_builder_column type=”1_1″ layout=”1_1″ spacing=”” center_content=”no” hover_type=”none” link=”” min_height=”” hide_on_mobile=”small-visibility,medium-visibility,large-visibility” class=”” id=”” background_color=”” background_image=”” background_position=”left top” background_repeat=”no-repeat” border_size=”0″ border_color=”” border_style=”solid” border_position=”all” padding=”” dimension_margin=”” animation_type=”” animation_direction=”left” animation_speed=”0.3″ animation_offset=”” last=”no”][fusion_imageframe image_id=”” style_type=”none” stylecolor=”” hover_type=”none” bordersize=”” bordercolor=”” borderradius=”” align=”center” lightbox=”no” gallery_id=”” lightbox_image=”” alt=”No Line Watercolor Leaves + Simon’s STAMPtember Release Blog Hop | Nina-Marie Design” link=”” linktarget=”_blank” hide_on_mobile=”small-visibility,medium-visibility,large-visibility” class=”” id=”” animation_type=”” animation_direction=”left” animation_speed=”0.3″ animation_offset=””]https://ninamariedesign.com/wp-content/uploads/2017/08/STAMPtember_No-Line-Watercolor-Leaves-SLIDER-01.jpg[/fusion_imageframe][fusion_separator style_type=”none” hide_on_mobile=”small-visibility,medium-visibility,large-visibility” class=”” id=”” sep_color=”” top_margin=”10″ bottom_margin=”10″ border_size=”” icon=”” icon_circle=”” icon_circle_color=”” width=”” alignment=”center” /][fusion_text]
I also created another card using the new STAMPtember release, and that is this colorful, autumn design…
[/fusion_text][fusion_separator style_type=”none” hide_on_mobile=”small-visibility,medium-visibility,large-visibility” class=”” id=”” sep_color=”” top_margin=”10″ bottom_margin=”10″ border_size=”” icon=”” icon_circle=”” icon_circle_color=”” width=”” alignment=”center” /][fusion_imageframe image_id=”13572″ style_type=”none” stylecolor=”” hover_type=”none” bordersize=”” bordercolor=”” borderradius=”” align=”center” lightbox=”yes” gallery_id=”” lightbox_image=”https://ninamariedesign.com/wp-content/uploads/2017/09/STAMPtember_No-Line-Watercolor-Leaves-1.jpg” alt=”No Line Watercolor Leaves + Simon’s STAMPtember Release Blog Hop | Nina-Marie Design” link=”http://shrsl.com/jomv” linktarget=”_blank” hide_on_mobile=”small-visibility,medium-visibility,large-visibility” class=”” id=”” animation_type=”” animation_direction=”left” animation_speed=”0.3″ animation_offset=””]https://ninamariedesign.com/wp-content/uploads/2017/09/STAMPtember_No-Line-Watercolor-Leaves-1.jpg[/fusion_imageframe][fusion_separator style_type=”none” hide_on_mobile=”small-visibility,medium-visibility,large-visibility” class=”” id=”” sep_color=”” top_margin=”10″ bottom_margin=”10″ border_size=”” icon=”” icon_circle=”” icon_circle_color=”” width=”” alignment=”center” /][fusion_text]
The weather has been on the chillier side here in Maine of late, and it inspired me to think of the crisp, fall days that will soon be upon us. I really love the geometric design of the new Fractal Leaves stamp set from the STAMPtember release. There are also two gorgeous collections of Daniel Smith watercolor dot charts Simon released, one of which I used to watercolor this card (the Shari Carroll palette; there is also the Debby Hughes’ palette).
[/fusion_text][fusion_separator style_type=”none” hide_on_mobile=”small-visibility,medium-visibility,large-visibility” class=”” id=”” sep_color=”” top_margin=”10″ bottom_margin=”10″ border_size=”” icon=”” icon_circle=”” icon_circle_color=”” width=”” alignment=”center” /][/fusion_builder_column][fusion_builder_column type=”1_2″ layout=”1_2″ spacing=”” center_content=”no” hover_type=”none” link=”” min_height=”” hide_on_mobile=”small-visibility,medium-visibility,large-visibility” class=”” id=”” background_color=”” background_image=”” background_position=”left top” background_repeat=”no-repeat” border_size=”0″ border_color=”” border_style=”solid” border_position=”all” padding=”” dimension_margin=”” animation_type=”” animation_direction=”left” animation_speed=”0.3″ animation_offset=”” last=”no”][fusion_imageframe image_id=”13574″ style_type=”none” stylecolor=”” hover_type=”none” bordersize=”” bordercolor=”” borderradius=”” align=”center” lightbox=”yes” gallery_id=”” lightbox_image=”https://ninamariedesign.com/wp-content/uploads/2017/09/STAMPtember_No-Line-Watercolor-Leaves-3.jpg” alt=”No Line Watercolor Leaves + Simon’s STAMPtember Release Blog Hop | Nina-Marie Design” link=”http://shrsl.com/jomv” linktarget=”_blank” hide_on_mobile=”small-visibility,medium-visibility,large-visibility” class=”” id=”” animation_type=”” animation_direction=”left” animation_speed=”0.3″ animation_offset=””]https://ninamariedesign.com/wp-content/uploads/2017/09/STAMPtember_No-Line-Watercolor-Leaves-3.jpg[/fusion_imageframe][/fusion_builder_column][fusion_builder_column type=”1_2″ layout=”1_2″ spacing=”” center_content=”no” hover_type=”none” link=”” min_height=”” hide_on_mobile=”small-visibility,medium-visibility,large-visibility” class=”” id=”” background_color=”” background_image=”” background_position=”left top” background_repeat=”no-repeat” border_size=”0″ border_color=”” border_style=”solid” border_position=”all” padding=”” dimension_margin=”” animation_type=”” animation_direction=”left” animation_speed=”0.3″ animation_offset=”” last=”no”][fusion_imageframe image_id=”13575″ style_type=”none” stylecolor=”” hover_type=”none” bordersize=”” bordercolor=”” borderradius=”” align=”center” lightbox=”yes” gallery_id=”” lightbox_image=”https://ninamariedesign.com/wp-content/uploads/2017/09/STAMPtember_No-Line-Watercolor-Leaves-6.jpg” alt=”No Line Watercolor Leaves + Simon’s STAMPtember Release Blog Hop | Nina-Marie Design” link=”http://shrsl.com/jomv” linktarget=”_blank” hide_on_mobile=”small-visibility,medium-visibility,large-visibility” class=”” id=”” animation_type=”” animation_direction=”left” animation_speed=”0.3″ animation_offset=””]https://ninamariedesign.com/wp-content/uploads/2017/09/STAMPtember_No-Line-Watercolor-Leaves-6.jpg[/fusion_imageframe][/fusion_builder_column][fusion_builder_column type=”1_1″ layout=”1_1″ spacing=”” center_content=”no” hover_type=”none” link=”” min_height=”” hide_on_mobile=”small-visibility,medium-visibility,large-visibility” class=”” id=”” background_color=”” background_image=”” background_position=”left top” background_repeat=”no-repeat” border_size=”0″ border_color=”” border_style=”solid” border_position=”all” padding=”” dimension_margin=”” animation_type=”” animation_direction=”left” animation_speed=”0.3″ animation_offset=”” last=”no”][fusion_separator style_type=”none” hide_on_mobile=”small-visibility,medium-visibility,large-visibility” class=”” id=”” sep_color=”” top_margin=”10″ bottom_margin=”10″ border_size=”” icon=”” icon_circle=”” icon_circle_color=”” width=”” alignment=”center” /][fusion_text]
These dot charts are great for testing out new colors to see what you might like to add to your collection of watercolors. I have a couple of Daniel Smith’s colors in my palette, along with many from Winsor and Newton. One of my favorites from Simon’s Daniel Smith dot charts is Sap Green; something about this green makes me happy! That color is included in the Debby Hughes’ palette.
[/fusion_text][fusion_separator style_type=”none” hide_on_mobile=”small-visibility,medium-visibility,large-visibility” class=”” id=”” sep_color=”” top_margin=”10″ bottom_margin=”10″ border_size=”” icon=”” icon_circle=”” icon_circle_color=”” width=”” alignment=”center” /][fusion_imageframe image_id=”13576″ style_type=”none” stylecolor=”” hover_type=”none” bordersize=”” bordercolor=”” borderradius=”” align=”center” lightbox=”yes” gallery_id=”” lightbox_image=”https://ninamariedesign.com/wp-content/uploads/2017/09/STAMPtember_No-Line-Watercolor-Leaves-2.jpg” alt=”No Line Watercolor Leaves + Simon’s STAMPtember Release Blog Hop | Nina-Marie Design” link=”http://shrsl.com/jomv” linktarget=”_blank” hide_on_mobile=”small-visibility,medium-visibility,large-visibility” class=”” id=”” animation_type=”” animation_direction=”left” animation_speed=”0.3″ animation_offset=””]https://ninamariedesign.com/wp-content/uploads/2017/09/STAMPtember_No-Line-Watercolor-Leaves-2.jpg[/fusion_imageframe][fusion_separator style_type=”none” hide_on_mobile=”small-visibility,medium-visibility,large-visibility” class=”” id=”” sep_color=”” top_margin=”10″ bottom_margin=”10″ border_size=”” icon=”” icon_circle=”” icon_circle_color=”” width=”” alignment=”center” /][fusion_text]
I started by stamping the entire set of images from Fractal Leaves in Barely Beige ink from Simon. I chose this ink in particular because it will not show up after the coloring was finished. I then proceeded to watercolor all the leaves; the paper I used was some 100% cotton watercolor paper. I just recently found this paper and have loved using it!
[/fusion_text][fusion_separator style_type=”none” hide_on_mobile=”small-visibility,medium-visibility,large-visibility” class=”” id=”” sep_color=”” top_margin=”10″ bottom_margin=”10″ border_size=”” icon=”” icon_circle=”” icon_circle_color=”” width=”” alignment=”center” /][fusion_imageframe image_id=”13577″ style_type=”none” stylecolor=”” hover_type=”none” bordersize=”” bordercolor=”” borderradius=”” align=”center” lightbox=”yes” gallery_id=”” lightbox_image=”https://ninamariedesign.com/wp-content/uploads/2017/09/STAMPtember_No-Line-Watercolor-Leaves-5.jpg” alt=”No Line Watercolor Leaves + Simon’s STAMPtember Release Blog Hop | Nina-Marie Design” link=”http://shrsl.com/jomv” linktarget=”_blank” hide_on_mobile=”small-visibility,medium-visibility,large-visibility” class=”” id=”” animation_type=”” animation_direction=”left” animation_speed=”0.3″ animation_offset=””]https://ninamariedesign.com/wp-content/uploads/2017/09/STAMPtember_No-Line-Watercolor-Leaves-5.jpg[/fusion_imageframe][fusion_separator style_type=”none” hide_on_mobile=”small-visibility,medium-visibility,large-visibility” class=”” id=”” sep_color=”” top_margin=”10″ bottom_margin=”10″ border_size=”” icon=”” icon_circle=”” icon_circle_color=”” width=”” alignment=”center” /][fusion_text]
After coloring the leaves, I also painted a very light version of Yellow Ochre into the background around the leaves.
My panel was cut down with a Simon Wonky Rectangle die; I also layered some yellow cardstock cut with the same die behind the panel before attaching the two panels to a purple card base.
I then cut a red sentiment with Simon’s Grateful word die and attached it onto the coordinating outline (die cut in cream). The entire sentiment I then layered onto some vellum. To make the vellum match the watercolored leaves, I used an ink blending tool and brushed on some Caribbean Blue ink
[/fusion_text][fusion_separator style_type=”none” hide_on_mobile=”small-visibility,medium-visibility,large-visibility” class=”” id=”” sep_color=”” top_margin=”10″ bottom_margin=”10″ border_size=”” icon=”” icon_circle=”” icon_circle_color=”” width=”” alignment=”center” /][fusion_imageframe image_id=”13580″ style_type=”none” stylecolor=”” hover_type=”none” bordersize=”” bordercolor=”” borderradius=”” align=”center” lightbox=”yes” gallery_id=”” lightbox_image=”https://ninamariedesign.com/wp-content/uploads/2017/09/STAMPtember_No-Line-Watercolor-Leaves-4.jpg” alt=”No Line Watercolor Leaves + Simon’s STAMPtember Release Blog Hop | Nina-Marie Design” link=”http://shrsl.com/jomv” linktarget=”_blank” hide_on_mobile=”small-visibility,medium-visibility,large-visibility” class=”” id=”” animation_type=”” animation_direction=”left” animation_speed=”0.3″ animation_offset=””]https://ninamariedesign.com/wp-content/uploads/2017/09/STAMPtember_No-Line-Watercolor-Leaves-4.jpg[/fusion_imageframe][fusion_separator style_type=”none” hide_on_mobile=”small-visibility,medium-visibility,large-visibility” class=”” id=”” sep_color=”” top_margin=”10″ bottom_margin=”10″ border_size=”” icon=”” icon_circle=”” icon_circle_color=”” width=”” alignment=”center” /][fusion_text]
The colors from the Shari Carroll palette work so well for autumn, and I was really pleased with how they turned out! If you don’t have the Daniel Smith watercolors and instead have Winsor and Newton colors, I did some comparing for you.
I personally have mostly Winsor and Newton watercolor in my palette, with the exception of a few Daniel Smith colors. As I find new colors I love, I’ll add them to my collection. But if you wanted to recreate this card and have the Winsor and Newton paints (or prefer them over the Daniel Smith), these are the Winsor and Newton colors you can use to get the same colors I used on this card:
[/fusion_text][fusion_separator style_type=”none” hide_on_mobile=”small-visibility,medium-visibility,large-visibility” class=”” id=”” sep_color=”” top_margin=”10″ bottom_margin=”10″ border_size=”” icon=”” icon_circle=”” icon_circle_color=”” width=”” alignment=”center” /][/fusion_builder_column][fusion_builder_column type=”1_3″ layout=”1_3″ spacing=”” center_content=”no” hover_type=”none” link=”” min_height=”” hide_on_mobile=”small-visibility,medium-visibility,large-visibility” class=”” id=”” background_color=”” background_image=”” background_position=”left top” background_repeat=”no-repeat” border_size=”0″ border_color=”” border_style=”solid” border_position=”all” padding=”” dimension_margin=”” animation_type=”” animation_direction=”left” animation_speed=”0.3″ animation_offset=”” last=”no”][fusion_checklist icon=”fa-heart” iconcolor=”” circle=”” circlecolor=”#e91e63″ size=”13px” hide_on_mobile=”small-visibility,medium-visibility,large-visibility” class=”” id=””][fusion_li_item icon=””]
Quinacridone Red (DS) = Alizaran Crimson Hue + Permanent Rose (W&N)
[/fusion_li_item][fusion_li_item icon=””]
Quinacridone Coral (DS) = Permanent Rose + Cadmium Red Light + Alizaran Crimson Hue (W&N)
[/fusion_li_item][fusion_li_item icon=””]
Perinone Orange (DS) = Cadmium Red Light (W&N)
[/fusion_li_item][fusion_li_item icon=””]
Permanent Orange (DS) = Cadmium Orange Hue (W&N)
[/fusion_li_item][fusion_li_item icon=””]
Indian Yellow (DS) = Gamboge Hue + Cadmium Yellow Light (W&N)
[/fusion_li_item][fusion_li_item icon=””]
Yellow Ochre (DS) = Yellow Ochre (W&N)
[/fusion_li_item][fusion_li_item icon=””]
Sleeping Beauty Turquoise Genuine (DS) = Turquoise + Indigo + Emerald (W&N)
[/fusion_li_item][fusion_li_item icon=””]
Rose of Ultramarine (DS) = Mauve + Sepia (W&N)
[/fusion_li_item][/fusion_checklist][fusion_text]
Note: DS is Daniel Smith and W&N is Winsor & Newton. All colors are linked below in the supply list.
[/fusion_text][/fusion_builder_column][fusion_builder_column type=”2_3″ layout=”2_3″ spacing=”” center_content=”no” hover_type=”none” link=”” min_height=”” hide_on_mobile=”small-visibility,medium-visibility,large-visibility” class=”” id=”” background_color=”” background_image=”” background_position=”left top” background_repeat=”no-repeat” border_size=”0″ border_color=”” border_style=”solid” border_position=”all” padding=”” dimension_margin=”” animation_type=”” animation_direction=”left” animation_speed=”0.3″ animation_offset=”” last=”no”][fusion_imageframe image_id=”13582″ style_type=”none” stylecolor=”” hover_type=”none” bordersize=”” bordercolor=”” borderradius=”” align=”center” lightbox=”yes” gallery_id=”” lightbox_image=”https://ninamariedesign.com/wp-content/uploads/2017/09/STAMPtember_No-Line-Watercolor-Leaves-7.jpg” alt=”No Line Watercolor Leaves + Simon’s STAMPtember Release Blog Hop | Nina-Marie Design” link=”http://shrsl.com/jomv” linktarget=”_blank” hide_on_mobile=”small-visibility,medium-visibility,large-visibility” class=”” id=”” animation_type=”” animation_direction=”left” animation_speed=”0.3″ animation_offset=””]https://ninamariedesign.com/wp-content/uploads/2017/09/STAMPtember_No-Line-Watercolor-Leaves-7.jpg[/fusion_imageframe][/fusion_builder_column][fusion_builder_column type=”1_1″ layout=”1_1″ spacing=”” center_content=”no” hover_type=”none” link=”” min_height=”” hide_on_mobile=”small-visibility,medium-visibility,large-visibility” class=”” id=”” background_color=”” background_image=”” background_position=”left top” background_repeat=”no-repeat” border_size=”0″ border_color=”” border_style=”solid” border_position=”all” padding=”” dimension_margin=”” animation_type=”” animation_direction=”left” animation_speed=”0.3″ animation_offset=”” last=”no”][fusion_separator style_type=”none” hide_on_mobile=”small-visibility,medium-visibility,large-visibility” class=”” id=”” sep_color=”” top_margin=”10″ bottom_margin=”10″ border_size=”” icon=”” icon_circle=”” icon_circle_color=”” width=”” alignment=”center” /][/fusion_builder_column][/fusion_builder_row][/fusion_builder_container][fusion_builder_container hundred_percent=”no” equal_height_columns=”no” hide_on_mobile=”small-visibility,medium-visibility,large-visibility” background_position=”center center” background_repeat=”no-repeat” fade=”no” background_parallax=”none” enable_mobile=”no” parallax_speed=”0.3″ video_aspect_ratio=”16:9″ video_loop=”yes” video_mute=”yes” border_style=”solid” padding_top=”20px” padding_bottom=”20px” admin_label=”Products COLORED PENCIL CARDS” admin_toggled=”no”][fusion_builder_row][fusion_builder_column type=”1_1″ layout=”1_1″ spacing=”” center_content=”no” hover_type=”none” link=”” min_height=”” hide_on_mobile=”small-visibility,medium-visibility,large-visibility” class=”” id=”” background_color=”” background_image=”” background_position=”left top” background_repeat=”no-repeat” border_size=”0″ border_color=”” border_style=”solid” border_position=”all” padding=”” animation_type=”” animation_direction=”left” animation_speed=”0.3″ animation_offset=”” last=”no”][fusion_title margin_top=”” margin_bottom=”” hide_on_mobile=”small-visibility,medium-visibility,large-visibility” class=”” id=”” size=”1″ content_align=”center” style_type=”none” sep_color=””]
SUPPLIES USED FOR THIS CARD
[/fusion_title][fusion_separator style_type=”none” hide_on_mobile=”small-visibility,medium-visibility,large-visibility” top_margin=”10″ bottom_margin=”10″ alignment=”center” /][fusion_text]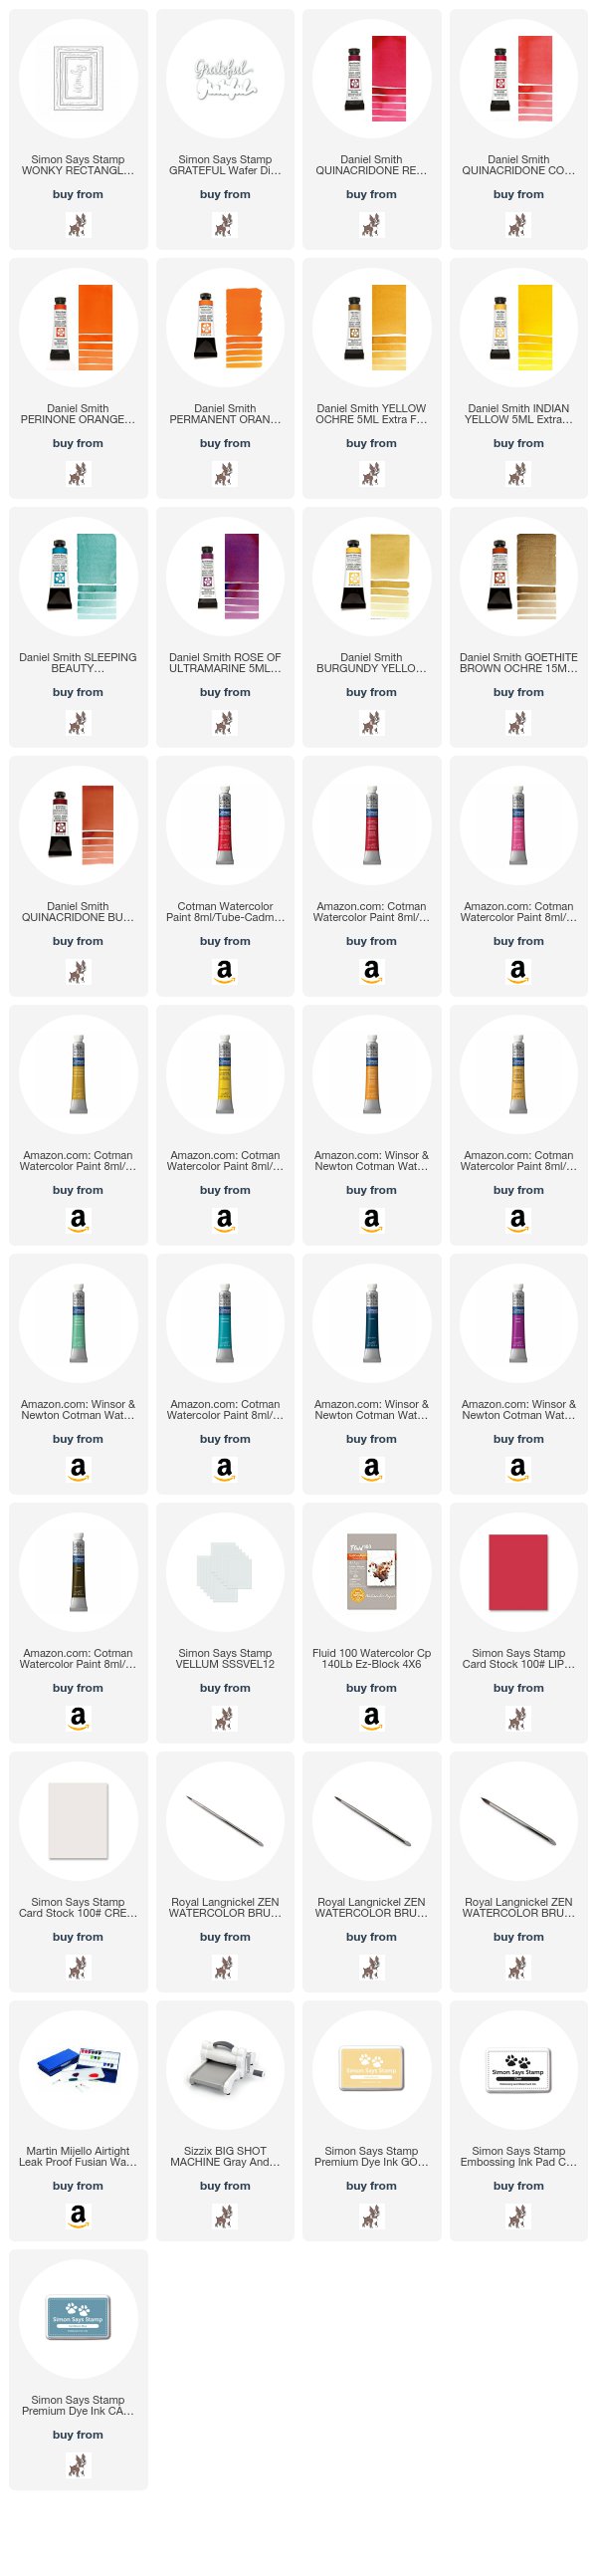
[/fusion_text][/fusion_builder_column][fusion_builder_column type=”1_1″ layout=”1_1″ spacing=”” center_content=”no” hover_type=”none” link=”” min_height=”” hide_on_mobile=”small-visibility,medium-visibility,large-visibility” class=”” id=”” background_color=”” background_image=”” background_position=”left top” background_repeat=”no-repeat” border_size=”0″ border_color=”” border_style=”solid” border_position=”all” padding=”” dimension_margin=”” animation_type=”” animation_direction=”left” animation_speed=”0.3″ animation_offset=”” last=”no”][fusion_separator style_type=”none” hide_on_mobile=”small-visibility,medium-visibility,large-visibility” class=”” id=”” sep_color=”” top_margin=”10″ bottom_margin=”10″ border_size=”” icon=”” icon_circle=”” icon_circle_color=”” width=”” alignment=”center” /][fusion_separator style_type=”shadow” hide_on_mobile=”small-visibility,medium-visibility,large-visibility” class=”” id=”” sep_color=”#ffffff” top_margin=”” bottom_margin=”” border_size=”0″ icon=”fa-heart” icon_circle=”yes” icon_circle_color=”#00b3aa” width=”” alignment=”center” /][fusion_separator style_type=”none” hide_on_mobile=”small-visibility,medium-visibility,large-visibility” class=”” id=”” sep_color=”” top_margin=”10″ bottom_margin=”10″ border_size=”” icon=”” icon_circle=”” icon_circle_color=”” width=”” alignment=”center” /][/fusion_builder_column][/fusion_builder_row][/fusion_builder_container][fusion_builder_container hundred_percent=”no” equal_height_columns=”no” menu_anchor=”” hide_on_mobile=”small-visibility,medium-visibility,large-visibility” class=”” id=”” background_color=”” background_image=”” background_position=”center center” background_repeat=”no-repeat” fade=”no” background_parallax=”none” enable_mobile=”no” parallax_speed=”0.3″ video_mp4=”” video_webm=”” video_ogv=”” video_url=”” video_aspect_ratio=”16:9″ video_loop=”yes” video_mute=”yes” video_preview_image=”” border_size=”” border_color=”” border_style=”solid” margin_top=”” margin_bottom=”” padding_top=”” padding_right=”” padding_bottom=”” padding_left=”” admin_label=”hopping “][fusion_builder_row][fusion_builder_column type=”1_1″ layout=”1_1″ spacing=”” center_content=”no” hover_type=”none” link=”” min_height=”” hide_on_mobile=”small-visibility,medium-visibility,large-visibility” class=”” id=”” background_color=”” background_image=”” background_position=”left top” background_repeat=”no-repeat” border_size=”0″ border_color=”” border_style=”solid” border_position=”all” padding=”” dimension_margin=”” animation_type=”” animation_direction=”left” animation_speed=”0.3″ animation_offset=”” last=”no”][fusion_title margin_top=”” margin_bottom=”” hide_on_mobile=”small-visibility,medium-visibility,large-visibility” class=”” id=”” size=”1″ content_align=”center” style_type=”none” sep_color=””]
MY NEWEST DESIGNS + THE STAMPTEMBER RELEASE
[/fusion_title][fusion_separator style_type=”none” hide_on_mobile=”small-visibility,medium-visibility,large-visibility” top_margin=”10″ bottom_margin=”10″ alignment=”center” /][fusion_text]
I am THRILLED to share my newest stamp and die designs with you: the You Got This stamps and Prettied Up Gift Card dies!
The You Got This set was inspired by the fact that I love creating encouragement cards. Often I want something more than just the usual simple greeting though. So I came up with a whole assortment of encouraging sentiments and designed them in a clean font that could be used on just about any card.
Prettied Up Gift Card is a die set that is perfect for using in a variety of ways to dress up a gift card. The set includes a scalloped gift card holder, a set of dies to make a bow, and a “belly band” to wrap around the gift card. The gift card holder can be used on its own, or mounted onto (or inside!) an A2 card. You can also make the gift card holder with or without the bow. My goal was to make this die be versatile for any type of card.
If you’d like to see how to build the Prettied Up Gift Card die, you can find a “how to” video that I did HERE.
[/fusion_text][fusion_separator style_type=”none” hide_on_mobile=”small-visibility,medium-visibility,large-visibility” top_margin=”10″ bottom_margin=”10″ alignment=”center” /][/fusion_builder_column][fusion_builder_column type=”1_2″ layout=”1_1″ spacing=”” center_content=”no” hover_type=”none” link=”” min_height=”” hide_on_mobile=”small-visibility,medium-visibility,large-visibility” class=”” id=”” background_color=”” background_image=”” background_position=”left top” background_repeat=”no-repeat” border_size=”0″ border_color=”” border_style=”solid” border_position=”all” padding=”” dimension_margin=”” animation_type=”” animation_direction=”left” animation_speed=”0.3″ animation_offset=”” last=”no”][fusion_imageframe image_id=”” style_type=”none” stylecolor=”” hover_type=”none” bordersize=”” bordercolor=”” borderradius=”” align=”center” lightbox=”no” gallery_id=”” lightbox_image=”” alt=”No Line Watercolor Leaves + Simon’s STAMPtember Release Blog Hop | Nina-Marie Design” link=”http://www.shareasale.com/r.cfm?u=1051449&b=199868&m=24698&afftrack=&urllink=https%3A%2F%2Fwww%2Esimonsaysstamp%2Ecom%2Fproduct%2FSimon%2DSays%2DStamp%2DPRETTIED%2DUP%2DGIFT%2DCARD%2DWafer%2DDies%2DSSSD111769%2DSTAMPtember%2DSSSD111769″ linktarget=”_blank” hide_on_mobile=”small-visibility,medium-visibility,large-visibility” class=”” id=”” animation_type=”” animation_direction=”left” animation_speed=”0.3″ animation_offset=””]https://ninamariedesign.com/wp-content/uploads/2017/09/SSSD111669_Prettied-Up-Gift-Card_dies-01.jpg[/fusion_imageframe][/fusion_builder_column][fusion_builder_column type=”1_2″ layout=”1_1″ spacing=”” center_content=”no” hover_type=”none” link=”” min_height=”” hide_on_mobile=”small-visibility,medium-visibility,large-visibility” class=”” id=”” background_color=”” background_image=”” background_position=”left top” background_repeat=”no-repeat” border_size=”0″ border_color=”” border_style=”solid” border_position=”all” padding=”” dimension_margin=”” animation_type=”” animation_direction=”left” animation_speed=”0.3″ animation_offset=”” last=”no”][fusion_imageframe image_id=”13606″ style_type=”none” stylecolor=”” hover_type=”none” bordersize=”” bordercolor=”” borderradius=”” align=”center” lightbox=”no” gallery_id=”” lightbox_image=”https://ninamariedesign.com/wp-content/uploads/2017/09/STAMPtember_No-Line-Watercolor-Leaves-7.jpg” alt=”No Line Watercolor Leaves + Simon’s STAMPtember Release Blog Hop | Nina-Marie Design” link=”http://www.shareasale.com/r.cfm?u=1051449&b=199868&m=24698&afftrack=&urllink=https%3A%2F%2Fwww%2Esimonsaysstamp%2Ecom%2Fproduct%2FSimon%2DSays%2DClear%2DStamps%2DYOU%2DGOT%2DTHIS%2DSSS101782%2DSTAMPtember%2DSSS101782″ linktarget=”_blank” hide_on_mobile=”small-visibility,medium-visibility,large-visibility” class=”” id=”” animation_type=”” animation_direction=”left” animation_speed=”0.3″ animation_offset=””]https://ninamariedesign.com/wp-content/uploads/2017/09/SSS101782_YouGotThis_stamps.jpg[/fusion_imageframe][/fusion_builder_column][fusion_builder_column type=”1_1″ layout=”1_1″ spacing=”” center_content=”no” hover_type=”none” link=”” min_height=”” hide_on_mobile=”small-visibility,medium-visibility,large-visibility” class=”” id=”” background_color=”” background_image=”” background_position=”left top” background_repeat=”no-repeat” border_size=”0″ border_color=”” border_style=”solid” border_position=”all” padding=”” dimension_margin=”” animation_type=”” animation_direction=”left” animation_speed=”0.3″ animation_offset=”” last=”no”][fusion_separator style_type=”none” hide_on_mobile=”small-visibility,medium-visibility,large-visibility” top_margin=”10″ bottom_margin=”10″ alignment=”center” /][fusion_text]
There are SO many fabulous products from this new release! Everything from stamps, stencils, dies, paper, envelopes and even a new embossing plate! You can see all the new products below:
[/fusion_text][fusion_separator style_type=”none” hide_on_mobile=”small-visibility,medium-visibility,large-visibility” top_margin=”10″ bottom_margin=”10″ alignment=”center” /][fusion_text]
[/fusion_text][/fusion_builder_column][fusion_builder_column type=”1_1″ layout=”1_1″ spacing=”” center_content=”no” hover_type=”none” link=”” min_height=”” hide_on_mobile=”small-visibility,medium-visibility,large-visibility” class=”” id=”” background_color=”” background_image=”” background_position=”left top” background_repeat=”no-repeat” border_size=”0″ border_color=”” border_style=”solid” border_position=”all” padding=”” dimension_margin=”” animation_type=”” animation_direction=”left” animation_speed=”0.3″ animation_offset=”” last=”no”][fusion_separator style_type=”none” hide_on_mobile=”small-visibility,medium-visibility,large-visibility” top_margin=”10″ bottom_margin=”10″ alignment=”center” /][fusion_separator style_type=”shadow” hide_on_mobile=”small-visibility,medium-visibility,large-visibility” class=”” id=”” sep_color=”#ffffff” top_margin=”” bottom_margin=”” border_size=”0″ icon=”fa-heart” icon_circle=”yes” icon_circle_color=”#00b3aa” width=”” alignment=”center” /][fusion_separator style_type=”none” hide_on_mobile=”small-visibility,medium-visibility,large-visibility” top_margin=”10″ bottom_margin=”10″ alignment=”center” /][/fusion_builder_column][/fusion_builder_row][/fusion_builder_container][fusion_builder_container hundred_percent=”no” equal_height_columns=”no” menu_anchor=”” hide_on_mobile=”small-visibility,medium-visibility,large-visibility” class=”” id=”” background_color=”” background_image=”” background_position=”center center” background_repeat=”no-repeat” fade=”no” background_parallax=”none” enable_mobile=”no” parallax_speed=”0.3″ video_mp4=”” video_webm=”” video_ogv=”” video_url=”” video_aspect_ratio=”16:9″ video_loop=”yes” video_mute=”yes” video_preview_image=”” border_size=”” border_color=”” border_style=”solid” margin_top=”” margin_bottom=”” padding_top=”” padding_right=”” padding_bottom=”” padding_left=”” admin_label=”hopping “][fusion_builder_row][fusion_builder_column type=”1_1″ layout=”1_1″ spacing=”” center_content=”no” hover_type=”none” link=”” min_height=”” hide_on_mobile=”small-visibility,medium-visibility,large-visibility” class=”” id=”” background_color=”” background_image=”” background_position=”left top” background_repeat=”no-repeat” border_size=”0″ border_color=”” border_style=”solid” border_position=”all” padding=”” dimension_margin=”” animation_type=”” animation_direction=”left” animation_speed=”0.3″ animation_offset=”” last=”no”][fusion_title margin_top=”” margin_bottom=”” hide_on_mobile=”small-visibility,medium-visibility,large-visibility” class=”” id=”” size=”1″ content_align=”center” style_type=”none” sep_color=””]
KEEP HOPPING & GIVEAWAYS!
[/fusion_title][fusion_separator style_type=”none” hide_on_mobile=”small-visibility,medium-visibility,large-visibility” top_margin=”10″ bottom_margin=”10″ alignment=”center” /][fusion_imageframe image_id=”” style_type=”none” stylecolor=”” hover_type=”none” bordersize=”” bordercolor=”” borderradius=”” align=”center” lightbox=”no” gallery_id=”” lightbox_image=”” alt=”Colored Pencils + Stencils + Simon’s STAMPtember Release Blog Hop | Nina-Marie Design” link=”http://shrsl.com/jomv” linktarget=”_blank” hide_on_mobile=”small-visibility,medium-visibility,large-visibility” class=”” id=”” animation_type=”” animation_direction=”left” animation_speed=”0.3″ animation_offset=””]https://ninamariedesign.com/wp-content/uploads/2017/08/STAMPtember-HOP-600×264.jpg[/fusion_imageframe][fusion_separator style_type=”none” hide_on_mobile=”small-visibility,medium-visibility,large-visibility” top_margin=”10″ bottom_margin=”10″ alignment=”center” /][fusion_text]
There is SO much more to see in the STAMPtember release blog hop! Your next stop is my amazingly talented friend Kelly Latevola! You can also find the entire hop list here:
Nina-Marie Trapani – that’s me!
Simon is also generously giving away $50 gift certificates at EACH stop in the hop! Leave a comment here on my blog, as well as everyone else’s blogs, for a chance to win!
And remember that tomorrow Simon is hosting a second blog hop! Make sure you visit the Simon blog for additional details!
[/fusion_text][/fusion_builder_column][fusion_builder_column type=”1_1″ layout=”1_1″ spacing=”” center_content=”no” hover_type=”none” link=”” min_height=”” hide_on_mobile=”small-visibility,medium-visibility,large-visibility” class=”” id=”” background_color=”” background_image=”” background_position=”left top” background_repeat=”no-repeat” border_size=”0″ border_color=”” border_style=”solid” border_position=”all” padding=”” dimension_margin=”” animation_type=”” animation_direction=”left” animation_speed=”0.3″ animation_offset=”” last=”no”][fusion_separator style_type=”none” hide_on_mobile=”small-visibility,medium-visibility,large-visibility” top_margin=”10″ bottom_margin=”10″ alignment=”center” /][fusion_separator style_type=”shadow” hide_on_mobile=”small-visibility,medium-visibility,large-visibility” class=”” id=”” sep_color=”#ffffff” top_margin=”” bottom_margin=”” border_size=”0″ icon=”fa-heart” icon_circle=”yes” icon_circle_color=”#00b3aa” width=”” alignment=”center” /][fusion_separator style_type=”none” hide_on_mobile=”small-visibility,medium-visibility,large-visibility” top_margin=”10″ bottom_margin=”10″ alignment=”center” /][/fusion_builder_column][/fusion_builder_row][/fusion_builder_container][fusion_builder_container hundred_percent=”no” equal_height_columns=”no” menu_anchor=”” hide_on_mobile=”small-visibility,medium-visibility,large-visibility” class=”” id=”” background_color=”” background_image=”” background_position=”center center” background_repeat=”no-repeat” fade=”no” background_parallax=”none” enable_mobile=”no” parallax_speed=”0.3″ video_mp4=”” video_webm=”” video_ogv=”” video_url=”” video_aspect_ratio=”16:9″ video_loop=”yes” video_mute=”yes” video_preview_image=”” border_size=”” border_color=”” border_style=”solid” margin_top=”” margin_bottom=”” padding_top=”” padding_right=”” padding_bottom=”” padding_left=”” admin_label=”SOCIAL”][fusion_builder_row][fusion_builder_column type=”1_2″ layout=”1_1″ spacing=”” center_content=”no” hover_type=”none” link=”” min_height=”” hide_on_mobile=”small-visibility,medium-visibility,large-visibility” class=”” id=”” background_color=”” background_image=”” background_position=”left top” background_repeat=”no-repeat” border_size=”0″ border_color=”” border_style=”solid” border_position=”all” padding=”” dimension_margin=”” animation_type=”” animation_direction=”left” animation_speed=”0.3″ animation_offset=”” last=”no”][fusion_title margin_top=”” margin_bottom=”” hide_on_mobile=”small-visibility,medium-visibility,large-visibility” class=”” id=”” size=”1″ content_align=”center” style_type=”none” sep_color=””]
SHARE THIS POST ON SOCIAL MEDIA
[/fusion_title][fusion_separator style_type=”none” hide_on_mobile=”small-visibility,medium-visibility,large-visibility” top_margin=”10″ bottom_margin=”10″ alignment=”center” /][fusion_text]
[/fusion_text][/fusion_builder_column][fusion_builder_column type=”1_2″ layout=”1_1″ spacing=”” center_content=”no” hover_type=”none” link=”” min_height=”” hide_on_mobile=”small-visibility,medium-visibility,large-visibility” class=”” id=”” background_color=”” background_image=”” background_position=”left top” background_repeat=”no-repeat” border_size=”0″ border_color=”” border_style=”solid” border_position=”all” padding=”” dimension_margin=”” animation_type=”” animation_direction=”left” animation_speed=”0.3″ animation_offset=”” last=”no”][fusion_title margin_top=”” margin_bottom=”” hide_on_mobile=”small-visibility,medium-visibility,large-visibility” class=”” id=”” size=”1″ content_align=”center” style_type=”none” sep_color=””]
STAMPTEMBER INSPIRATION!
[/fusion_title][fusion_separator style_type=”none” hide_on_mobile=”small-visibility,medium-visibility,large-visibility” top_margin=”10″ bottom_margin=”10″ alignment=”center” /][fusion_imageframe image_id=”13604″ style_type=”none” stylecolor=”” hover_type=”none” bordersize=”” bordercolor=”” borderradius=”” align=”center” lightbox=”no” gallery_id=”” lightbox_image=”” alt=”Colored Pencils + Stencils + Simon’s STAMPtember Release Blog Hop | Nina-Marie Design” link=”http://www.simonsaysstampblog.com/blog/simon-brand-galleries/stamptember-2017-gallery/” linktarget=”_blank” hide_on_mobile=”small-visibility,medium-visibility,large-visibility” class=”” id=”” animation_type=”” animation_direction=”left” animation_speed=”0.3″ animation_offset=””]https://ninamariedesign.com/wp-content/uploads/2017/09/STAMPtember-1080×1080.jpg[/fusion_imageframe][fusion_separator style_type=”none” hide_on_mobile=”small-visibility,medium-visibility,large-visibility” top_margin=”10″ bottom_margin=”10″ alignment=”center” /][fusion_text]
Don’t forget that you can see more STAMPtember inspiration in the Simon Brand Galleries! And you can add to the gallery too! When you great something with our new STAMPtember release products, be sure to link up your projects to the gallery! We love seeing what you create!
[/fusion_text][/fusion_builder_column][/fusion_builder_row][/fusion_builder_container]

 LinkDeli Free 15 day trial
Such pretty cards!!! Love your colored pencil coloring, so pretty!!!
Wow, I love these awesome bright card that you make, and what a beautiful stamps!
Love the blue card, especially the technique. Something I had not come across before!
Thank you for sharing your colored pencil skills. That is my favorite medium!
Amazing cards
I always love your colour choices, Nina-Marie! Your videos are a joy to watch as well! Thank you for always inspiring! STAMPtember is a lot of fun!
Great vibrant colors, love them!
A very colorful cards. I love it!
Wonderfully bright and colorful cards, Nina-Marie!!
Love your bright and fun colors. Thanks for the inspiration
Amazing card! Love the brilliant colors!
You are very talented. What beautiful cards.
I adore the stamp set you designed, and love the cards you created with the stained glass stencil. You are so very talented!
Amazing talent, adorable cards, fun new products! Thanks for sharing!
Love the watercolor.
Love those first couple of cards. Looks like a caliedescope.
Absolutely beautiful!
I love the bright, cheerful colors here. Sure to bring a smile to the lucky recipient.
WOW You made beautiful cards with the new stuff from the release.
So colorful and bright!! Love the sentiments stamp set, just perfect!
Never thought to use a stencil for coloring which I am into recently. Great cards and love the technique. Thanks for sharing this. Beautiful cards.
SQUEAL!! I LOVE LOVE LOVE the New Release and ALL of the AMAZING Inspiration!! THANKS SO MUCH for sharing and have a FABULOUS Labor Day Weekend!! =)
Lots of colorful inspiration here!
Wow, your care would brighten anybody’s day! I love it!
Wow! The bright colored pencils with the stencil is beautiful.
Stunning! Love the colors!
Wow! I need sun glasses. Awesome bright colors!
Gorgeous, absolutely gorgeous, tfs!
I AM ABSOLUTLY MESMERIZED.
I have watched this for days and I just get totally intranced in the colours.
I am in love. And must get one of those styluses with that magic liquid. Just gorgeous.
T xx
Your cards are stunning! Beautiful colors.
The blue card is so beautiful and what a really cool card technique.
I love these encouraging sentiments.
Love the bright cheery colors you used. Thank you for sharing.
Pure rainbow joy! Thank you for the inspiration!
I REALLY love the blue monochromatic card!! Just stunning!!
So colorful but so simple! This is just my speed!
Such bright and bold cards! I am loving the coloring!
I love your videos! Thanks for sharing and the inspiration!
Those colors are gorgeous!
Love the card you make and I will try this. thank you. Love your videos.
I loved all your cards. The You Got This set is one of my favorites from this release. I know I will be reaching for it often.
Great cards, so colorful, the blue is my favorite!
The coloring is awesome! Never thought to try stencils and pencils. (NIce that it rhymes, too!) Love your new sentiment stamp set. That one is a must-have.
Wow- love your bright fun cards! I’m loving this release.
So bright and cheerful. Just lovely projects.
So bright and cheerful. I Love all your ideas, colors, patterns, and inspiration! Just lovely creations. Thanks for sharing.
Always such amazing coloring! I need to practice.
Beautiful cards with vibrant colours. Thanks for your inspiration.
You made 3 really beautiful cards ! Each of them a colourful eyecatcher ! Thank you for sharing your talent in the clear video.
You also created 2 great products for the new release — congratulations !
Greetings from Belgium.
Beautiful bright colours and your colouring is amazing!
Oh, my! What gorgeous cards! Love the stencil and how you used it with colored pencils. So unique!
Very bright & cheery cards. The shades of blue card is particularly effective
You Got This is so ENCOURAGING! Great design! Love, love, love your creativity and color choices!
Such bold colours, they’re sure to brighten the recipients day!
So bright and wonderful! I love how you were still able to get such strong vibrant colours from a coloured pencil. Can’t wait to try it!
I really enjoyed the video close up on the new products. Congrats on the great designs/products you created for SSS and the STAMPtember release.
Beautiful stencil and you look like you had fun coloring in the areas. Lovely cards and great sayings :)
Your cards are great, so bright and fun!
Beautiful cards! Wow, just imagine the smile when the fabulously vibrant card is removed from the envelope!
Wonderful cards!
Such bright, fun cards…..sure to bring a smile to anyone’s face!
Love the sentiment stamp!! Way to go Nina!
WOW! These cards are SO bright and beautiful!! Thanks for sharing!!
This is an awesome blog hop with amazing inspiration from you! Beautiful card!s
Such gorgeous, bold and vibrant examples!!! I love all the designs and so excited to get my first order to play!
I love the vibrant colors & gorgeous background!!Amazing coloring too!! Stunning creations! Wonderfully done!
Wow, I’m so impressed with the coloring you did with pencils. It is terrific. The watercolor is lovely also and I love the sets you created for SSS.
Wow – love the vibrant colors and the painting – amazing!!!!
Gorgeous cards! Fabulous release!
love the colors!!
Your coloring is awesome! I love the stained glass look. thank for the inspiration!
I love a good blog hop, tons of ideas, lots of pretty art work, and giveaways are a definite plus!
Fabulous cards and great inspiratoin. Gotta love Stamp-tember!
Stunning colours, love them all!
Wow, that first card is sure to brighten someone’s day! I love the way you colored the leaves – puts a nice non-fall twist to the image. Thank you for sharing!
If these cards wouldn’t brighten up someones day, I don’t know what would. Loving all the color!!
Love how bright and cheery these cards are. Thanks
What a great idea for using the stencils. Thanks for the inspiration.
Lovely cards and very colorful.
Wow, these cards are like a burst of sunshine! Beautiful new products, love these stencils! Happy Stamptember!
Soo Bright and soo beautiful, love these cards.
What a great idea, I have never seen that done before. I can’t wait to try it!
What a great idea, I have never seen that done before. Can’t wait to try it!
Wow, i love all those amazing colors, I also love the dot card idea, Ill be trying that out.
All of your cards are so vibrant and fun but I especially love the monochromatic blue one.
Wow! What beautiful and vibrant cards. I especially love the colour pencil and stencil. Will definitely be giving this one a go!
Stunning colouring! So vibrant!
What an amazing idea with coloring through the stensil. Beautiful colours.
Well, now I have to dig out my colored pencils. I’ve only used them once and they have just been collecting dust. I love the idea of using the stencil with colored pencils! Both of your color combinations turned out GREAT! Congrats on designing another wonderful stamp set – it’s so practical and can be used for so many different occassions. .
The colours are outstanding. Thanks for sharing.
I can’t believe the rainbow card didn’t even use gamsol! It looks like water color.
Your use of gorgeous, rich, vibrant colors makes these fabulous products shine! Exceptionally beautiful cards!
Wow! I’ve never seen coloring like this with pencils!! I love both versions…full of color!
Colorful
Great cards but I especially love those sentiments Nina!
“You Got This” set is wonderful. It’s perfect in so many ways. Thank you for designing it. All your designs are beautiful:)
WOW, Nina-Marie, what a lovely post and stunning cards! Who knew you could create such beautiful stained glass with colored pencils? Your new products look awesome and will definitely be top sellers. TFS!
These cards just put a big smile on my face!
So so so so so bright :)
Wow! I am in love with that stencil and the fractal leaves stamps!! So pretty!! And I also love your sentiment set…I think I need it! :)
I really appreciate the supporting sentiment you created on the blue kaleidoscope cards. It is rare to find Christian stamps. Thank you for creating this.
Wow, I love what you did with these backgrounds! Such a neat idea to use the stencils this way!
Beautiful cards! The colored pencils are so vibrant used on watercolor paper.
That bold,colorful background using the stained glass stencil is the best!! What great new products…there are so many I want!!
Wow! All of your cards are gorgeous! I especially love the ones you used the stencil for the pattern and colored with pencils! I would be afraid it would take forever, but during the 30 Day Coloring Challenge, I’m going to try it. SSS has made amazing stencils lately! I also love the new sentiment stamp set you created. It is definitely on my wish list!
I have to say I love the fractle stamps the best. Your coloring skills are excellent! Your cards are beautiful.
Love the stencils you used.
Such bright and colorful cards!
Such happy colors! Love the cards
Love the colored stencil and your no line watercoloring!
Beautiful cards! Anouther place I can break out the colored pencils! Great idea!
I love your stamp set!! The cards are full of bright and happy colors. Love the cards ????
Looks like Stamptember is staring off with a BANG. Goodness what a fabulous release! Love all this new, cool product. Thank you
These are beautiful! Great job colouring!
Love the bright cheery colors and awesome card designs! The Fractile Leaves is my fave!
Nina, your cards are beautiful, l love the vibrant colour! Lovely.
What gorgeous and vibrant cards! I also love the fractal leaves. Stamptember is getting off to a great start!
I really love the blue stained glass card! Lovely!
Beautiful bright colors !!!
I admire your patience in coloring in this delicate, detailed stencil. I also enjoyed your “Grateful” card, which also involves detailed coloring. Congratulations on your new encouraging stamp set you designed, too. I enjoy your videos each Monday on the Simon Says Stamp blog.
Really like both versions of your stained glass cards!
Love the bright colors!
Beautiful cards Nina. I love the idea of using these new stencils in my cards making. Thank you for the inspiration.
Such vivid colors! Aeesome.
Beautiful cards!!!!
What gorgeous and vibrant creations! Hard to believe you achieved this with colored pencils!
Oh my – that watercolor leaf card is amazing!
love all your cards.. your use of color is awesome.
Thanks for sharing
Love these background stamps. Your take is so bold & colorful. Love your cards. Thanks for sharing.
As aleays Nina you did a wonderful job! Love all your designs and your new dies and stamp sets! Thanks for the wonderful inspiration!
I love how colorful your cards are!!
Very colorful fun cards.. all of them are fun and bright I really like them all
I love your cards, and love the stamp set even more! I can’t wait to get it!
Your cards are so beautiful, bright, colorful and fun. My favorites from this release are the stencil and background stamps and of course Halloween. Gorgeous.
So pretty! The stencils in this release are great!
More than anything, I love the fact that you kept wiping the stump on your hand. The cards are beautiful. I would NEVER have thought to color AROUND a stencil. I’ll have to rethink that. Thank you.
What gorgeous cards! I love the bursts of color and how it makes everything POP! I’m going to try the watercolor paper you used to see if it helps me with my watercoloring woes. :)
Your colored backgrounds are so pretty. Thanks for sharing.
So much inspiration!! Love your bright colors with that new SSS stencil!
Wow… how pretty. Thanks for sharing.
Love the gorgeous “grateful” card!
Wow…these cards are so amazing!! I love them ALL, but that no line watercolor leaf card has my heart. ♥
Oh so much inspiration. Thank you!
Wow! If you look up BRIGHT in the dictionary, this card would be there! Amazingly intense colors!
Pretty coloring. I like how the gamsol made the colors smooth and the use of the gemstones in the design. Very nice cards with great sentiments!
great use of stencils
Wow super fantastic cards!!! Love all the bright colours!!!
What impressive card designs…the colors just POP!!! I love your samples of all the ways to use these stamps.
WOW! I didn’t even know you could use colored pencils through stencils! Gorgeousness! And those You Got This sentiments – to die for! I NEED those desperately! So encouraging. LOVE, LOVE, LOVE! Thanks so much for sharing… and I’m now following you, too!
I have never thought to use stencils this way. Great idea!
WOW!! I love these vibrant cards :)
Gosh, your cards are so bright and pretty! I think my favourite is the no-lines watercolour leaves – lovely! Congratulations on the new release of your own designs and thanks for the chance to win the generous prize.
striking colors!
All I can say is … WOW!!! Your cards are amazing!! The bold colors and lovely designs are always wonderful to see. And I have a second “wow” because you designed the great stamp set that I’ve been loving throughout the hop!!! Those sentiments are super encouraging and carry such important messages of faith and perseverance. My friends and I get together once a month for Encouragement Club where we make cards and pray for people in need of support. This set would be a blessing to use!
Oh my, Nina-Marie! You have been a busy girl! I love “You got this” and your cards are so-o-o inspiring. TY!
Muddle … what a fun word … and what great cards
Muddle … what a fun word … and what great cards
LOVE that MUDDLE through sentiment and your mesmerizingly bright designs!
Nice card. Thanks for sharing it with us
Such colorful cards!
Love this technique! Thanks you for sharing!
What beautiful colours!! Gorgeous cards!
The color on these cards are so beautiful..lovely
I absolutely love the color throughout all your cards! Very bright and cheerful!
Thank you for sharing your desigsn and techniques !
Love the colors and designs.
This blog hop is taking me forever!!! I love your work- linked over to Amazon and bought some of the WC paper to give it a try. I love seeing you color and seeing the no line water coloring. Thanks for the inspiration!
WOW such beautiful, vibrant cards!
I love the blue combo. Thai a lot of colorin but worth the effort. I have become a big fan of your videos. Thanks for sharing.
Wow Nina, these are gorgeous. Great job.
Wow, you’re cards are so beautiful and colorful! I love them all! Thanks so much for sharing!
Wow – so vibrant and colorful! All have to be time consuming but any could be framed as art work.
Now that is bright and beautiful! Both are great.
A true work of art with all of these lovely creations – I am amazed at your patience’s – it paid off! TFS and for the hop! https://ilikepaper01.blogspot.com/
you chose amazing sentiments for your set!
Sending huge props on your designs of my favorites on this Stamptember release! You Got This is such a perfect addition to send encouraging and uplifting messages, which we all need in the challenges of life. Together is also a favorite and so fitting for the holidays as well as to any first responder, volunteer, animal rescue or any person affected by the recent hurricane and floods in Texas and Louisiana. It was meant to be Nina!
Love your cards, Nina – they are always so inspirational:)
Beautiful cards! Thank you for sharing your technique and the two variations.
Perfect card for a perfect release! Thanks for the great inspiration and for great giveaway!
Beautiful cards! I’m not very good at using colored pencils (not smooth) but you’ve inspired me to try again. And I love that sentiment stamp set!
Love them all, especially the blue! It is really stunning.
Gorgeous colourful card.
Spectacular cards – love the bright colors on the first one! The Stained Glass Stencil is super – thanks for the inspiration !
Oh, my gosh! So bright and vibrant! You make me wish I was better with colored pencil! Lovely!
So many beautiful colors!
You hit it out of the park with the you got this stamp set! It is so timely and classic.
Beautiful colors!
Your cards are beautiful, love the bright colors. This is a great release.
The colour combinations are just stunning. I LOVE BRIGHT COLOUR! Beautiful work, as always.
Your designs are all so gorgeous and colorful! I love all that pretty detail, and every single one is a work of art! I am SO impressed!
Take Care!
Michele
So beautiful! Your choice of color is fantastic! Can’t wait to try out those stencils myself
Wow! This is amazing. Love the look you created.
I really love the bright colors on these cards. I never think to use brights but I am drawn to them as something unexpected.
Really fabulous use of color in all your projects!
I loved that first card UNTIL i saw the second – then I was torn – they are BOTH gorgeous!
Nina, you are so talented! I really like both of the coloured background cards, but have to say the blue one really draws me in. Thanks so much. By the way, I really want your You Got This set. Your sayings of faith are so encouraging. Blessings to you.
Nina, your cards are so beautiful! I really love the first one with all the bright, beautiful color! It makes my heart happy just to look at it! Seriously!???? I also really love the stamp set You’ve Got This! Incredible sentiments! I love to send my daughter (she’s away at college and struggles with anxiety) encouraging cards and this set is perfect for that! Thank you so much for creating it!
On a side note, I just wanted to say that I really enjoy the way you’ve been doing your videos recently! So personable! I just love it!❤️
The fractal leasves went straight on my wishlist after seeing your beautiful card!
Colored pencils are probably my favorite medium….never thought to use them with stencils! thanks for the inspiration!! beautiful cards!!
Wow, your cards are fabulous.
Wow! Absolutely stunning colours.
Thanks for creating “YOU GOT THIS” stamp set. Love the many encouraging sayings. Finally we have some options. Love your cards- pops of colour everywhere!
Thanks for creating “YOU GOT THIS” stamp set. Love the many encouraging sayings. Finally we have some options! Love your cards – pops of colour everywhere.
Very nice cards. Thanks for sharing.
Wow–love your bright and colorful cards.
Oh WOW Nina!! Love all the beautiful bright colors on your cards…they are amazing!!
Beautiful colorfull cards. Love them.
I LOVE your use of color. Sometimes I tend to go the safe route but this just gave me so much inspiration. The “grateful” card is GORGEOUS!
The pencils did a wonderful for the coloring.
I haven’t used them very much but will get
the pencils out again and give them a try.
Fantastic cards.
thanks for sharing.
Wow!!! Amazing cards!!
I never think to color with stencils! So creative and a great way to stretch supplies!
Love, love, love your cards. So festive and so colorful. Thank you so much for sharing your talent.
Nina, Great stuff. Thank you. Love the bright colors.
Your no line watercoloring card is so gorgeous Nina and I love the way you added the sentiment, it looks amazing on the velum that you added a little colour too. Your pencil crayon stencil cards are fantastic, the first one you did with the bold rainbow colours is so striking and I really liked that you showed us one with and one without gamsol, it really does make a difference. Your ‘Prettied up Gift Card’ die is gorgeous and I love the sentiment stamp set ‘You’ve Got This’ that you created, those are both on my must have list!!! Thank you for the awesome videos and all of the fantastic inspiration!!!
Oh my goodness!!! I’m totally in love for your awesome cards!!! Your colouring is flawless!!! <3
I had not thought of coloring my stencils with colored pencils. Thanks for the inspiration.
The sentiment stamp set you designed is really great; love the encouraging words! I’ve never tried coloring through a stencil. I’ll have to give it a try. Beautiful cards!
What stunning cards! I love the idea of colored pencils with this intricate stencils – definitely want to try this! And I love that sentiment stamp set you created – packed with great sentiments perfect for encouragement/there for you cards. Thanks so much for sharing!
I love your use of Gamisol to smooth out the colors. Your work is just so pretty. Thank you ????
Love the bold use of the color pencils
I love love LOVE the no line watercolor! It’s perfect.
Very bold and bright. Would cheer up even the grumpiest cat. Love that gift card holder. A must have. Thanks for the release video. Love to see the products up close.
I love your cards they are so bright and happy! Your stamp set and die for gift cards are just fabulous!!!!
Gorgeous and I am so glad you are part of the hop so I can follow you as well :)
OH my gosh was this the longest blog post ever?? I watched the videos yesterday, and today’s video today and came to comment and thought I’d never find where to comment because I didn’t actually realize how much you had done yesterday! You are a work horse young lady!! I love the autumn card (as I said on the video), well, I love it all! :)
Awesome cards!
LOVE those bright colors. I like colored pencils and you really made them look great!
Like WOW! The colored pencil cards are stunning! Love how you just colored in with keeping the stencil on top! Feeling so inspired! Thank you so much for sharing!
Absolutely stunning with the boldness. Thank you for sharing.
Such beautiful and vibrantly colored cards!! Thanks for the wonderful inspiration.
Great cards. I like that you used colored pencils, I think those are often forgotten.
wow, you’ve been busy, that’s a lot of coloring and really awesome results.
Your “You got This”-set is my favourite. I am in love with it, and I can’t wait to get it for myself! :D
Your cards are amazing, as always! So “simple” yet so beautiful. Thank you for the inspiration! :D
Great idea. Love the blue one!
Such great inspiration with the new release! Love the bright colours.
Wow, wow, wow. I really need to watch all of your videos to learn how to use my pencils. You get amazing bright color. I have much to learn!
Love my pencilsmtoo and appreciate seing projects with them. Your cards are gorgeous. Thanks.
Such beautiful cards! They look like so much fun to color! Great job! You really inspired me! Awesome Stamptember event! So much fun! Thanks for sharing!
So colorful, great coloring.
Fantastic cards and all so beautiful who knew pencil could be so bold and stunning ,I love bright colours so the painbow is fab but blues my go to colour so thats the one for me, lovin, the blog hop thank you.
Love bright colors.
I love that stained glass card. I can’t wait to receive my stamps and stencils from this newest release.
I had never thought of using coloured pencils (pencil crayons!) with a stencil but now I know I need to give it a try. All of your creations are completely wonderful. Thank you for sharing!
Wow beautiful and Happy cards.
First, congratulations on your new stamp set; it’s fantastic! Second, thank you for the array of stellar cards you’ve designed for us. Colouring with stencils is now on my must-do-immediately list!
~carol
Your creations are always so colourful and fun! Thank you for sharing all your creativity with us and inspiring me to get crafting!
Beautiful cards and lots of ideas, tips and techniques! Congratulations on your terrific designs for this release – they’re wonderful!
The cards are so colorful and happy
Amazing BRIGHT cards!! They are awesome! TFS!
Absolutely gorgeous! I’m going to try the colored pencils and stencil technique today. And I love the die set as well as the YOU GOT THIS stamp set. They went straight into my cart.
Love the stained glass look. Absolutely beautiful cards.
Beautiful leaves!!!!
Oh yes! Those cards are amazing and sooooo much color ;) gorgeous !!!
Wow! So much beautiful! Love the colorful stained glass….but also love the quiet blues…and those leaves! Just wow!
I love, love, love your blue card! Can you tell that blue is my favorite color? Thank you.
such beautiful cards, the first card made me think I had returned to the 60’s :)
thanks for sharing your creativity
Beautiful autumn card with the leaves
Gorgeous cards, especially love the watercolor leaves. Like ho you did the colored pencil stenciled cards as well. thanks for sharing!
~Gin K.~
Beautiful cards. Thanks for sharing…
OMG, the color on your cards woke me right up! Brilliant!
Wow! What beautiful cards! I love that fractile leaves set so much! Can’t wait to start playing with it!
Beautiful cards. I like the fractal leaves!
I can’t believe this is done with colored pencils! So lovely and vibrant! And a totally new way to use stencils!
Fun coloring! Each one I saw became my new favorite! Thanks for sharing WN/DS color conversions too!
I love love love those new stencils. The blue gamsoled … is that a word? Is super lovely
Oh so bright! a test in patience..Very pretty cards.
Beautiful card! Love the colors
Wow, the design of your cards is beautiful and I really love the colors you used for the fractal leaves, which just happens to be my favorite Stamptember release. I’m not terribly comfortable with watercolors but I’m definitely going to try the colored pencils with stencil technique. Thanks for the video. Congrats on your designs being released by SSS this Stamptember.
Such a great idea to color stencils with pencils. Very bright and vibrant,
Pretty colors!
Ok —– WOW!!!! Your colouring on those stencil cards is totally amazing! Thanks for the inspiration and love your new products as well!
Really pretty cards!! I can’t wait for my order to be delivered, so I can use your stampset! So excited!
I have recently discovered your videos! Yay! Love your coloring technique especially the colored pencils using the new medallion stencils!! A must have for sure!!
I am in love with the fractile leaves stamp set! Thankyou for your inspiration! Look forward to getting and using this stamp set.
What gorgeous colors and with pencils. Amazing!
So pretty!
So so pretty
Your cards are so beautiful. Love the colors.
Thanks for creating a stamp set with inspirational sentiments. Can’t wait to use them.
The rainbow card is so cheerful. Love the blue card because blue is my favorite color. The card is so calming. Thanks for sharing the technique and showing the difference of using Gamsol.
Stunning colours! Such great results, I would not have thought to colour in when using stencil, only paint. Thanks for this.
What an awesome, awesome blog post … so many fantastic techniques and projects. Just beautiful; you are so very talented. I love the technique with the coloured pencils – what a fun and unique way to use them. The stained glass stencil is definitely on my list (oh boy I can tell I will have a long list by the end of the hop LOL)
Wow! So bright, so beautiful! I love your combination of colours! Thank you for sharing!
Beautiful vibrant card. Love all the colours.
This is an awesome release and I love what you did with the new products – simply stunning!
You created some gorgeous cards. I also want to try out the dot charts and have already put them in my basket.
Amazing post with beautiful inspriations! I love this effects on background! Very good!
WOW! Amazing post with beautiful background cards! I love this! I think that those backgrounds are very creative!
Amazing coloring and I love the stamps sets you designed!! You’re use of color is inspiring. I like your use of stencils with colored pencil, great options!! Thanks!!
Very beautiful cards. The blue stained glass one is my favorite.
Beautiful cards. I never thought to use colored pencils with a stencil and I am definitely going to try it. Thank you for sharing your fabulous cards.
wow—LOVING those cards!! All of them!! Fantastic job!
Just beautiful! I am going t have to look at my stencils again to see what I can use to play with this technique. Thanks so much.
It is going to be a rainy dreary day here – your cards are colorful amazing and beautiful!
Great cards! Thank you for the inspiration.
Your cards are so colorful and fun! What a great idea to use colored pencils and the results are beautiful!
I always forget about my pencils! Thank you for the beautiful reminders!
These cards are so bright and colorful. So different from the other cards on this blog hop. Love them!
Beautiful cards and beautiful new sets, Nina-Marie! Love your
bold, pretty coloring.
Hahaha, wow! Opening up your website was a big SPLASH of color! I love that Stained Glass Window stencil. Both cards look fabulous. I really love the rainbow leaves on the third card with the warm tones.
I love your use of colours
Your cards are very cool! I love the stamp set you designed and appreciate all the info on the release.
Awesome creations! Reminds me of kitschy tie-dyes, love it!
Love the bright stencilled card.
These cards are so beautiful!!! The rainbow one is my favorite though. So bright and cheerful!! Thanks for the inspiration!!!
You blew me away with all the products you designed and used! I love all the complex coloring you did with the stencils because I lose myself when I get involved with coloring projects – it’s so relaxing! And the leaves are definitely on my list. I love that stain glass look they have! Thank you for sharing, Nina Marie ♥
Just breath taking! Love each one in your style and thanks for sharing your talent!
Wow! Just WOW! Thank you so much for the inspiration. I always think of stencils and ink or stencils and paint. Never would have thought of colored pencils, but I absolutely LOVE your results. Thank you.
You make such cheerful and happy cards!
love the colors… lovely project
Thank you lovely cards, like the idea of using pencil colours with stencils.
The leaves remind me of a fancy quilt.
Those kaleidoscope cards are STUNNING! Thank you for sharing♡
Great job. tfs
Great job. Love everything.
Love those bright colors!
Love these cards. The vibrant colours are fantastic. Really appreciate that you have used water colours and given the colours used. Love the SSS new release products.
Very colorful cards. Love the YOU GOT THIS stamp set. Thanks for sharing.
Wow.. your color choices are so bold and cheerful! And your no line watercolor is impeccable
Wow colored pencils with stencils. Think I found my new activity whole watching TV. Great inspiration!
These cards are so wonderful they hurt my brain…in a good way!
Wonderful coloring.
So bright and beautiful!!!
Beautiful cards, and they actually look like something I could try! Thanks for sharing!
Love the stencil, really like the blue card
Love the cards! Great inspiration!
So bright and beautiful;!
What a great idea! Beautiful cards!!
What a beautiful release. I love Stamptember. This cards are gorgeous. Thanks for the bloghop. Kiss from Belgium
thanks for sharing all of the new simon releases now my appetite is WET
Love how colorful your cards are and it really does look like stained glass!
I love Fractal Leaves stamps and your cards with bright colors.
What an awesome post, so many awesome projects, so many awesome products. The new sentiment set is just so awesome. I’m really impressed, I love when releases have items that are unique. This release has it all!!
wow! you are amazing … such color and great release
Wow, your cards look amazing!
I love seeing the stencil used with coloured pencils, so cool!
I love how colorful these cards are. Thanks for sharing.
Love, love, love these cards. Thank you!
Wow that’s a serious lot of colouring but looks so fabulous Nina.
Very striking cards. Thanks.
I absolutely love your bright colors!
Love the effects of the gamsol, it gives the pencil coloring such a creamy look! Beautiful cards!
Your colour choices make me oh so happy. I also love that you used coloured pencils, as these are my colouring tool of choice. Thanks for the inspiration, can’t wait to try some of these myself.
Take care
Tracy
Love the fractal leaves!!!
The stained glass is fun too but the leaves get me.
Too cool
The cards are so pretty! I love the way the gamsol smooths out the colored pencils!
Beauitful cards! I love using stencil with color pencils. Nice idea.
Love this release from SSS! I love your stencil card…but especially love the no line watercolour card made with the Fractile Leaves stamp! Hoping you will post a video on that ❤️ Happy Stamptember!
OMG so much to love, I love the cards (color pencils are so my jam), Daniel Smith and Simon Says Stamp, YES YES YES.
Fabulous cards! The bright colors with the new stencil and stamps is just stunning! You have inspired me to get out the colored pencils!
What colorful ideas you have. Beautiful work.
You went all out, Nina-Marie! The colored pencil cards are a work of art! The Fractile Leaves card is really stunning with those water colors! Really fine quality work on them. Love your new stamp set too. You’re an inspiration!
Beautiful color choices for both cards!
Your cards are inspiring me to try coloring with pencils and watercolor Your creations are just lovely!
Such beautiful vibrant cards!!
Love the fractal leaves. I already ordered it
Wow! Your coloured stencil cards are so beautiful! Love the Fractal Leaves card too!
Love your bold colors on these designs! So pretty!
I was loving the rainbow colors on the first card. Then I saw the second card-oh my goodness-it’s gorgeous!
So many gorgeous cards you created! I love them all! I would love to learn to use stencils like you do.
I wish I could color like you!
I love your coloring. It reminds me of tie dying!
Fabulous cards! I love your “You Got This” stamp set. It’s already in my cart. (I’m exercising restraint until Monday’s release! LOL) Thanks for sharing!
Some really great things in this release and one of my favorites is your sentiment set. All of your cards are so pretty. Love the colored pencil rainbow, so bright, happy and cheerful!
Wonderful video of all the releases and loved your no line coloring with these new palettes! Gorgeous cards!
One word….. Beautiful!!!
Quite a long post !! But totalky worth reading,with beautiful cards with amazing color combos :) Thanks for sharing the video :)
The colors are brilliant!!!
beautiful cards–coloring is my new unwind activity. Hadn’t thought about stencils but I have some SSS ones and plan to prep one to start coloring on it tomorrow. Thanks for the cards and techniques.
Wow, such bright and beautiful colors!! Love all your cards! :)
Wow! I love your bold, vivid colors/coloring! They make me happy!
Very bright and vibrant! Beautiful cards!
I LOVE the bright colors! Your cards are awesome!
Wow! Great colors, great cards!
Awesome videos. I am getting more and more excited about this release.
What bright happy cards. I like what you did with that vellum on the last one, it make a complete difference on the look. I’m going to have to remember that.
Love your approach to stained glass. Thank you.
Everything you have created is just so very beautiful! Love how vibrant the colors are! We could all use a little brightness these days for sure! A job well done!
I don’t even know where to start. No line water color! Stunning!
Love all of your bright and cheery cards!
Your fractile leaves card is so pretty and I just bet was a lot of fun to paint.
Wow! Your cards are gorgeous!
I love these. They are so bright and colorful!
Love your cards!
Great cards and thanks for all the tips and inspiration! Your sentiment stamp is my favorite one of the release and I really need to get it. I want to make some encouragement cards for my sister-in-law who is about to start chemo and I think some of the sentiments will be perfect for the cards.
Beautiful cards! Love how colorful they are!
Gorgeous. And I love, love, love your You Got This sentiment set.
WooHoo is right! What an amazing selection of cards. The colors are so stunning, beautiful.
Love these colorful cards. They just make me so happy! Thanks for the inspiration Nina-Marie :)
So pretty Nina-Marie!!!
Wow. I love the Fractal Leaves set and your colorful take is amazing. I wanted this set before, but now it’s a must have.
OMG!! These cards are stunning. Great colouring.
Your coloring is amazing! Love the look of the cards you made! Gorgeous!
Love these happy cards! WOW!
Who knew you could combine colored pencil and stencils. Brilliant!
Gorgeous cards. Love the coloring
Psychedelic! The colors on the first card are beautiful! Such a pretty card! :)
Wow! Such vibrant creations! Brings so much cheer and festive mood! Love your cards :)
Love the electric color! WOW! Thank you for sharing.
Your cards are wonderful. Love your idea. May I also add that the sentiments in the You Got this stamp set are so uplifting. I especially love the “You grow through what you go through”. That got me. Congrats on your new designs.
Omg!! These are the most beautiful cards ever!! Who would of thought colored pencils could be so vibrant and smooth?!?! ????
Your cards are amazing! I just started with colored pencils and this is wonderful inspiration, thanks for sharing!
What amazing coloring! All of your creations are so beautiful and bright.
Truly a work of love. Both cards are beautiful. How long did it take to color one card? One of a kind masterpiece.
WOW what an amazing new release!!!
Love this arabesque-like design of card!
So so bright and beautiful. I will definately try out this technique.
I love your color choices!!
Thanks for the great ideas for using these new stencils.. your work is beautiful!
All so beautiful!
Love your cards
Wow! Great colors.
I love the mosaic stenciled cards with colored pencils. It was great to see the two different finishes if you use the Gamsol. AND my FAVORITE stamp set of this release is YOUR stamp set… YOU GOT THIS! I also love to do encouraging cards… Awesome! Thank you!!!
Like the bright cheerful colors. I wish my pencil coloring looked half as good as your wonderful coloring.
Melissa
“Sunshine HoneyBee”
Bright, beautiful colors, great shading technique; a joyful card!!!
Such beautiful and colorful cards! LOVE them!
Sooo pretty!
WOW, WOW, WOW!! The colors are just gorgeous, love them and the stencils! These are absolutely stunning cards. Thanks for sharing!
Love your cards
Wow. I wouldn’t have thought of using my colored pencils with the stencils. Will definitely try it. :)
Hi Nina ~ You’ve totally inspired me to pull out the Gamsol that my daughter left behind when she finished up grad school (and couldn’t take everything to her small (tiny) apartment! You continue to inspire me in so many ways and I feel like your You Got This was created just for me (thanks! haha). I hope you have a wonderful weekend! ~HUGS~
#kindnessmatters #prayforTexas
Oh, I love your cards! So beautiful!
Beautiful color on these cards!
I’m so happy that I recently found your blog. You’ve made me want the Medallion stencil–such beautiful cards.
Thanks for showing close ups of the new products! Love the pencil colored cards.
Such vibrant color palettes, instant happy! I never would have thought to use colored pencils with a stencil. Great tip and thanks for sharing it.
Lovely card. I love the colors. I must put this release in my budget to add to my collection. Thanks for sharing.
Oh my just gorgeous colors!!
Thanks for the tutorial on coloring with a stencil. I shall have to try this.
lovely cards, Nina-Marie – so bright and cheerful!
Beautiful use of the stencil…Loved the colouring with pencils!!
Bright and beautiful!
Amazing cards! So colorful and fun!
Loce your cards so vibrant!
so bright and beautiful Nina! I love these!
Beautiful cards and video! Congrats on your design work too.
Interesting. Never thought of coloring with a stencil that way.
Wow, what a fabulous bunch of cards! I really love blue, so that all blue card is beautiful, but that multi-colored one is just stunning!!
What a creative idea to use colored pencils with a stencil!!!!! You are brilliant!
Love the bright colors! Colored pencils are fun to use and the results can be as bright or as subtle as you want! It’s a fun medium to work with! Your cards are so cheerful – just like you!
Very colorful cards – great inspiration.
I just left a comment on Jennifer McGuire’s blog saying the You Got This stamp set is my favorite part of this release! Brilliant!
So vibrant looking! :)
Wow, so colorful and psychedelic! So much fun!
Love the color you used really looks like stain glass
Beautiful cards. I love the vibrant colors. Thank you so much for sharing with us.
You did beautiful coloring!!!
Love the idea of using colored pencils the card are very beautiful love the bright colors!
Wow! Your colors are electric and bold. Thanks for the inspiration.
Gorgeous cards and remind me of tye dye t-shirts!
Beautiful cards.
Using color pencils with a stencil never occurred to me. It’s gorgeous
Love how bright and cheery they are!
Why did I not think of the colored pencils and the stencils technique when drawing in my journal. Love the vibrant colors
Thank you
I love the idea of pencils with the stencils. The blue one reminds me of water.
strong work on the die set. i love it!
Beautiful cards! Thanks!
Beautiful. Cards! I have not seen such intensity before from colored pencils.
Amazing coloring!!!!
Love your beautifully colored stained glass cards! The colors look amazing! That blue one takes my breath away! This is such a great blog hop!! Love it!!
Nina, I LOVE the new set you’ve done, “You Got This!” SOOO MANY nice sentiments to encourage! I make them EVERY WEEK for our daughter in College! So, I am ALWAYS LOOKING for a “perfect” sentiment! THIS SET WOULD HELP ME SO MUCH!!! CAN’T WAIT to get it! FABULOUS CARDS & VIDEOS!!! THANKS for showing us!!! ;)
I love both of those cards but the blue one is my favourite, absolutely stunning.
Gorgeous, love how bright they are. Great to see pencils being used.
Wow! Beautiful
Wow, amazing cards! I love the bright colors!
So bright and amazing!!
WOW Nina, your cards are wonderful and I loved seeing your preview of the products. I didn’t know you designed my fave sentiment set in this release. Cudos to you. I also somehow missed seeing your gift card die set. BEAUTIFUL! Another must have!
All of your cards were beautiful! I never thought to leave a stencil taped to a piece of cardstock and the color it in with pencils. Great idea! But I also want to compliment you on your idea for the sentiment set. I send many cards that need sentiments like these. Thanks!
Wow, great job with the colored pencils. The colors blend beautifully!
Wow! Your cards are so beautiful and colorful, like a burst of happiness !!
Beautiful, vibrant colors! Love these cards!
Great bright and happy cards !!
Nina–as always, your cards are absolutely beautiful! I also enjoyed learning a new technique! Thank you so much for sharing all of your wonderful techniques and inspiration. I have learned so much from you!
Your Greatfull card took my breath away. Wow!!!!
The blue colored stained glass stencil card is my absolute favorite. So bright and cheerful cards.
Lovely vibrant colours on your cards. Did you create You Got This stamp?!?! My favourite from this release is the You’ve Got This stamp set. I love all the uplifting and a encouraging sayings. Thank you!
Awww thank you Memoriesbymanda! I did create that set!!! :D So happy you loved it!!!!
I enjoyed learning about coloring techniques. And, I love the You Got This stamp set you designed. Wonderful sentiments.
Love your bold, colorful style! And really love “You Got This” – I was blessed to receive this before the release and have already had several opportunities to use it!
Oh that makes me so happy to hear Becky!!
Wow these cards are super bright!Great colors!Thank you for sharing :)
I love that your cards are bursting with color! Its like starburst for my eyes (and without the calories!!)
Those are gorgeous and I was surprised to see that you had used colored pencils. Thank you for your inspiration! I’m going to go find my colored pencils.
Absolutely Gorgeous! Love that you did these with colored pencils and a SSS stencil! Stunning – and the sentiments are so very true!
I love blog hops because they inspire me to create.
A card like this would certainly brighten up someone’s day!
fall is in the air and these stamps will be perfect!
Ha ha… your designs are certainly not subtle… love them! Especially the blue one! TFS.
Loved the blue one and the use of gamsol. Looks so relaxing to do and it turned out beautifully!
Oh wow! Such beautiful vibrant colors on your wonderful cards. Thanks so much for sharing with us!!
Like the blue combination best– and the You Got This stamp set is terrific….
Like the blue combination best– and the You Got This stamp set is terrific….
very very cool need to watch your video.
WOW…I am so impressed. I have never thought of colouring through a stencil with pencils before. Your cards look great! I am definitely going to try this. And I think the You got this sentiment stamps are fantastic. I think this is the best part of the release!!! I live where ordering from SSS is difficult because of the enormous postage cost…but this stamp has me very tempted to buy it anyway. Well done :)
Cheers, Marie
Such wonderful designs. I love the gift card holder!
I love seeing ideas for using colored pencils with cards! Have some new ideas for using supplies I already have with new supplies from this release!
Such bright, cheerful cards – love them!
Very nice! Thanks for sharing and all your hard work!
love the colors so bright and cheery! Im hoping to order some of the products from this September release for my birthday on September 21st!
Lovely cards. Thank you for sharing
What amazing cards and stamps!! Love the bright and bold colors!!
Wow. You’ve been busy. Congrats on all!
Such vibrant cards. Makes me want to get out my colored pencils an create! Thanks for sharing your ideas with us all!
Magical coloring!
What a great way to extent the use of stencils!
Just gorgeous! Love both color combos with the stencils! And those Leaves……beautiful!!!! Thanks for sharing!
Such colorful cheery cards, love them! Thanks for sharing!
Wow! Beautiful use of color in your cards. I never would have thought of using colored pencils with a stencil. Thanks for the inspiration!
So beautiful and love that colored
Pencils were used! Thanks for sharing
Love those bright, vibrant cards colored with color pencils and a stencil. And I’m obsessed with the Fractile Leaves set!
I love the way you have coloured this stained glass stencil in those two pretty colour ways and then the fractal leaves using watercolours which looks great too. x
Very bright and vibrant, love your cards!
Beautiful selection of cards! I love you bright, colorful coloring! Thanks for the video showing your techniques!
Absolutely amazing coloring!!! I often work with copics, but it is nice to see techniques with colored pencils because I forget that I have them sometimes! You are so creative! Thank you for sharing with us :)
You did a great job. Looks like stained glass.
love the bright colors ! congrats on the release!
wow- a beautiful explosion of happy colors-LOVE!!
Very nice ideas with how to use stencils. Love to see more ideas.
These cards are so bright and fun! Thanks for the inspiration :)
Stunning! The bold colours are gorgeous!
Beautiful! Love all the bright colors!!
Love the colors bright and playful!
Congratulations on the You Got This stamp set! You’re right – it’s a great font that goes with everything, and the sentiments are wonderful. It’s definitely going on my wish list!
Love the card and the SSS release.
Beautiful cards. And I never thought of using pencils with stencils. Great new release.
Love the stained glass 1 pencil colouring! Thanks so much for sharing!
Love all your wonderful cards!
Love, love, love the coloring! You have inspired me!
Wonderful cards and videos, Nina-Marie! I love how intricate the backgrounds are and the wonderful pops of color!
Love this stencil and your lovely cards!
WOW, such vibrant and gorgeous cards! TFS and for the videos
Love, love, love your cards. I love to color, but never find the time, so I joined a coloring challenge just this morning before I found this blog hop. I will be coloring using your technique tonight. Thank you for the inspiration.
I Love these cards! They are so bright and cheerful!
A match made in heaven. I love to color and have watched so many of your tutorial videos. Those bright colors really excite me to get crafting.
I love the wonderful bold colors you used!
Thank you for sharing
Gorgeous cards – thanks for sharing such inspiring ideas!
I absolutely LOVE your cards! They are so full of color and happiness!!
Wow!! You certainly have a lot of patience.
Love the blue daily stencil card.
Doily even!
Beautiful, bold colors!
Stunning cards!
You call this some inspiration, I call it huge inspiration aspecially with the beautiful stencils of htis release. I would never thought about using it with only my colour pencils. Thanks for that. I love the bright colours you have used at the first one, you made me so happy wiht those colours!
The stained glass with blues is absolutely gorgeous!
My gosh – the colors are so vibrant and WOW! I have never thought to use colored pencils with stencils honestly. This is a whole new take for me. Amazing. It’s always great to find new ways to use old tools and products you’ve had for ages. I love these new stencils and can see MANY ways they could be used to make beautiful cards and journal pages.
Wow! Beautiful. Thanks.
Wow! such beautiful cards! Blue is my favorite color so I really like the blue one, but I love the bright and cheerful colors of the first card too!
Your ideas are great for these products, love them all!
I’m just getting to know my colored pencils and you are an inspiration.
Wonderful cards! The colors on the stained glass cards are so vibrant.
I love your card, thank you!
Stunning coloring job!! I can’t believe you did it all in colored pencil! I also love the fractal leaves card, I really think that set is a must hav
Oh gorgeous cards with gorgeous colors!
Amazing job !! Your colored cards are mesmerizing !
Love love love the colors you chose!
Gorgeous, beautiful, pretty… I could go on and on :) I am not only in love with your creations but also these Stamptember products!
I’m loving Stamptember! Beautiful cards! I love to color, so this is right up my alley! Thanks for sharing.
fun and colorful cards,. thanks for sharing
Stunning cards, Nina Marie! I especially like the leaves and your color palette on them. Swoon!
Beautiful cards, love the blue one
Love the stencils
Have a great weekend
Rachelle
Wow!! An explosion of creative colors!
Fantastic start to the best month of the year!! Thanks for the chance to win!
Nina, these cards are SO beautiful and inspiring! Way to go!!
Wow what amazing colouring. Loved the vibrant colours of the first, fell in love with the blues of the second. Thanks for the video too.
I like your bright cards made with the stencil. Congrats on your designs in the release. I may have to order the sentiment set. Everyone needs encouraging words.
Whoa! Great cards, love your amazing coloring!
Can’t imagine doing all that coloring, but sure gives a wonderful look!
what fun and colorful designs… especially like the card made with the fractile leaves stamp set!
LOVE Stamptember! So many great toys. :)
Your vibrant colors make for such happy cards! Thanks.
Wow these are so bright and colorful, love them all
Love the stained glass look on your cards. Just stunning.
What a FUN Stamptember Release!
Love this bright colors you used on your cards!
I love all the bright colors!!! The techniques are great.
LOVE your coloring thanks for sharing!
Love all your cards but absolutely love the intense colours on your first card. It reminds me of high school in the 80’s. Also the “You Got This” stamp set is my favorite in the Stamptember release. So many people could use a little encouragement and I love all the sentiments. Thank you!
Thanks for the videos, Nina! Love all of the things you have shared today. this release is mind boggling.
I love how you colored this card! Can’t wait to give it a try myself!
These cards are gorgeous! I’ve never thought to use colored pencils with stencils! I will have to try!
I love how the Stained Glass 1 stencil looks in the blue hues! If I didn’t already love the stencil the ble hues would have won me over! Thanks for sharing your art.
Great cards
Beautiful cards! Another Simon Says Stamp intricate stencil to die for. I love the technique you share. Thank you!
Beautiful cards! Blue is always my favorite.
Beautiful cards. Love Stamptember!
Gorgeous cards!!@
Love that blue card with the stained glass stencil.Beautiful.
Beautiful cards! Thanks for sharing!
The cards are gorgeous and I do love the You’ve Got This sentiment set. It was a favorite from the beginning!
Cute, cute cards! The more I see the more I want.
That’s a lot of new stuff! Love the idea of coloring a stencil. The fractal leaves card is beautiful, too.
OMG! I just adore your brightly colored stained glass cards! I love how bright and cheerful they are. I also love your new You Got This stamps. I can tell these stamps will get used over and over.
Congratulations on your designs and thank you for sharing your ideas.
oh my goodness those are some seriously bright colors..but i love them
Beautiful cards! Love the bright colors. I never think to color inside the stencil. Thanks for the inspiration.
Such amazing use of colour on all your projects! So cheerful and wonderful!!
These cards are beautiful and the release is fabulous as usual. My favorites are Under the Sea and Ornate leaves, but I wouldn’t be able to stop there.
Fabulous release and stunning cards ! If only my budget was bigger and the shipping fees for Europe smaller….. ????
That blue card is drop-dead gorgeous!
You have a great eye for color combinations! Love your cards!
Love the bright colors. Beautiful cards.
Lovely cards, they are so colorful you cannot help smiling.
Wow, these are beautiful, I love the leaves no line watercolor card. I can’t wait to get my hands on these stamps!
Beautiful coloring!
Beautiful cards, loving the no line watercolor. Tfs ????
Love the sentiments and love your eye for color!
The bright colors are really interesting, and I love the sayings.
Wow! I love what you did here. The cards are sensational and I love that new stamp set! I can’t wait to try this.
Absolutely gorgeous cards. I’ve never tried to take my colored pencils to stencils, but I will now!
i love all these bright colors!! I would never have thought to use my stencils with colored pencils I dont know why! its so simple! Thanks for the video!
Wow. Love all the cards. That rainbow colored card is absolutely gorgeous. Thanks so much for sharing your techniques.
Very colorful cards! And I love the set you created. Very beautiful.
Oh my goodness! Love, love, love your coloring! So vibrant and alive. And I love the stamp set you designed! Great encouraging sentiments that I would use all the time. Thank you for the chance to win!
I just love your cards as they are so vibrant and full of life. I haven’t worked much with stencils although you are making me want to [pull them out and try them!
Wow the colours are sooo vibrant and I am just in love with that fractile leaf stamp set! Beautiful!
I love your cards! Great inspiration!
Your cards are gorgeousl and I love the You Got This stamp set you designed. It has so many wonderful sentiments – well done!
Pretty cards – love your new stamp set. It’s my fav in the release!
I adore your cards AND your enthusiasm! Thanks for sharing with us.
So pretty! I like the technique of the stencil and the colored pencils! I’ll have to give that a try. Thanks for sharing :)
Love the bright colours
GreAt cards. Love the colors.
These cards are beautiful. Thanks for the inspiration. Also enjoy watching your videos.
Oh my goodness! As soon as I saw your first card for this I subscribed to your YT channel. SO MANY COLORS!!!
Awesome coloring! And I love the products you designed!
So colourful and fun, beautiful cards!
Your coloring is so vibrant and pretty!! Thanks for the inspiration!
Wow, what colorful cards! Gorgeous!
Wow, such vibrant colors! My favorite one is the leaves, and it inspires me so much!
Whoa! Amazing what you can do with colored pencils!
The “You Got this” stamp set is my favourite thing in the whole release, simple font, but the sayings are so thoughtful and heartfelt! I can’t wait to break out my pencil crayons, this is such a fun technique!
Wow! Love the bright colors!
Wow! Love all the bright colors!
Love what you have done with these fun new products! Thanks
Love all the bright colors!!
Your watercolor leaves card is stunning. Thanks for sharing all of your projects.
What amazingly vivid cards! Reminds me of tie died cloth and kaleidoscopes!
Oh My Goodness!!! Your cards are a dream! I just love color, and they are fabulous! The no line watercolor leaves is my favorite, I think, but truly I love them all.
I love the bright and colorful projects you created and can I say, your products are also some of my favorites!
Love the prettied up gift card! Nice job on the coloring as well.
Those are just gorgeous! I love all of the bright, cheerful colors.
So many fabulous cards! I love the bright colours you used in the first two!
Every stop so far on this blog hop has been great, but I just love that first card of yours! My favorite so far.
Those colours would brighten anyone’s day!
I love how you colored the cards and the colors you used.
I love your colorful cards!!!
What bright, vibrant color combinations. Will have to order the You Got This stamp set!
Wow! Thanks for all the inspiration. Your cards are gorgeous.
Beautiful cards. So many wonderful ideas. Your coloring is amazing. I need these stencils.
Lovely cards. I’m especially drawn to the shades of blue you uses with the stencil design
The blue colored card is SO beautiful! The colors are so vibrant as well!
Beautiful coloring cards ! Long to do but a wonderful result !
Nina, you are one talented lady! All three cards are simply beautiful!
Stunning cards :)
Wow! Amazing cards, love the coloring!
Such lovely cards!!!
Beautul cards! I love that you used pencils with the stencils! Love ghe leaves card also!
Lovely!
LOVE the bright colors on your cards! Your sentiment set is at the top of my wishlist. It’s great. Thank you!
These cards are super fun. The new stencils from the release are amazing.
WOW such vibrant colors!!!
wow! These are so fun and bright and you did an amazing job coloring them, yay Stamptember!
I already have so many people in mind for the you got this sentiments. Thank you,for your inspiration.
Beautiful, colorful cards!!!
Amazing cards — will have to try this technique.
I love the You Got This stampe set. Awesome job on the designing and gorgeous cards!
I love the You Got This stamp set you created, such an array of awesome sentiments. Definitely added to my wish list. Loving your bright cheerful cards.
Love the blues you used on one of the cards and the card with the leaves..just beautiful!
What a fabulous idea to use the stencil for coloring! Especially like your monochromatic one!
Beautiful card, beautiful coloring, I am loving these new background stencils!
Lovely cards! My wish list is getting longer and longer!
the watercolor leaves card is beautiful. thank you
Your coloring & painting are absolutely amazing!