Workshop Wednesday: Stamping with Objects
Hello Everyone, and welcome to another Workshop Wednesday!
Today’s card is all about stamping with an “object”; You can stamp with petty much anything you can think of… your finger, rubber bands, food, an eraser, bubblewrap… like I said, anything! For today’s tutorial, I chose to work with the eraser of a pencil.
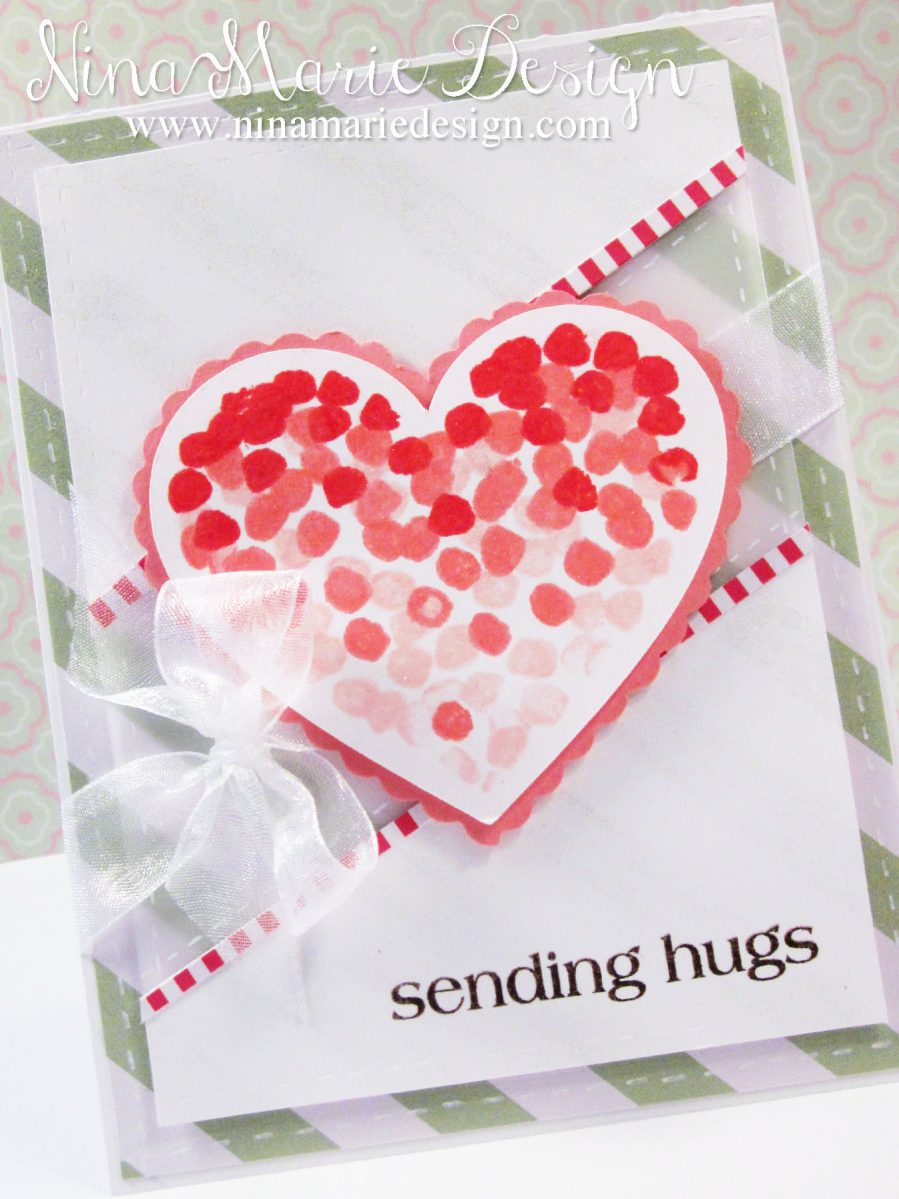
The look I was going for in this was “slightly imperfect”. If I wanted perfect circles, I could have simply used a small circle stamp to achieve the same effect. However, by using the lightly worn pencil eraser, you can get these fantastic unrefined circles that add some really great texture to your card!
I began by die cutting a heart from white cardstock using the Echo Park “Heart” cut file and my Silhouette Came. With three colors of Tim Holtz distress inks, I randomly stamped my eraser all over the heart until I was pleased with the fill.

I then layered the heart atop of a pink scalloped heart (cut from pink cardstock with some paper edgers), before moving on to the rest of the card.
Cutting a 3 1/2″ x 5″ panel out of white cardstock, I made markings at 1/2″ and 2 1/4″ on both sides of my panel and connected the marks to create a guide for cutting, before taking my craft knife and cutting them apart (see photo below).

These resulting two polygons were then adhered to a piece of vellum cut to the same dimensions as before (3 1/2″ x 5″).
The sentiment is from the Hero Arts “XO” stamp set and is stamped in StazOn Timber Brown ink. Some white faux stitching was added to the panel, as well as some strips of pink and white striped patterned paper, before adhering the entire panel to my card base.

My card base is covered in a mint and white striped patterned paper from Craft Smith’s “Charming Charlotte” paper pad. Prior to adhering the white panel to my card base, I cover all the stripes with Wink of Stella clear glitter. Once the panel was adhered to my base, I drew stripes with my Wink of Stella brush to “continue” the stripes on the patterned paper.
A sheer ribbon is tied around the center of the card, and the heart is layered on top. I covered the heart with some Wink of Stella as well to finish it all off.
I love how sparkly and shimmery this card is! This card would be perfect for any occasion… I think this would also be great for an encouragement, get well, or friendship card. Its bright, cheerful colors would fill the recipients heart with warmth!
Inspiration & Challenges
The inspiration for the colors of this card were inspired by the ColourQ #276 color challenge and is submitted in the challenge. It is also submitted into the Uniko Studio “Love and Friendship” challenge, the Simon Says Stamp “Have a Heart” Wednesday Challenge, the CASology week 130 “Friend” challenge and the NBUS Challenge #3 at DJ Kard Kreations. My NBUS supplies are the sentiment and the pencil eraser.
[one_third] [/one_third][one_third]
![]() [/one_third][one_third_last]
[/one_third][one_third_last]
 [/one_third_last][one_third]

[/one_third]
Supplies
- white and pink cardstock
- Craft Smith “Charming Charlotte” 12×12 paper pad
- Tim Holtz distress inks: Festive Berries, Worn Lipstick, Spun Sugar
- StazOn Timber Brown ink
- Wink of Stella clear glitter
- Uniball Signo white gel pen
- Hero Arts “XO” clear stamp set
- sheer ribbon
- Fishers scalloped scissors
- vellum
- Silhouette Cameo
- Echo Park “Heart” digital cut file

 LinkDeli Free 15 day trial
I really appreciate your professional approach. These are pieces of very useful information that will be of great use for me in future.
Lovely card, Nina-Marie, love your design and tutorial! So happy you joined in the fun at the colourQ!
This is just lovely, so feminine! Thanks so much for joining us at the ColourQ!
I really like the ombre effect you’ve created inside the heart – so very pretty. Thanks so much for joining in with our Uniko Studio challenge. xx
wow, stunning, I luv the design! so glad you played along with Simon Says Stamp Wednesday Challenge!
add a little glimmer to your life….sparkle & shine! *~*
This is wonderful and such a great use of an everyday object. The shading of red adds the perfect amount of interest. Thanks SO much for joining in on the Uniko Studio Challenge. Hugs Bev x
Lovely design. Thank you for sharing this week at CASology!
I’ve been quite mesmerized by the process you went through to create this spectacular card, Nina-Marie. It’s not just using the pencil eraser, it’s the entire design of the card itself that is fascinating! I love the effect of the unrefined circles in the ombre stamping you achieved with the eraser. (The oddest thing I’ve ever stamped with was a potato!) I just think you have such an exceptional eye for design! I love the stripes and how you carried that design element over to the edges of your angled pieces and I love that you have matted your pieces to vellum and wrapped that section with a beautiful organza ribbon. It’s such a feminine, lovely masterpiece!! Thank you so much for playing again in my NBUS Challenge #3! Enjoy your day!! Hugs, Darnell
Thank you so much Darnell for such a sweet comment! I am so glad you enjoyed the card!
Nina-Marie :)
Very well done. Fabulous idea to use a pencil eraser as a stamp, and it really makes for the nicest effect. Thanks so much for playing along at CASology this week.
Very cute idea