Happy Birthday, Cupcake!
Hello again everyone!
 With all the holiday hustle and bustle, those special birthdays during the month of December can sometimes be overlooked… so I have another card to share with you all in hopes that it will inspire you in creating a birthday card for someone you know!
I don’t know about you, but I really have enjoyed the “shaped card” trend thats been in full swing lately, and this birthday card is following that trend… in the shape of a yummy cupcake!
I love the cupcake digi stamp from Paper Smooches… it is so cute! And when turned into a cut file, enlarged, and then paper pieced together, it looks FABULOUS! So let me show you how I created this card…
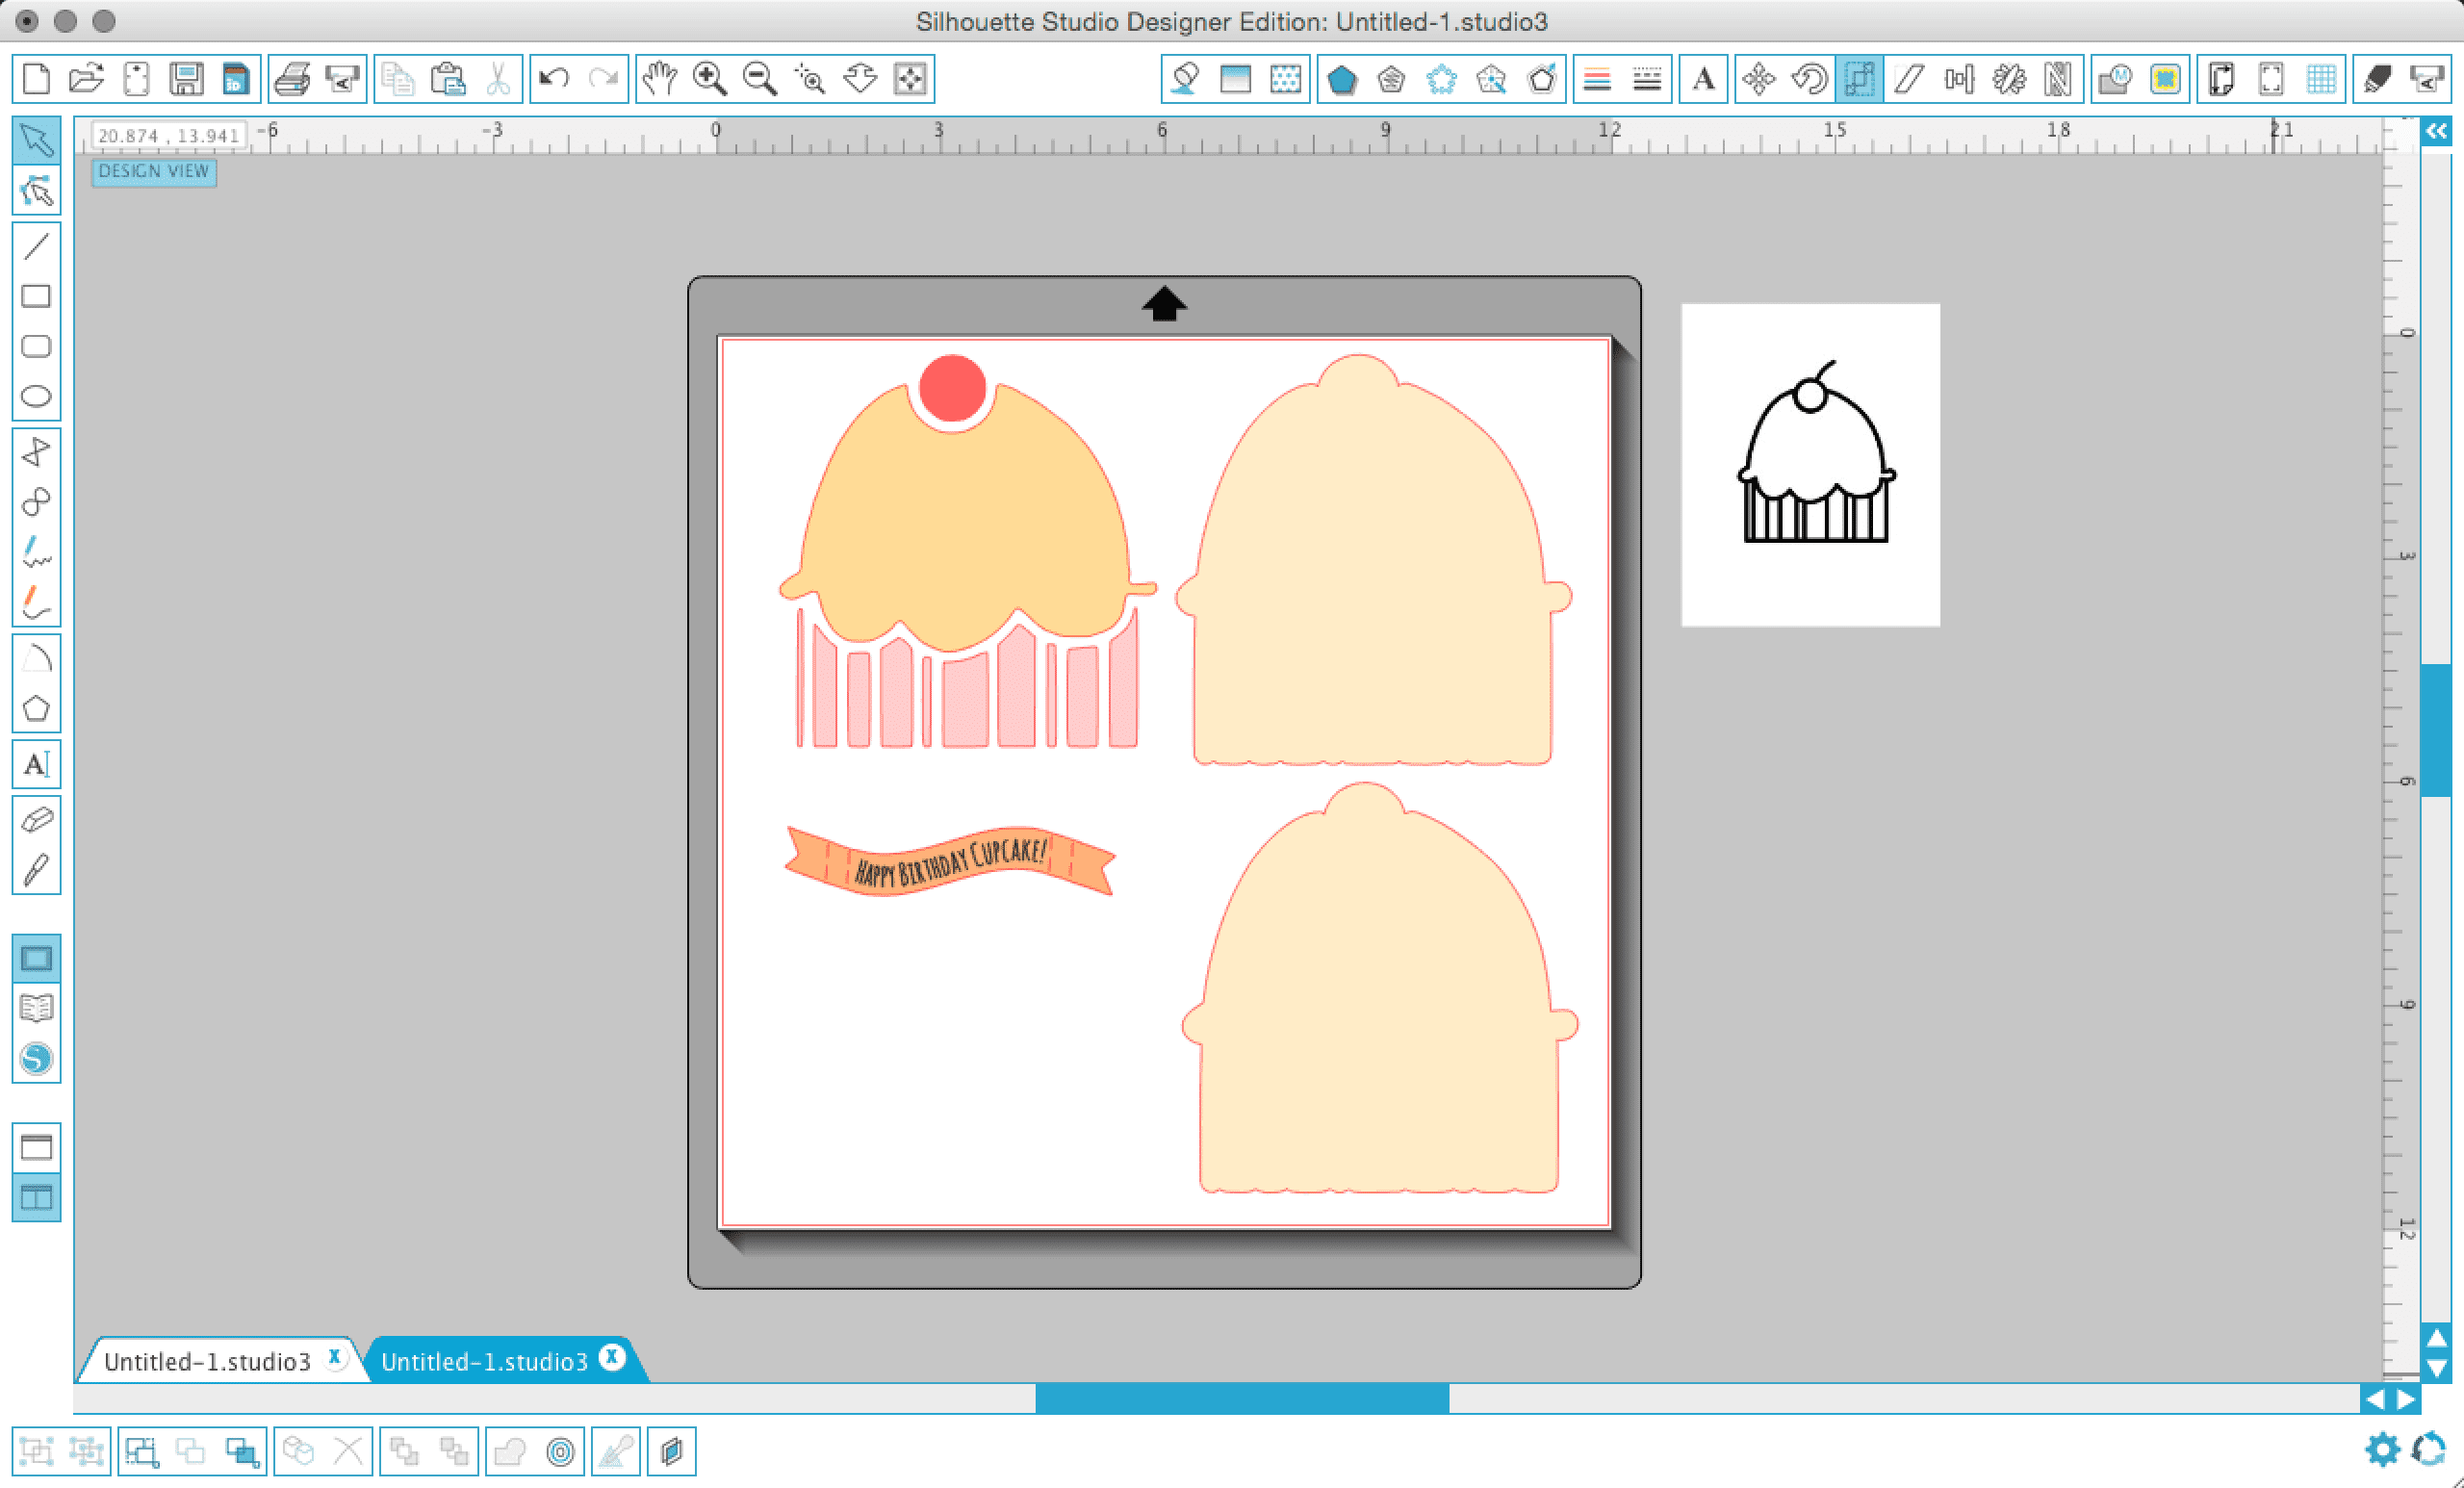
Opening the cupcake digi stamp in my Silhouette Studio, I first traced the image using the trace tool. Setting the parameters to: no high pass filter, threshold set at 45% and scale set to 4, I then used the “trace” option and ended up with the pieces you see in the picture below.

I resized the pieces to a height of 5 1/2 inches, leaving the “lock aspect ratio” box check so that it would resize the width to the right scale. I then ungrouped the pieces and deleted the offset outline layer, as I did not want the stem of the cherry on this particular card, so that it would not get bent in the mail… for a card where the cupcake’s delicate pieces would not be in danger of being bent, leaving the stem on would be just fine. Either way, the card still looks beautiful!
 Grouping my pieces back together once again, I then went into the offset menu and created a .05″ offset around the cupcake. I then duplicated this offset shape to create the front and back of the card. (note: once you cut your shapes out, you’ll want to score a fold line about an inch down from the top of the back card panel; then adhere this panel to the front panel to create your card base.) I also created a sentiment banner using the font Amatic; the sentiment was sketched onto the patterned paper I chose for the banner, and then reloaded into my Cameo to cut the banner shape out… a very easy process. Just make sure you line your cutting mat up exactly how you did the first time! :)!
 After cutting out all the pieces of my card, I inked all the edges of the patterned papers with matching ink colors. The sparkling icing was created by covering the entire piece with a thin coating of Glossy Accents and shaking on some glitter. The Glossy Accents holds the glitter in place better than most adhesives and because it is clear, you don’t see anything behind the glitter, which is great.
I adhered the icing, the banner and the cherry with dimensional foam tape, and to finish off the card, I added some white faux stitching, and applied glitter glue to the polka dots on the cupcake wrapper and to the “cherry on top”! :)
While the colors I chose for this card are very feminine, you could easily turn this into a very masculine card by simply changing the colors of the papers… So there you have it, a very easy birthday card that is sure to make anybody’s day sweet as can be!
Supplies
- Silhouette Cameo cutting mat, ratchet blade and pen holder
- Paper Smooches “cupcake” digi stamp
- Recollections White Cardstock Paper
- Recollections Signature Extra Fine Glitter
- Copic Black Multiliner pen 0.3mm
- Colorbök “Frolic” 12×12 paper pad
- clear, pink and yellow glitter glue

 LinkDeli Free 15 day trial
you are awesome, I love you card so much…
Your cupcake card is yummy! Love how it turned out! Thanks for playing along with us at the Simon Says Stamp Wednesday challenge!
Thanks Lin! I am so happy you enjoyed the post!
Nina-Marie