Workshop Wednesday: Merry Wishes from Santa!
Welcome back to another Workshop Wednesday!
As the days are counting down closer and closer towards Christmas, everybody is getting busier and busier with their Christmas cards, gifts and goodies… and of course, so is Santa! :)
Today’s project is a great card to send to that special someone on your list, or for a child who really enjoys the bright and cheery face of Santa Claus.
The Santa and presents I used for today’s card are perfect for using with watercolors or Copic markers to add some bright holiday colors. For this particular card, I used a Silhouette presents cut file and converted it to a sketch design. I also added an offset around each present so that I could cut them out with my Silhouette Cameo, rather then by hand… and save a lot more time! :)
I stamped Santa in StazOn Jet Black ink onto watercolor paper. I used a mixture of Tim Holtz distress inks and Staedtler Ergosoft colored pencils to color Santa in, as well as all his presents. The Ergosoft pencils I really enjoy using with my Prismacolor pencils; the Ergosoft has a nice feel in your hand and because they are soft, they blend very nicely with water. I added some coordinating glitter glue to each of the presents, and also cut Santa out with fine tipped scissors to later put dimensional tape behind him and raise up from the background.
To create the snowy background that Santa is sitting on, I first created my sentiment using my Cameo and a black waterproof multi-liner pen. The fonts I used for the sentiment were “Jenna Sue” and “Skia” (an Apple font; a good substitute would be “Tenderness” or “Euphemia“). The reason I chose a waterproof pen over a normal sketch pen is that the waterproof ink will not smear when inking the background with distress inks. A tip: it is always a good idea to heat set the waterproof ink when applied to watercolor paper; watercolor paper has a smoother finish than most regular cardstocks, allowing the ink to stay wetter longer.
I stamped the itty-bitty snowflakes with Versamark Ink and white embossing powder. Taking an ink blending tool, I sponged on Broken China and Peacock Feathers distress inks, applying light pressure as I went around the sentiment; I wanted there to be a lot of white left around the sentiment so that it stood out nicely. With a white gel pen, I then drew little snowflake dots inbetween the embossed snowflakes, and also added some faux stitching around the edges.
With some white cardstock, I hand cut a hilly bank, and I lightly inked the top edge with Milled Lavender distress inks to add a little more depth. Using that same white cardstock, I also created a scalloped edged panel to layer behind my main panel.
The presents were adhered behind the snowy hill, with a mixture of regular adhesive and dimensional foam tape; Santa was attached on top of the snowy hill with dimensional tape, and I tied a bow around the panel with red and white baker’s twine. Some red snowflake paper adhered to the A2 card base accents the red in Santa’s suit nicely and finishes off the card!

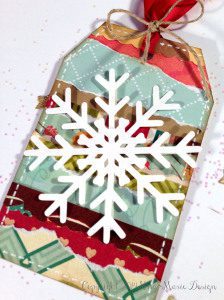
Using a variety of scraps in holiday colors, I layered them in a random order all across my 2 1/2″ x 4″ tag I cut from white cardstock using my Silhouette Cameo. To add some really neat texture, I ripped the edges of the paper instead of cutting in a straight line… do not be afraid to get creative with this! The more uneven the rips across your paper are, the better.
Once the entire tag was covered with scraps of paper, I used some Walnut Stain distress ink and lightly went along the sides of the paper to hide the white edges, and also added some faux stitching using a white gel pen.
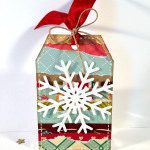
The snowflake was also cut with my Cameo, using the same white cardstock I made my tag from. I adhered the snowflake onto my tag using dimensional foam tape, and added the last finishing touches by threading a red ribbon through the hole in the tag and tying it in place with some hemp.
I hope today’s Workshop Wednesday has inspired all of you to create some fantastic cards and tags of your own as you are getting your Christmas preparations underway… See you soon! :)


 LinkDeli Free 15 day trial
Very sweet card – love the little scene you created.
Thanks for playing along at the Simon Says Stamp Wednesday Challenge.
Hugs,
Caryn xxx