Have Yourself a Merry Christmas
It’s almost Christmas! Hard to believe, isn’t it? It came so fast… Today I have a quick and simple card to share with you all using big features on a small card. This type of card makes quite the “punch” with its bold elements and simple lines. For even more interest, I tossed in some non-traditional colors amongst the reds and greens, and I love how they matched up really well together.
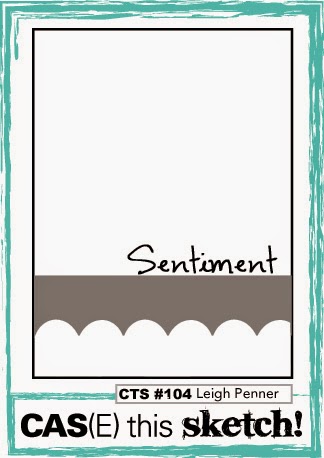
 The inspiration for the layout of my card came from the current sketch over at the CAS(E) this Sketch blog. I ended up changing the orientation of the sketch to have everything on it’s side shrunk the height to be a square card, rather than a normal A2 size.
I started off with a 8 1/2″ x 4 1/4″ piece of white cardstock which I scored and folded to create my 4 1/4″ square card. The teal stars patterned paper is from the “Follow Your Heart” 6×6 paper pack by My Mind’s Eye and covers the entire card base. Taking some Aquatic Splash chalk ink from Tsukineko, I applied ink to all the edges of the paper, letting some of the ink be heavier in spots and lighter in others. I then adhered a strip of white scalloped edged paper and some green ribbon around the bottom portion of the card.
 The sentiment panel is created within my Silhouette Studio, using the fonts Caviar Dreams and Credit Valley and a red gel pen. Once the sentiment was sketched out, I also drew some red dots along the top and bottom of “Merry Christmas”. The sentiment and dots were then heat embossed with some clear embossing powder to add a little bit of shine and dimension.
With some grey pigment ink, I stamped a flourish design in the background of my sentiment panel using the “Dot Flourishes” set from Inkadinkado. A scalloped patterned paper was layered behind the panel and the entire piece was mounted onto my card using dimensional foam tape.
 The snowflakes are cut from my Silhouette Cameo using white cardstock, and some Jolee’s snowflake embellishments are layered on top for some extra sparkle. The smaller snowflake is adhered at the bottom with dimensional foam tape, while the larger snowflake is layered behind the sentiment panel and attached with some regular adhesive.
A few final details for this card included some silver paint dotted around the patterned paper and some white faux stitching around the outside edges of the card.
As a special bonus, I have a downloadable SVG file of the sentiment I created for this card. To use, simply download the zip file, import the SVG into your Silhouette Studio, and trace the design with your trace tool!
Download: [download id=”1129″]
I hope you all enjoyed the post for today and are having fun with all your holiday preparations! :)
Happy Creating!


 LinkDeli Free 15 day trial
Wow!! So pretty!
Oh, this is gorgeous! Fabulous take on the sketch!