Layered Stamping
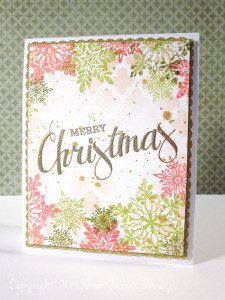
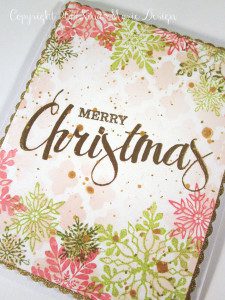
Today I’m here to share a fun layering technique using snowflake stamps! This technique could be replicated with any stamps in your collection; balloons, stars, flowers, leaves, etc. The really neat thing that I love about this technique is how layering the stamps overtop of each other creates different colors where the stamped images meet. So fun!
I first created the “Christmas” portion of my sentiment in my Silhouette Studio using the font “Antrokas“, and sketched it out with a gold gel pen onto a piece of 4″ x 5 1/4” watercolor paper. Because I was going to be doing a lot of embossing and using a lot of ink, I wanted to have a thicker paper for my panel. You could easily use a thicker cardstock instead (I recommend about 110lbs for this).
Once I had my sentiment sketched out, I heat embossed it in gold embossing powder, using the Silhouette heat embossing technique I showcased in this post. The “Merry” portion of my sentiment was from a lonely stamp set that no longer has the original packaging; however, there are many stamps that would make a great substitute, which I will list in the supplies list. This part of the sentiment is embossed in the same gold powder as “Christmas”.

I wanted to have a gold scalloped border layered behind my panel, so I took some gold glitter tape and covered the very edges of a piece of cardstock that was just slightly bigger than my panel. Once the cardstock was covered with tape, I took my paper edgers and cut the border. This scalloped panel was adhered behind my snowflake panel with dimensional foam tape.

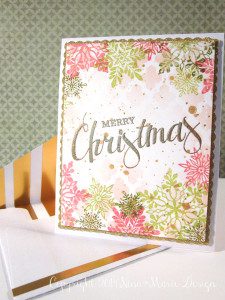
However, I wasn’t quite done…! :) I wanted to make this card extra special, so I created a envelope with gold foil stripes inside to match my card. The envelope was created from some plain white paper and an envelope cut file. The foil is from Silhouette, and is simply cut at 1/2″ strips and adhered to the envelope before assembling. And what I love about the Silhouette foil paper is that it has adhesive on the back… simply peel it of the backing sheet and lay it onto your project… Very easy and so pretty!
I hope you enjoyed today’s post! Happy Creating!
Inspiration
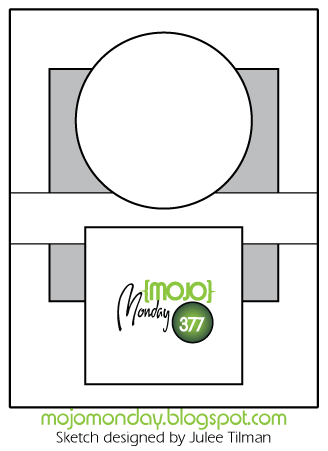
The inspiration for today’s layout on my card was from Mojo Monday’s card sketch #377. My interpretation of the sketch: the snowflakes use the above and below shapes, while the sentiment holds the middle. The scalloped layer behind my snowflake panel is what I used to be the layer behind the front shapes.
Supplies
- Ranger Inkssentials Watercolor Paper
- American Crafts 12×12 Textured Cardstock
- Silhouette Cameo, cutting mat, ratchet blade and pen holder
- Heidi Swapp Color Shine “Gold Lame“
- Heidi Swapp Lattice Stencil
- Ranger Princess Gold embossing powder
- Versamark ink
- Gelly Roll gold gel pen
- Uniball Signo white gel pen
- Sharpie Gold Paint Pen
- My Mind’s Eye Glitter Washi Tape
- Fiskars scalloped paper edgers
- Tim Holtz Tattered Rose distress ink
- Recollections “Christmas” collection stamp set
- green, dark green and red pigment inks
- Silhouette gold foil paper
- envelope cut file by Samantha Walker
Good substitutes for the “merry” stamp used in my card would be Cleary Besotted’s “Be Merry” set, Winnie & Walters “The Big, the Bold and the Merry” set or Kaiser Craft’s “Mistletoe” stamp set.


 LinkDeli Free 15 day trial
Very pretty! I love the colors you chose!
I just LOVE your card! I wanted to let you know that I’ve chosen your creation as one of my Favorite Picks and linked back to your blog! Thanks so much for sharing your talent. Kathy at stampsatplay.blogspot.com
This is so beautiful! I love how you layered the snowflakes and created a lovely frame for the gorgeous sentiment!
This is simply gorgeous! Love the stamped snowflakes and your interpretation of the sketch pieces. Thanks so much for playing along with Mojo Monday!