Craft Room Organization Quick Tips: Stamp and Die Storage
[fusion_builder_container hundred_percent=”no” equal_height_columns=”no” hide_on_mobile=”small-visibility,medium-visibility,large-visibility” background_position=”center center” background_repeat=”no-repeat” fade=”no” background_parallax=”none” parallax_speed=”0.3″ video_aspect_ratio=”16:9″ video_loop=”yes” video_mute=”yes” border_style=”solid” admin_toggled=”no” admin_label=”Post Content”][fusion_builder_row][fusion_builder_column type=”1_1″ layout=”1_1″ background_position=”left top” background_color=”” border_size=”” border_color=”” border_style=”solid” border_position=”all” spacing=”yes” background_image=”” background_repeat=”no-repeat” padding=”” margin_top=”0px” margin_bottom=”0px” class=”” id=”” animation_type=”” animation_speed=”0.3″ animation_direction=”left” hide_on_mobile=”small-visibility,medium-visibility,large-visibility” center_content=”no” last=”no” min_height=”” hover_type=”none” link=””][fusion_imageframe image_id=”” style_type=”none” stylecolor=”” hover_type=”none” bordersize=”” bordercolor=”” borderradius=”” align=”center” lightbox=”yes” gallery_id=”” lightbox_image=”” alt=”Craft Room Organization Quick Tips Stamp and Die Storage | Nina-Marie Design” link=”” linktarget=”_self” hide_on_mobile=”small-visibility,medium-visibility,large-visibility” class=”” id=”” animation_type=”” animation_direction=”left” animation_speed=”0.3″ animation_offset=””]https://ninamariedesign.com/wp-content/uploads/2017/05/Craft-Room-Organization-Quick-Tips-Stamps-and-Dies_featured-image-01.jpg[/fusion_imageframe][fusion_separator style_type=”none” hide_on_mobile=”small-visibility,medium-visibility,large-visibility” top_margin=”10″ bottom_margin=”10″ alignment=”center” /][fusion_text]
Hello everyone! Welcome back to a brand new Craft Room Organization Quick Tip video! This episode is going to feature how I store my 4×6 stamp sets and most die sets.
Before I get too far: I am in the process of moving at the time this post is going live, so the storage shelves my stamps and dies sit on in this video will be changing. I’m very excited to have large built-in white shelves in my new craft studio, which is where I plan on storing my stamps and dies (amongst other things)!
Once I have finished moving and have my new studio set up, I’ll share any updates/changes to stamp and die storage. But note that the storage sleeves and organizational method of storing these products is not going to change.
[/fusion_text][fusion_separator style_type=”none” hide_on_mobile=”small-visibility,medium-visibility,large-visibility” top_margin=”10″ bottom_margin=”10″ alignment=”center” /][fusion_imageframe image_id=”12589″ style_type=”none” stylecolor=”” hover_type=”none” bordersize=”” bordercolor=”” borderradius=”” align=”center” lightbox=”yes” gallery_id=”” lightbox_image=”https://ninamariedesign.com/wp-content/uploads/2017/05/Craft-Room-Organization-Quick-Tips-Stamps-and-Dies_3.jpg” alt=”Craft Room Organization Quick Tips Stamp and Die Storage | Nina-Marie Design” link=”” linktarget=”_self” hide_on_mobile=”small-visibility,medium-visibility,large-visibility” class=”” id=”” animation_type=”” animation_direction=”left” animation_speed=”0.3″ animation_offset=””]https://ninamariedesign.com/wp-content/uploads/2017/05/Craft-Room-Organization-Quick-Tips-Stamps-and-Dies_3.jpg[/fusion_imageframe][fusion_separator style_type=”none” hide_on_mobile=”small-visibility,medium-visibility,large-visibility” top_margin=”10″ bottom_margin=”10″ alignment=”center” /][fusion_text]
So the first thing I want to touch on is what sleeves I use for my stamps and dies. There are storage sleeves produced by many of our favorite brands. I make use of the Avery Elle storage pockets, but I will touch on that in a later video.
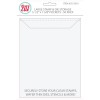
The method I use for storing my smaller stamp and die sets is by adapting C-Line 5×7 side folding photo sleeves into stamp pockets. Photo sleeves are durable, as they are meant to protect your photos and hold up against much use. By trimming the photo sleeve sheets into individual pieces, I get two sleeves from one sheet (since each sheet holds two 5×7 photo sleeves). I walk you through this in the video below.
[/fusion_text][fusion_separator style_type=”none” hide_on_mobile=”small-visibility,medium-visibility,large-visibility” top_margin=”10″ bottom_margin=”10″ alignment=”center” /][fusion_imageframe image_id=”12642″ style_type=”none” stylecolor=”” hover_type=”none” bordersize=”” bordercolor=”” borderradius=”” align=”center” lightbox=”yes” gallery_id=”” lightbox_image=”https://ninamariedesign.com/wp-content/uploads/2017/06/Craft-Room-Organization-Quick-Tips-Stamps-and-Dies_1.jpg” alt=”Craft Room Organization Quick Tips Stamp and Die Storage | Nina-Marie Design” link=”” linktarget=”_self” hide_on_mobile=”small-visibility,medium-visibility,large-visibility” class=”” id=”” animation_type=”” animation_direction=”left” animation_speed=”0.3″ animation_offset=””]https://ninamariedesign.com/wp-content/uploads/2017/06/Craft-Room-Organization-Quick-Tips-Stamps-and-Dies_1.jpg[/fusion_imageframe][fusion_separator style_type=”none” hide_on_mobile=”small-visibility,medium-visibility,large-visibility” top_margin=”10″ bottom_margin=”10″ alignment=”center” /][fusion_text]
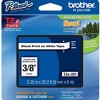
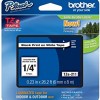
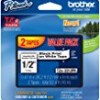
I also like to label all my stamps and dies. I insert white 5×7 pieces of paper into my photo sleeves and place a label with the stamp or die set’s name and the company who made it. For labeling, I prefer the P-Touch Brother label maker. The 1/2 inch white label tape is my go-to label choice for stamps and dies. Oftentimes I use smaller tape sizes for small items, such as sequins.
[/fusion_text][fusion_separator style_type=”none” hide_on_mobile=”small-visibility,medium-visibility,large-visibility” top_margin=”10″ bottom_margin=”10″ alignment=”center” /][fusion_imageframe image_id=”12643″ style_type=”none” stylecolor=”” hover_type=”none” bordersize=”” bordercolor=”” borderradius=”” align=”center” lightbox=”yes” gallery_id=”” lightbox_image=”https://ninamariedesign.com/wp-content/uploads/2017/06/Craft-Room-Organization-Quick-Tips-Stamps-and-Dies_6.jpg” alt=”Craft Room Organization Quick Tips Stamp and Die Storage | Nina-Marie Design” link=”” linktarget=”_self” hide_on_mobile=”small-visibility,medium-visibility,large-visibility” class=”” id=”” animation_type=”” animation_direction=”left” animation_speed=”0.3″ animation_offset=””]https://ninamariedesign.com/wp-content/uploads/2017/06/Craft-Room-Organization-Quick-Tips-Stamps-and-Dies_6.jpg[/fusion_imageframe][fusion_separator style_type=”none” hide_on_mobile=”small-visibility,medium-visibility,large-visibility” top_margin=”10″ bottom_margin=”10″ alignment=”center” /][fusion_text]
A helpful addition to my die storage sleeves are magnets. For larger die sets I don’t bother with placing the dies on magnets usually, but for die sets with small dies (such as sets that coordinate with stamp sets), I choose to place these on magnets. This holds the dies in place so that they aren’t flying everywhere and they don’t get lost. The magnets I use are meant for covering floor vents, but since they are thin, it makes them easy to cut and does not add too much bulk to the storage pocket.
[/fusion_text][fusion_separator style_type=”none” hide_on_mobile=”small-visibility,medium-visibility,large-visibility” top_margin=”10″ bottom_margin=”10″ alignment=”center” /][fusion_imageframe image_id=”12644″ style_type=”none” stylecolor=”” hover_type=”none” bordersize=”” bordercolor=”” borderradius=”” align=”center” lightbox=”yes” gallery_id=”” lightbox_image=”https://ninamariedesign.com/wp-content/uploads/2017/06/Craft-Room-Organization-Quick-Tips-Stamps-and-Dies_4.jpg” alt=”Craft Room Organization Quick Tips Stamp and Die Storage | Nina-Marie Design” link=”” linktarget=”_self” hide_on_mobile=”small-visibility,medium-visibility,large-visibility” class=”” id=”” animation_type=”” animation_direction=”left” animation_speed=”0.3″ animation_offset=””]https://ninamariedesign.com/wp-content/uploads/2017/06/Craft-Room-Organization-Quick-Tips-Stamps-and-Dies_4.jpg[/fusion_imageframe][fusion_separator style_type=”none” hide_on_mobile=”small-visibility,medium-visibility,large-visibility” top_margin=”10″ bottom_margin=”10″ alignment=”center” /][fusion_text]
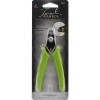
The other day in my Simon 10 Crafty Must-Haves post, I mentioned the Cousin’s Flush Cutters. I use these for cutting apart my dies. These particular cutters are perfect for this because they have a nice fine tip to them, unlike other wire cutters. If you struggle with getting dies cut apart, I recommend checking these out!
[/fusion_text][fusion_separator style_type=”none” hide_on_mobile=”small-visibility,medium-visibility,large-visibility” top_margin=”10″ bottom_margin=”10″ alignment=”center” /][/fusion_builder_column][fusion_builder_column type=”1_3″ spacing=”” center_content=”no” hover_type=”none” link=”” min_height=”” hide_on_mobile=”small-visibility,medium-visibility,large-visibility” class=”” id=”” background_color=”” background_image=”” background_position=”left top” background_repeat=”no-repeat” border_size=”0″ border_color=”” border_style=”solid” border_position=”all” padding=”” dimension_margin=”undefined” animation_type=”” animation_direction=”left” animation_speed=”0.3″ animation_offset=”” last=”no”][fusion_imageframe image_id=”12616″ style_type=”none” stylecolor=”” hover_type=”none” bordersize=”” bordercolor=”” borderradius=”” align=”none” lightbox=”no” gallery_id=”” lightbox_image=”” alt=”10 Crafty Must Haves | Nina-Marie Design” link=”https://ninamariedesign.com/2017/06/05/10-crafty-must-haves/” linktarget=”_self” hide_on_mobile=”small-visibility,medium-visibility,large-visibility” class=”” id=”” animation_type=”” animation_direction=”left” animation_speed=”0.3″ animation_offset=””]https://ninamariedesign.com/wp-content/uploads/2017/06/Crafty-Must-Haves-01.jpg[/fusion_imageframe][/fusion_builder_column][fusion_builder_column type=”2_3″ spacing=”” center_content=”no” hover_type=”none” link=”” min_height=”” hide_on_mobile=”small-visibility,medium-visibility,large-visibility” class=”” id=”” background_color=”” background_image=”” background_position=”left top” background_repeat=”no-repeat” border_size=”0″ border_color=”” border_style=”solid” border_position=”all” padding=”” dimension_margin=”undefined” animation_type=”” animation_direction=”left” animation_speed=”0.3″ animation_offset=”” last=”no”][fusion_tagline_box backgroundcolor=”” shadow=”no” shadowopacity=”0.7″ border=”1″ bordercolor=”” highlightposition=”left” content_alignment=”left” link=”https://ninamariedesign.com/2017/06/05/10-crafty-must-haves/” button=”SEE THE POST” linktarget=”_self” modal=”” button_size=”” button_type=”” button_shape=”” buttoncolor=”default” title=”10 CRAFTY MUST-HAVES” description=”Be sure to check out my recent crafty must-haves post where I share 10 of my most-loved-and-used tools! ” margin_top=”” margin_bottom=”” hide_on_mobile=”small-visibility,medium-visibility,large-visibility” class=”” id=”” animation_type=”” animation_direction=”left” animation_speed=”0.3″ animation_offset=”” /][/fusion_builder_column][fusion_builder_column type=”1_1″ spacing=”” center_content=”no” hover_type=”none” link=”” min_height=”” hide_on_mobile=”small-visibility,medium-visibility,large-visibility” class=”” id=”” background_color=”” background_image=”” background_position=”left top” background_repeat=”no-repeat” border_size=”0″ border_color=”” border_style=”solid” border_position=”all” padding=”” dimension_margin=”undefined” animation_type=”” animation_direction=”left” animation_speed=”0.3″ animation_offset=”” last=”no”][fusion_separator style_type=”none” hide_on_mobile=”small-visibility,medium-visibility,large-visibility” top_margin=”10″ bottom_margin=”10″ alignment=”center” /][fusion_text]
Finally, I want to share a bit about how I store all my stamps and dies. Now please remember that this is going to change slightly simply because I am moving. My studio is going to be smaller than what I currently work in right now, so my furniture is not going to be able to come with me. But also know that this storage solution worked for me while I was in this space, so I am confident that it could be helpful to you too!
[/fusion_text][fusion_separator style_type=”none” hide_on_mobile=”small-visibility,medium-visibility,large-visibility” top_margin=”10″ bottom_margin=”10″ alignment=”center” /][fusion_imageframe image_id=”12645″ style_type=”none” stylecolor=”” hover_type=”none” bordersize=”” bordercolor=”” borderradius=”” align=”center” lightbox=”yes” gallery_id=”” lightbox_image=”https://ninamariedesign.com/wp-content/uploads/2017/06/Craft-Room-Organization-Quick-Tips-Stamps-and-Dies_8.jpg” alt=”Craft Room Organization Quick Tips Stamp and Die Storage | Nina-Marie Design” link=”” linktarget=”_self” hide_on_mobile=”small-visibility,medium-visibility,large-visibility” class=”” id=”” animation_type=”” animation_direction=”left” animation_speed=”0.3″ animation_offset=””]https://ninamariedesign.com/wp-content/uploads/2017/06/Craft-Room-Organization-Quick-Tips-Stamps-and-Dies_8.jpg[/fusion_imageframe][fusion_separator style_type=”none” hide_on_mobile=”small-visibility,medium-visibility,large-visibility” top_margin=”10″ bottom_margin=”10″ alignment=”center” /][fusion_text]
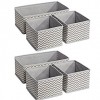
I store the stamps and dies in InterDesign fabric bins; I organize them by company, since that is the easiest method for me to find what I need. I love the size of these bins and how much product they can store. The set I get comes with two small bins and one large.
The width and height of the bins in both sizes are the same, but the depth of the smaller bins are half the size of the largest. If you put the two smaller ones back to back, they equal the same depth as the largest bin. This is what I did on my shelves and it works great. I can further organize this way by breaking up which brand goes in which bin.
As an example, I have quite a bit of Simon Says Stamp products since I design for them, so I use a couple larger bins for those. For other brands I may use smaller bins if I don’t have as many products from that company. If necessary to save on space, I can combine multiple brands together in one bin.
[/fusion_text][fusion_separator style_type=”none” hide_on_mobile=”small-visibility,medium-visibility,large-visibility” top_margin=”10″ bottom_margin=”10″ alignment=”center” /][fusion_imageframe image_id=”12646″ style_type=”none” stylecolor=”” hover_type=”none” bordersize=”” bordercolor=”” borderradius=”” align=”center” lightbox=”yes” gallery_id=”” lightbox_image=”https://ninamariedesign.com/wp-content/uploads/2017/06/Craft-Room-Organization-Quick-Tips-Stamps-and-Dies_9.jpg” alt=”Craft Room Organization Quick Tips Stamp and Die Storage | Nina-Marie Design” link=”” linktarget=”_self” hide_on_mobile=”small-visibility,medium-visibility,large-visibility” class=”” id=”” animation_type=”” animation_direction=”left” animation_speed=”0.3″ animation_offset=””]https://ninamariedesign.com/wp-content/uploads/2017/06/Craft-Room-Organization-Quick-Tips-Stamps-and-Dies_9.jpg[/fusion_imageframe][fusion_separator style_type=”none” hide_on_mobile=”small-visibility,medium-visibility,large-visibility” top_margin=”10″ bottom_margin=”10″ alignment=”center” /][fusion_text]
Be sure to check out the video to see all these things in action and get some additional details on everything I’ve covered so far. I hope this organization video proves helpful in coming up with additional ideas for storing your stamps and dies! Again, I will post an update at some point after I’ve moved into my new studio and have gotten things in their places, so stay tuned later this summer for that!
Thanks for stopping by today and spending some time with me… I will see you very soon with a new video! Until then, happy Tuesday!
[/fusion_text][/fusion_builder_column][/fusion_builder_row][/fusion_builder_container][fusion_builder_container hundred_percent=”no” equal_height_columns=”no” hide_on_mobile=”small-visibility,medium-visibility,large-visibility” background_position=”center center” background_repeat=”no-repeat” fade=”no” background_parallax=”none” enable_mobile=”no” parallax_speed=”0.3″ video_aspect_ratio=”16:9″ video_loop=”yes” video_mute=”yes” border_style=”solid” padding_top=”20px” padding_bottom=”20px” admin_label=”Video”][fusion_builder_row][fusion_builder_column type=”1_1″ layout=”1_1″ spacing=”” center_content=”no” hover_type=”none” link=”” min_height=”” hide_on_mobile=”small-visibility,medium-visibility,large-visibility” class=”” id=”” background_color=”” background_image=”” background_position=”left top” background_repeat=”no-repeat” border_size=”0″ border_color=”” border_style=”solid” border_position=”all” padding=”” dimension_margin=”” animation_type=”” animation_direction=”left” animation_speed=”0.3″ animation_offset=”” last=”no”][fusion_title hide_on_mobile=”small-visibility,medium-visibility,large-visibility” size=”1″ content_align=”left” style_type=”default”]
WATCH THE VIDEO
[/fusion_title][fusion_separator style_type=”none” hide_on_mobile=”small-visibility,medium-visibility,large-visibility” top_margin=”10″ bottom_margin=”10″ alignment=”center” /][fusion_youtube id=”https://youtu.be/bJKnmp8jjUI” width=”800″ height=”450″ autoplay=”false” api_params=”” hide_on_mobile=”small-visibility,medium-visibility,large-visibility” class=”” /][/fusion_builder_column][fusion_builder_column type=”1_1″ layout=”1_1″ spacing=”” center_content=”no” hover_type=”none” link=”” min_height=”” hide_on_mobile=”small-visibility,medium-visibility,large-visibility” class=”” id=”” background_color=”#ffffff” background_image=”” background_position=”left top” undefined=”” background_repeat=”no-repeat” border_size=”7″ border_color=”#f7c025″ border_style=”solid” border_position=”left” padding=”10px 20 20 20″ margin_top=”” margin_bottom=”” animation_type=”” animation_direction=”left” animation_speed=”0.3″ animation_offset=”” last=”no”][fusion_text]
WANT TO SEE ALL OF MY VIDEOS?
Subscribe to my YouTube channel so that you’ll never miss one of my weekly tutorials! And if you enjoyed today’s video, please give it a “thumbs up”!
[/fusion_text][fusion_button link=”http://www.youtube.com/channel/UC0op_DVZPkLDnypq69UHz5Q?sub_confirmation=1″ title=”” target=”_blank” alignment=”left” modal=”” hide_on_mobile=”small-visibility,medium-visibility,large-visibility” class=”” id=”” color=”custom” button_gradient_top_color=”#ce2580″ button_gradient_bottom_color=”#ce2580″ button_gradient_top_color_hover=”#f7c025″ button_gradient_bottom_color_hover=”#f7c025″ accent_color=”” accent_hover_color=”” type=”” bevel_color=”” border_width=”” size=”xlarge” stretch=”default” shape=”” icon=”fa-heart” icon_position=”left” icon_divider=”no” animation_type=”” animation_direction=”left” animation_speed=”0.3″ animation_offset=””]SUBSCRIBE[/fusion_button][/fusion_builder_column][/fusion_builder_row][/fusion_builder_container][fusion_builder_container hundred_percent=”no” equal_height_columns=”no” hide_on_mobile=”small-visibility,medium-visibility,large-visibility” background_position=”center center” background_repeat=”no-repeat” fade=”no” background_parallax=”none” enable_mobile=”no” parallax_speed=”0.3″ video_aspect_ratio=”16:9″ video_loop=”yes” video_mute=”yes” border_style=”solid” padding_top=”20px” padding_bottom=”20px” admin_label=”Products” admin_toggled=”no”][fusion_builder_row][fusion_builder_column type=”1_1″ layout=”1_1″ spacing=”” center_content=”no” hover_type=”none” link=”” min_height=”” hide_on_mobile=”small-visibility,medium-visibility,large-visibility” class=”” id=”” background_color=”” background_image=”” background_position=”left top” background_repeat=”no-repeat” border_size=”0″ border_color=”” border_style=”solid” border_position=”all” padding=”” animation_type=”” animation_direction=”left” animation_speed=”0.3″ animation_offset=”” last=”no”][fusion_title margin_top=”” margin_bottom=”” hide_on_mobile=”small-visibility,medium-visibility,large-visibility” class=”” id=”” size=”1″ content_align=”left” style_type=”default” sep_color=””]
SUPPLIES
[/fusion_title][fusion_separator style_type=”none” hide_on_mobile=”small-visibility,medium-visibility,large-visibility” top_margin=”10″ bottom_margin=”10″ alignment=”center” /][fusion_text]
[/fusion_text][/fusion_builder_column][/fusion_builder_row][/fusion_builder_container][fusion_builder_container hundred_percent=”no” equal_height_columns=”no” hide_on_mobile=”small-visibility,medium-visibility,large-visibility” background_position=”center center” background_repeat=”no-repeat” fade=”no” background_parallax=”none” enable_mobile=”no” parallax_speed=”0.3″ video_aspect_ratio=”16:9″ video_loop=”yes” video_mute=”yes” border_style=”solid” padding_top=”20px” padding_bottom=”20px” admin_label=”Share” admin_toggled=”yes”][fusion_builder_row][fusion_builder_column type=”1_1″ layout=”1_1″ spacing=”” center_content=”no” hover_type=”none” link=”” min_height=”” hide_on_mobile=”small-visibility,medium-visibility,large-visibility” class=”” id=”” background_color=”” background_image=”” background_position=”left top” background_repeat=”no-repeat” border_size=”0″ border_color=”” border_style=”solid” border_position=”all” padding=”” animation_type=”” animation_direction=”left” animation_speed=”0.3″ animation_offset=”” last=”no”][fusion_title hide_on_mobile=”small-visibility,medium-visibility,large-visibility” size=”1″ content_align=”left” style_type=”default”]
SHARE THIS POST ON SOCIAL MEDIA
[/fusion_title][fusion_separator style_type=”none” hide_on_mobile=”small-visibility,medium-visibility,large-visibility” top_margin=”10″ bottom_margin=”10″ alignment=”center” /][/fusion_builder_column][fusion_builder_column type=”1_2″ layout=”1_2″ spacing=”” center_content=”no” hover_type=”none” link=”” min_height=”” hide_on_mobile=”small-visibility,medium-visibility,large-visibility” class=”” id=”” background_color=”” background_image=”” background_position=”left top” undefined=”” background_repeat=”no-repeat” border_size=”0″ border_color=”” border_style=”solid” border_position=”all” padding=”” margin_top=”” margin_bottom=”” animation_type=”” animation_direction=”left” animation_speed=”0.3″ animation_offset=”” last=”no” element_content=””][fusion_imageframe image_id=”12656″ style_type=”none” stylecolor=”” hover_type=”none” bordersize=”” bordercolor=”” borderradius=”” align=”none” lightbox=”no” gallery_id=”” lightbox_image=”” alt=”” link=”” linktarget=”_self” hide_on_mobile=”small-visibility,medium-visibility,large-visibility” class=”” id=”” animation_type=”” animation_direction=”left” animation_speed=”0.3″ animation_offset=””]https://ninamariedesign.com/wp-content/uploads/2017/06/Craft-Room-Organization-Quick-Tips-Stamps-and-Dies_social-01.jpg[/fusion_imageframe][/fusion_builder_column][fusion_builder_column type=”1_2″ layout=”1_2″ spacing=”” center_content=”no” hover_type=”none” link=”” min_height=”” hide_on_mobile=”small-visibility,medium-visibility,large-visibility” class=”” id=”” background_color=”” background_image=”” background_position=”left top” undefined=”” background_repeat=”no-repeat” border_size=”0″ border_color=”” border_style=”solid” border_position=”all” padding=”” margin_top=”” margin_bottom=”” animation_type=”” animation_direction=”left” animation_speed=”0.3″ animation_offset=”” last=”no” element_content=””][/fusion_builder_column][/fusion_builder_row][/fusion_builder_container]








 LinkDeli Free 15 day trial
What do you use for your background stamps?