Alcohol Ink Die Cuts + Simon’s Love You Forever Card Kit
[fusion_builder_container hundred_percent=”no” equal_height_columns=”no” hide_on_mobile=”small-visibility,medium-visibility,large-visibility” background_position=”center center” background_repeat=”no-repeat” fade=”no” background_parallax=”none” parallax_speed=”0.3″ video_aspect_ratio=”16:9″ video_loop=”yes” video_mute=”yes” overlay_opacity=”0.5″ border_style=”solid” admin_toggled=”no” admin_label=”Post Content”][fusion_builder_row][fusion_builder_column type=”1_1″ layout=”1_1″ background_position=”left top” background_color=”” border_size=”” border_color=”” border_style=”solid” border_position=”all” spacing=”yes” background_image=”” background_repeat=”no-repeat” padding=”” margin_top=”0px” margin_bottom=”0px” class=”” id=”” animation_type=”” animation_speed=”0.3″ animation_direction=”left” hide_on_mobile=”small-visibility,medium-visibility,large-visibility” center_content=”no” last=”no” min_height=”” hover_type=”none” link=””][fusion_imageframe image_id=”10767″ style_type=”none” hover_type=”zoomin” align=”center” lightbox=”yes” lightbox_image=”https://ninamariedesign.com/wp-content/uploads/2017/01/Alcohol-Ink-Die-Cuts_10.jpg” alt=”Alcohol Ink Die Cuts | Nina-Marie Design” linktarget=”_self” hide_on_mobile=”small-visibility,medium-visibility,large-visibility” animation_direction=”left” animation_speed=”0.3″]https://ninamariedesign.com/wp-content/uploads/2017/01/Alcohol-Ink-Die-Cuts_10.jpg[/fusion_imageframe][fusion_separator style_type=”none” hide_on_mobile=”small-visibility,medium-visibility,large-visibility” top_margin=”10″ bottom_margin=”10″ alignment=”center” /][fusion_text]
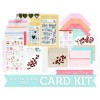
Hello everyone! I am very happy you have stopped by today, as I wanted to share some inspiration featuring the latest card kit from Simon Says Stamp: Love You Forever. In this video, I will be using alcohol inks to create gorgeously colored die cuts that create a huge impact!
Note that the Love You Forever kits are sold out, but all of the products in the kit are available for individual purchase. I have a full list of the products used in this card – and the ones included in the kit – at the bottom of this post.
[/fusion_text][fusion_separator style_type=”none” hide_on_mobile=”small-visibility,medium-visibility,large-visibility” top_margin=”10″ bottom_margin=”10″ alignment=”center” /][fusion_imageframe image_id=”10769″ style_type=”none” hover_type=”zoomin” align=”center” lightbox=”yes” lightbox_image=”https://ninamariedesign.com/wp-content/uploads/2017/01/Alcohol-Ink-Die-Cuts_5.jpg” alt=”Alcohol Ink Die Cuts | Nina-Marie Design” linktarget=”_self” hide_on_mobile=”small-visibility,medium-visibility,large-visibility” animation_direction=”left” animation_speed=”0.3″]https://ninamariedesign.com/wp-content/uploads/2017/01/Alcohol-Ink-Die-Cuts_5.jpg[/fusion_imageframe][fusion_separator style_type=”none” hide_on_mobile=”small-visibility,medium-visibility,large-visibility” top_margin=”10″ bottom_margin=”10″ alignment=”center” /][fusion_text]
Alcohol inks are a really fun medium to play with! The thing I find most exciting about them is the unpredictability, more so than Distress Inks and other similar mediums. Alcohol wicks away from itself when layered together while still wet, which creates amazing reactive effects. You’ll see a couple examples of this in the video. When adding a wet layer onto a dry layer, the colors sit on top of each fairly well and aren’t quite as translucent as Distress Ink. This means you can layer with these inks a bit more before the layers turn murky and brown.
Also note that while I used Tim Holtz alcohol inks for this project, you can use other alcohol inks such as Copic marker refills to achieve the same effect!
[/fusion_text][fusion_separator style_type=”none” hide_on_mobile=”small-visibility,medium-visibility,large-visibility” top_margin=”10″ bottom_margin=”10″ alignment=”center” /][fusion_imageframe image_id=”10770″ style_type=”none” hover_type=”zoomin” align=”center” lightbox=”yes” lightbox_image=”https://ninamariedesign.com/wp-content/uploads/2017/01/Alcohol-Ink-Die-Cuts_6.jpg” alt=”Alcohol Ink Die Cuts | Nina-Marie Design” linktarget=”_self” hide_on_mobile=”small-visibility,medium-visibility,large-visibility” animation_direction=”left” animation_speed=”0.3″]https://ninamariedesign.com/wp-content/uploads/2017/01/Alcohol-Ink-Die-Cuts_6.jpg[/fusion_imageframe][fusion_separator style_type=”none” hide_on_mobile=”small-visibility,medium-visibility,large-visibility” top_margin=”10″ bottom_margin=”10″ alignment=”center” /][fusion_text]
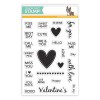
As I mentioned above, these cards I incorporate items from the Simon Says Stamp Special Edition card kit. I used the Loving Heart stamp set, the Heart Trio die and the little 4-bar white card bases.
I hope you will be checking out the video and see how I created the gorgeous patterns on my die cut hearts! If you enjoy the video, please give it a thumbs up and subscribe to my channel for more weekly inspiration. Thanks for visiting me today!
[/fusion_text][fusion_separator style_type=”none” hide_on_mobile=”small-visibility,medium-visibility,large-visibility” top_margin=”10″ bottom_margin=”10″ alignment=”center” /][fusion_imageframe image_id=”10772″ style_type=”none” hover_type=”zoomin” align=”center” lightbox=”yes” lightbox_image=”https://ninamariedesign.com/wp-content/uploads/2017/01/Alcohol-Ink-Die-Cuts_8.jpg” alt=”Alcohol Ink Die Cuts | Nina-Marie Design” linktarget=”_self” hide_on_mobile=”small-visibility,medium-visibility,large-visibility” animation_direction=”left” animation_speed=”0.3″]https://ninamariedesign.com/wp-content/uploads/2017/01/Alcohol-Ink-Die-Cuts_8.jpg[/fusion_imageframe][fusion_separator style_type=”none” hide_on_mobile=”small-visibility,medium-visibility,large-visibility” top_margin=”20″ bottom_margin=”20″ alignment=”center” /][fusion_text]
WATCH THE VIDEO
[/fusion_text][fusion_separator style_type=”none” hide_on_mobile=”small-visibility,medium-visibility,large-visibility” top_margin=”10″ bottom_margin=”10″ alignment=”center” /][fusion_youtube id=”https://youtu.be/RKl4jtkuFCQ” width=”800″ height=”450″ autoplay=”false” hide_on_mobile=”small-visibility,medium-visibility,large-visibility” /][fusion_separator style_type=”none” hide_on_mobile=”small-visibility,medium-visibility,large-visibility” top_margin=”20″ bottom_margin=”20″ alignment=”center” /][fusion_text]
SHARE THIS POST ON SOCIAL MEDIA
[/fusion_text][fusion_separator style_type=”none” hide_on_mobile=”small-visibility,medium-visibility,large-visibility” top_margin=”20″ bottom_margin=”20″ alignment=”center” /][fusion_text]
PRODUCTS
[/fusion_text][fusion_separator style_type=”none” hide_on_mobile=”small-visibility,medium-visibility,large-visibility” top_margin=”10″ bottom_margin=”10″ alignment=”center” /][fusion_text]
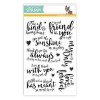
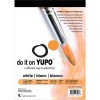
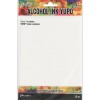
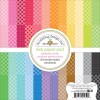
If you are interested in any of the products used in this post, I have them all linked below to Simon Says Stamp. Affiliate links used when possible.
[/fusion_text][fusion_text]All the products included in the Love You Forever Card Kit are listed here:
[/fusion_text][/fusion_builder_column][/fusion_builder_row][/fusion_builder_container]









 LinkDeli Free 15 day trial
These are fun cards with some fabulous colors! Thanks for the great video!!
Love how bright and vibrant the alcohol inks are but then more subtle as you showed in the video. I’ve been wanting to play with alcohol inks for a while but needed some inspiration and proof that it’s not too scary. Love your cards. I saw you used 91% alcohol. Can you use 70% rubbing alcohol, too?