Believe in Christmas
Happy Sunday!
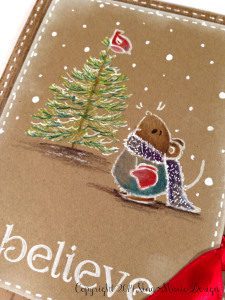
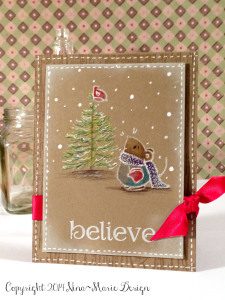
 As part of my participation the Operation Write Home link-up, today’s card features a cute little mouse and bird that were colored with colored pencils on kraft paper. As many of you know, Operation Write Home is a non-profit organization that collects donated cards from crafters so that they can send these to our service men and women overseas. Our troops can then use these handmade cards to send to their loved ones… a wonderful way for our troops to be able to share a special moment with the ones they love while away from home. Operation Write Home is always looking for more donors, and I encourage you to check out their site to learn more about the program.
So lets get started on today’s post! I created this card by first stamping the mouse and tree stamp in white ink onto a 3 1/2″ x 5″ kraft cardstock panel. With colored pencils I colored in everything, creating shadows with darker pencils to give depth. After coloring in the stamp, I loaded the panel into my Silhouette Cameo to create the sentiment.

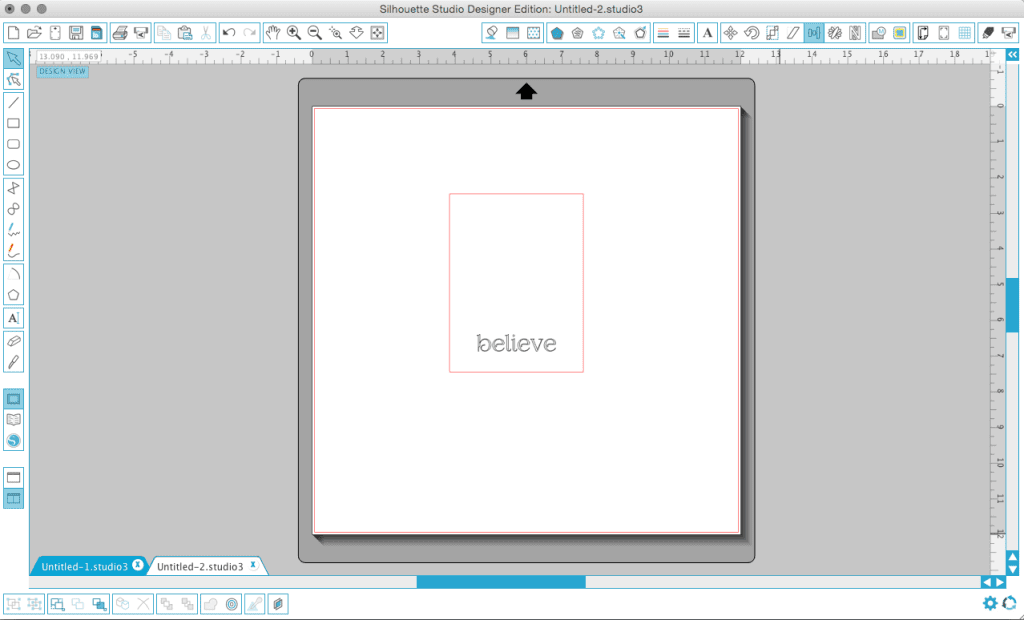
- Create a 3 1/2″ x 5″ placeholder panel; do not cut this panel. This is simply a guide for creating your sentiment.
- In the font, “FoglihtenNo07”, type out the word “believe”. Navigate to your sketch settings and define as “plain” sketch.
- Align along the bottom center of your placeholder panel.
- Delete the placeholder panel.
- Sketch out “believe” in a white gel pen (using the Silhouette pen holder)
After sketching the sentiment onto the colored mouse panel, I took some more of the white ink and a small piece of felt (about 2″ square) and inked around the edges of the entire panel. You could also use a ink blending tool for this, but I wanted more control in where the ink was going, so I opted for the felt. This allowed me to use my felt-wrapped fingertip, moving in a circular motion around the panel to apply the ink where I wanted. I also drew some snowflakes and faux stitching around the edges of the panel with a white gel pen, and set the panel aside while I created the card base.
Using some more of the kraft cardstock I had used for the mouse panel, I cut it at 4 1/4″ x 11″, and then scored and folded along the 5 1/2″ line to create an A2 sized card base. 
I then adhered the mouse panel onto my card base using some dimensional foam tape, and some satin red ribbon tied around the center completed the card!
So there you have it! I really love the way the colored pencils look on kraft paper; it gives a more softer tone to the colors, and the white complements everything perfectly.
Extra bonus! I have a quick video on the coloring technique I used for today’s card…
I hope you all enjoyed today’s post. See you again soon!
Supplies
- Recollections® Cardstock Paper Value Pack, 8.5″ X 11″
- Clearsnap Colorbox Frost White Pigment Ink Pad
- Heidi Swapp clear stamp Woodgrain
- Penny Black Clear Stamps Jolly Friends clear stamp set
- Silhouette Cameo cutting mat and pen holder
- Uni-Ball Signo Gel Pen -White
- red satin ribbon- 5/8″
- assorted colored pencils


 LinkDeli Free 15 day trial