Creative Stamping

Hello, and a Happy Saturday to you!
I was playing around with my Simon Says Stamp “Sending Happy Thoughts” stamp set the other day, and I thought it would be really neat if one of the little envelopes in the set could actually open, and inside one could find something.
I began playing around until I finally came up with a design that I liked best. Below are the steps I used to create my interactive stamped envelope:
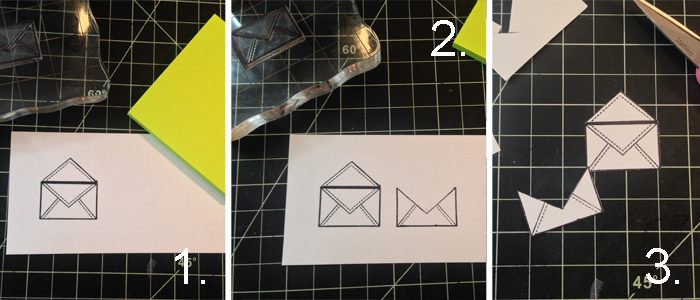
- Stamp the envelope onto a piece of cardstock; this will eventually be the backside, and won’t be seen.
- Mask off all but the flap of the envelope and stamp it directly above the first envelope. Mask off the flap of the envelope and stamp onto a piece of cardstock.
- Fussy cut both images out.
- Score a line where the flap will fold on the first stamped envelope.
- Apply adhesive to all three sides of the second stamped envelope and adhere to the backside of first stamped envelope. Fold the flap over to close.
Once my envelope was created, I filled it with little, pink die cut hearts and added one onto the front of the envelope as the “closure”; I attached a little glue dot to the back of the heart to hold it shut.
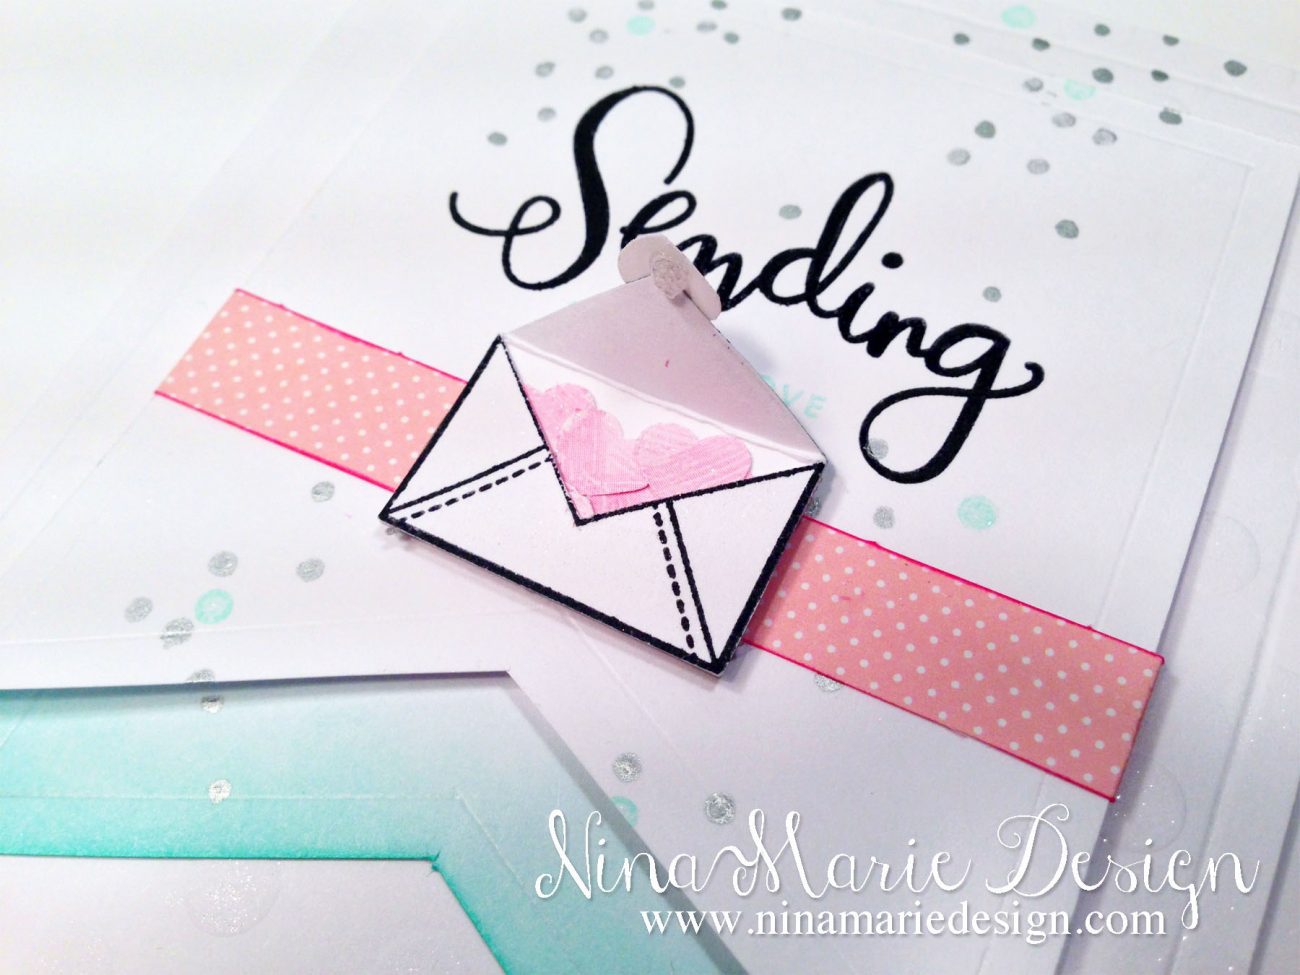
For the rest of the card, I cut two tags from white cardstock; on one, I stamped my sentiment (also from the “Sending Happy Thoughts” stamp set), and layered on some patterned paper and my mini envelope. I also added some confetti by stamping the single circle stamp with some teal ink, and drawing other dots with a silver paint pen.
The second tag, which is slightly smaller than the first tag, is inked with some of the same teal ink used for the sentiment and confetti.
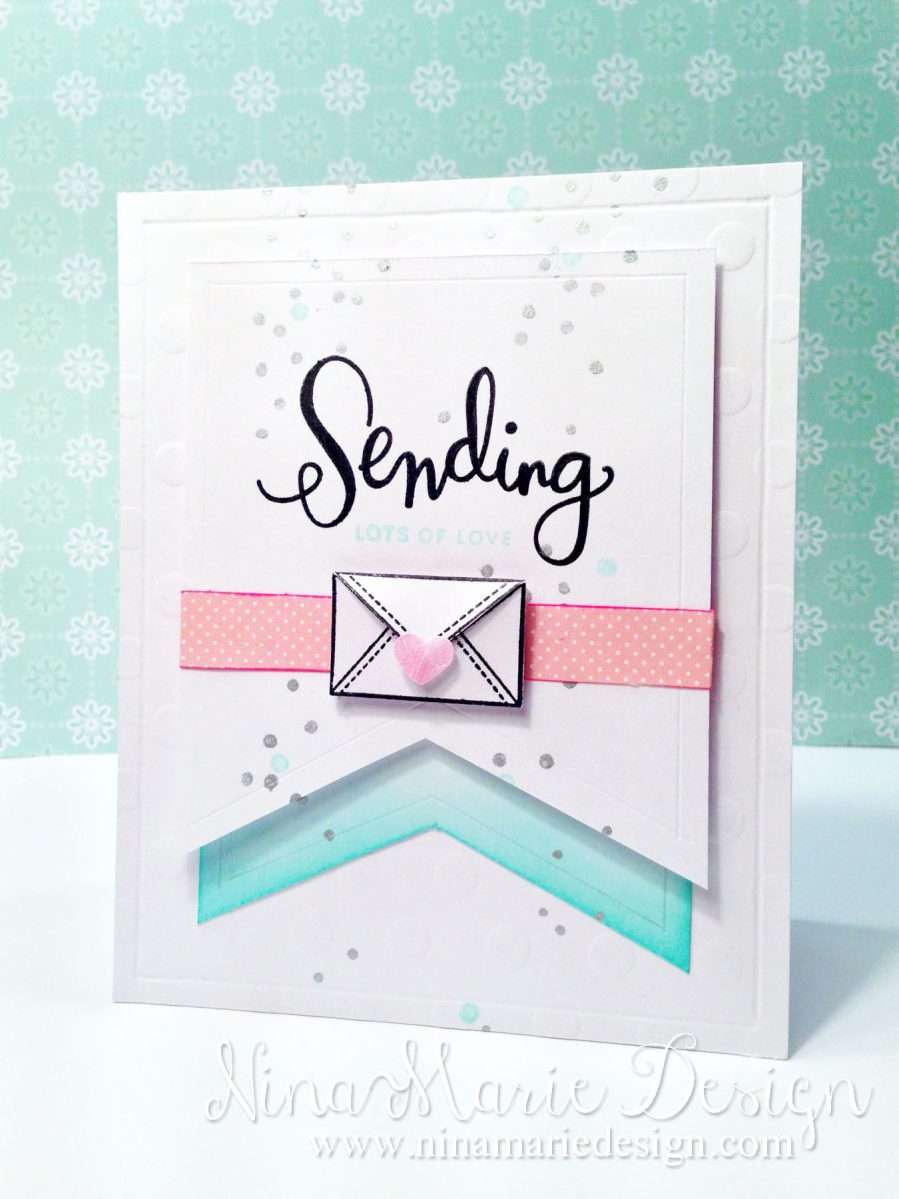
My tags are layered onto my card base, which is 4″ by 5″ and was run through my Big Shot machine to emboss the polka dot pattern. I also scored a frame around the edges of the card, and covered all the polka dots with Wink of Stella clear glitter.
I love the pink and teal color combination… gives a very spring-like and feminine feel to the card. I hope you’ve enjoyed and that you’ll give my little envelope technique a try! Thanks so much for stopping by! :)
Challenges
This card is submitted into the Simon Says Stamp “Anything Goes” Wednesday challenge, the Simon Says Stamp “One Stamp, Many Ways” Monday challenge, and the Addicted to CAS challenge #60 “Cute”.
[one_third]![]() [/one_third][one_third]
[/one_third][one_third]![]() [/one_third][one_third_last]
[/one_third][one_third_last]![]() [/one_third_last]
[/one_third_last]

 LinkDeli Free 15 day trial
Love this layout! Awesome card – Thanks for joining in at ATCAS!
Gorgeous, beautiful card and love how you can open the envelope, thanks for showing how.
Thank you for joining us at Simon says Stamp Wednesday Challenge.
Luv
Debby
So cute! Love the soft colors! Thank you so much for joining us at Simon Says Stamp Monday Challenge. Hugs, Sandra
Such a charming card! Beautiful inking, and I love how you created your envie…so cute! Thanks so much for playing along with us this week at ATCAS!
I have had so much fun visiting your blog today. You’re creativity truly is amazing.This is such a pretty card. I love what you’ve done with the envelope stamp. Brilliant! Thanks again for sharing your work with us for the Simon Says Stamp Monday Challenge. ~Michelle