It’s Your Birthday

Hello! So glad you’ve stopped by today!
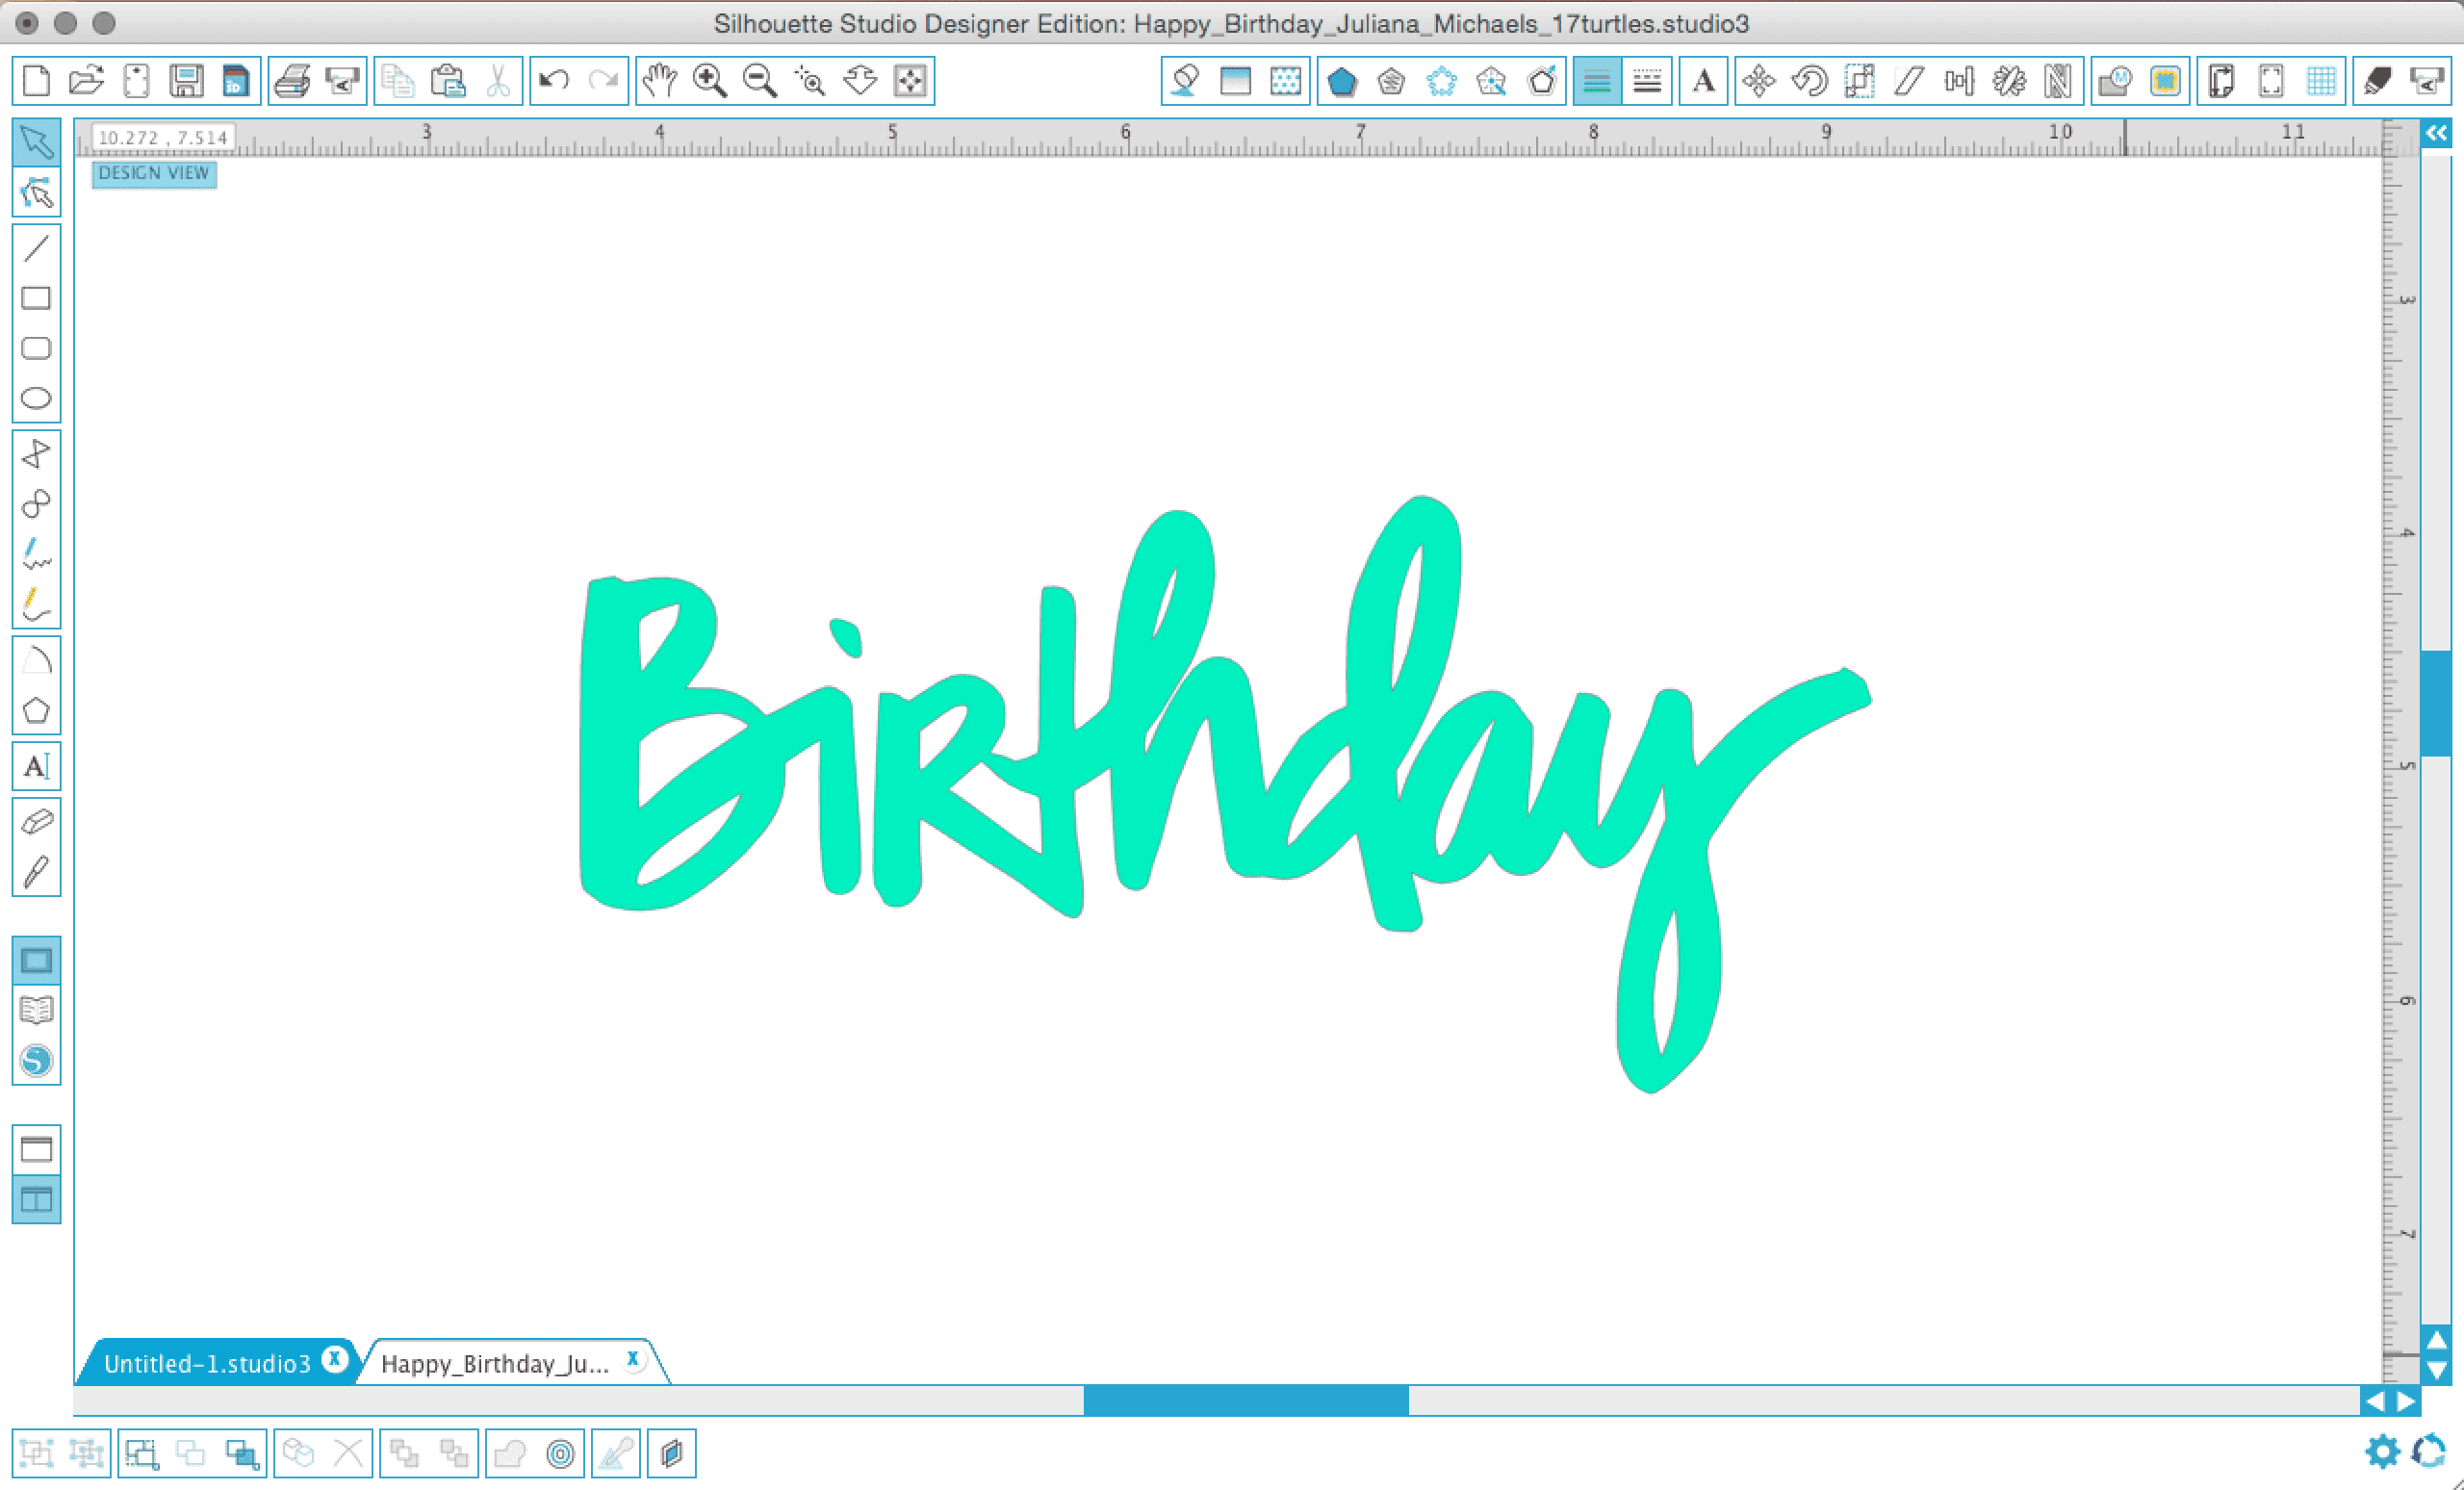
I don’t know about you, but I think you can never have too many birthday cards on hand! :) I love the “Happy Birthday” digital cut files by 17 Turtles. There are some really fun script sentiments included in the set, and for my card I’ve chosen to work with the “birthday” file.
I imported the file into my Silhouette Studio (Designer Edition), and prepared the image for cutting. I began by highlighting the image with my trace tool (see picture below), and deselecting the “high pass filter” option. I left the threshold at 45%, but dropped the scale down to 4.

I then hit the “trace” method option, and ungrouped the image so that I could delete the extra pieces that were traced along with the word birthday. I then cut the file out three times using my Silhouette Cameo; once onto some teal glitter paper, and twice from white cardstock.
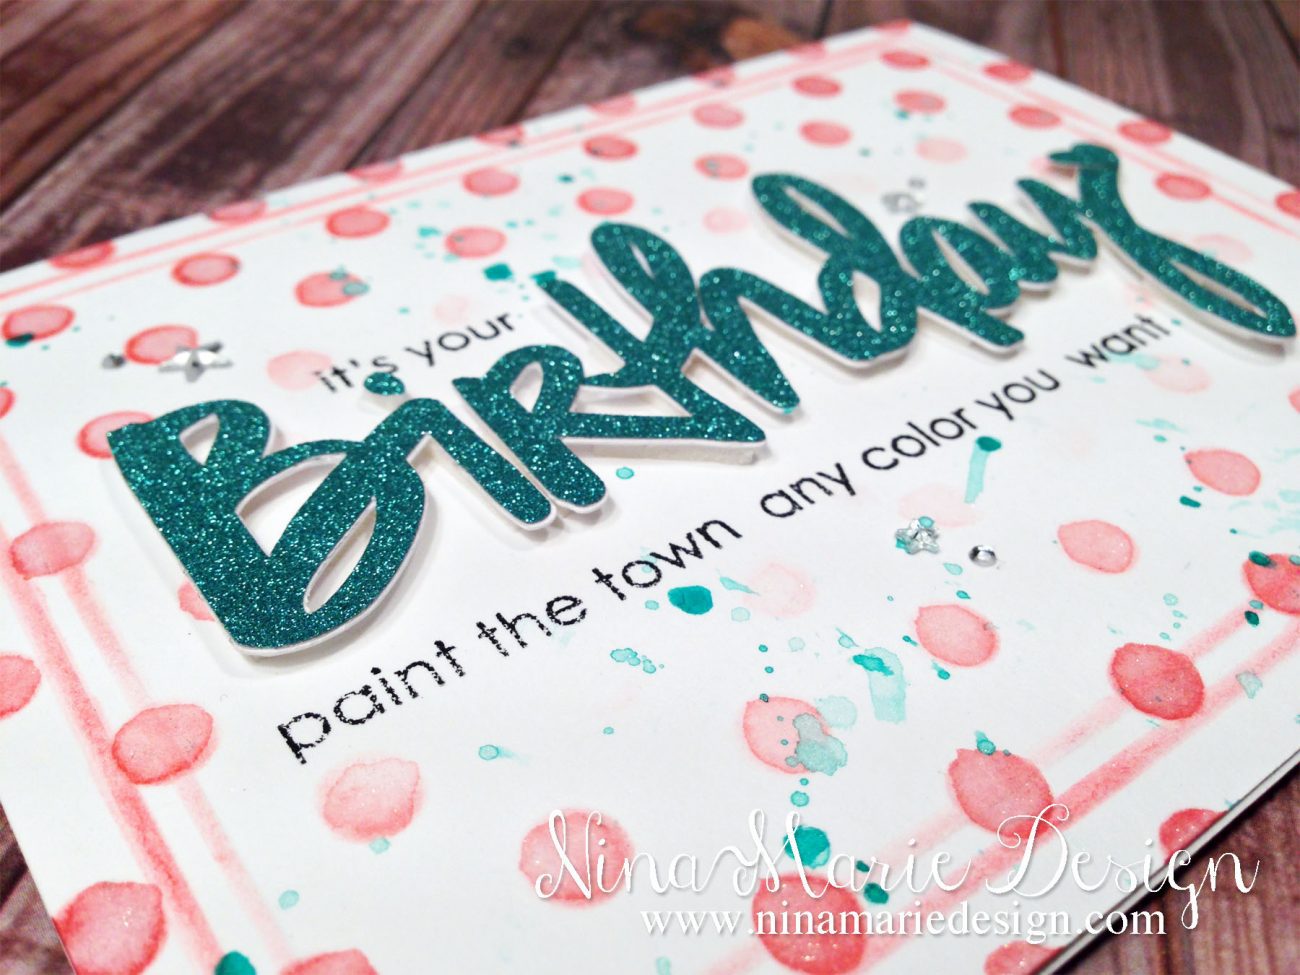
Once my three die cuts were cut out, I adhered them all together with some liquid adhesive to create a more sturdy shape, as I was going to be attaching this to my card later on with foam tape, and did not want it to warp.
I then cut an A2 card base from watercolor paper, and stamped the rest of my sentiment using the “Paint the Town” set by Penny Black Inc.
With a polka dot stencil and some Tim Holtz distress inks, I began inking polka dots onto the edges of my card. To create the deep pink tone, I applied Worn Lipstick, Dusty Concord and Festive Berries (in this order) over the stencil, and then applied one more coat of Worn Lipstick. I applied my Wink of Stella glitter brush over top of each to create a watercolored (and sparkly!) effect.
Taking my scoring board, I scored two frames around the center of the card; afterwards, I masked and inked the frames with some Worn Lipstick ink.
I flicked on some ink splatters using the Heidi Swapp Mint color shine, and then adhered my birthday sentiment onto the card using foam tape. And for a final touch, I scattered a few clear rhinestones about, just to add a bit of embellishing.
I love how the sentiment takes center stage on this feminine, sparkly birthday card, and the teal glitter paper is my absolute favorite part! :) I hope you’ve enjoyed, and thanks again for stopping by my crafty corner.
Challenges
This card is submitted into the Seize the Birthday challenge, with the Toppings of “Make the Sentiment the Focal Point”.
I’ve also submitted this card into the Addicted to Stamps challenge #135 “Photo Inspiration”.
[one_third][/one_third][one_third]
![]() [/one_third]
[/one_third]

 LinkDeli Free 15 day trial
Great card and design. Thanks so much for joining us at Seize the Birthday.
Perfect job making your sentiment the focal point of your card Nina! Thanks for joining us over at Seize the Birthday…we sure do appreciate it!
That was so cool, Nina-Maria! Thank you! You so deserved the win at ATSM!! Congratulations!! Hugs, Darnell
Fabulous colors, love the dotted background!!! Glad to have you play with us again at Addicted to Stamps and More!!
Thanks for the explanation as to how this was made! I love the colors and the fabulous shimmer! So happy you could join us at ATSM!
I love this card, great way to stack the die cut and add. the colors are gorgeous.
Another gorgeous card and I love the design! Thanks for joining us again this week at ATSM xx