Workshop Wednesday: Creating A One Layer Card
Back again with another Workshop Wednesday! Today’s post is all about creating a one layer card… and a pretty fun technique too that I’m going to share!
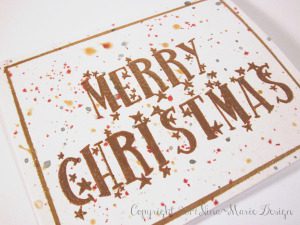
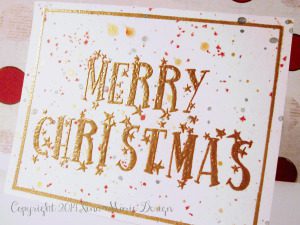
This card was created by heat embossing a file I created within Silhouette Studio… yes! A design sketched out with your Cameo, can indeed be embossed! How you may ask? Well I am about to show you how I came up with this fun technique, so let’s get started…
- Using the font “Happy New One“, I wrote out my sentiment and sketched it using a gold gel pen. Doing this will create an outline of all the letters and stars, especially depending on how large you make the font (for this card the font was enlarged to 66pt).
- After the sentiment had been sketched out: taking the same gold gel pen, I colored in one letter and sprinkle on gold embossing powder and repeated this for each letter until all were covered with powder. The reason for doing one letter at a time is because a pen does not have the same wetness as a embossing ink pad does. However, it does have enough wetness so that if you get the powder onto the ink right away, it will stick.
- Once I had all my letters colored and covered in embossing powder, heat set it.
- I then moved onto the stars and repeated the same process I did for the letters; for this, you will have enough time to be able to color in a few stars at a time before having to get the powder onto your ink.
- After all the stars were colored I heat set all the powder-covered stars.
It already looks fantastic, doesn’t it? But we are not done yet! :)

Now it needed were some splashes of color! I wanted this to be a very festive, sparkly card, so taking spray inks, I tapped on splotches of red, gold and silver ink to create a “flecked” or “speckled” look to the background of the card. I heat set this as well, and that was it! Very easy to make and just as easy to mail! :) I really like how simple the style is on the card, but very bright and full of sparkle, just like the holidays!
So hopefully today’s post has inspired you to try heat embossing on your sketched Silhouette designs! Stop back soon, as I have some more fun projects to share!

Supplies
- Ranger Inkssentials Watercolor Paper
- Silhouette Cameo, cutting mat and pen holder
- Stampendous Champagne embossing powder from the Sorrento Embossing kit
- Tim Holtz “Festive Berries” Spray Stain
- Heidi Swapp Color Shine “Gold Lame” and “Tinsel”
- Versamark ink
- Gelly Roll gold gel pen
- post-it sticky notes


 LinkDeli Free 15 day trial
That big embossed sentiment is fabulous and I love the touches of colour around it. Thanks for playing along with CASology this week!
I love the gold, sparkly, festive feel of your card! Thanks for joining us at CASology!
such a festive and fun holiday card!!! thank you for playing a long with us at simon says stamp!
Amazing card! Love the big bold sentiment! Thank you so much for joining us at Simon Says Stamp Monday Challenge. Hugs, Sandra